This document is a user manual for the TACKLIFE Ceiling Fan, Model No: CF01. It provides comprehensive instructions for installation, operation, and maintenance of the fan.
Function Description:
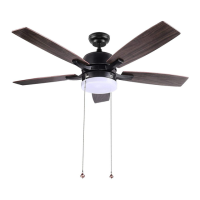
The TACKLIFE Ceiling Fan is designed to provide air circulation and illumination in a room. It features a multi-blade design to efficiently move air and includes a light kit for ambient lighting. The fan can be operated in two modes: a summer function for creating a breeze and improving air circulation, and a winter function to move warm air near the ceiling around the room. The direction switch on the fan body controls the airflow direction, and a drawstring switch is used to turn the fan on/off and change speed.
Important Technical Specifications:
- Model Number: CF01
- Power Connection: 120V main power (dwelling)
- Light Bulb Type: 2x E27 LED T45 MAX.10W light bulbs
- Minimum Clearance: 7 feet from the floor to the trailing edge of the blades (as per safety instructions).
- Mounting Support: Must be able to support the moving weight of the fan (at least 50 lbs.) if mounted on a ceiling outlet box or joist.
- Clearance from Floor to Blades: At least 230 cm (as per warning).
Usage Features:
- Assembly: The manual provides detailed assembly diagrams and a parts list, including components like the hanger bracket, downrod assembly, canopy, fan motor assembly, blades, blade holders, lamp shade, chain bead, pendant, and light bulbs.
- Installation:
- Hanger Bracket Installation: Securely attach the hanger bracket to the ceiling joist using a lag bolt, flat washer, and spring washer.
- Blade Assembly: Insert blades into the blade bracket using blade screws and washers, then screw the fan blades to the motor assembly. Ensure set screws are tight and blades are properly seated.
- Downrod and Hanger Ball Installation: Loosen set screws in the hanger ball assembly, slide the ball down the downrod, and remove the pin. Re-install the hanger ball after connecting the downrod to the fan motor assembly.
- Downrod Support Connection: Place the downrod into the downrod support, align clevis pin holes, and secure with the clevis pin and hairpin clip. Re-tighten set screws.
- Fan Mounting: Carefully lift the fan and set the downrod/hanger ball assembly onto the hanger bracket, ensuring the groove in the ball aligns with the tab on the hanger bracket.
- Wiring: Connect 120V main power to the ceiling fan. Specific connections include AC IN N to white N of the motor assembly, AC IN L to blue light wire L of the motor assembly, AC IN L to black motor wire L of the motor assembly, and green ground wire to green ground wire of the motor assembly.
- Light Bulb Installation: Insert two E27 LED T45 MAX.10W light bulbs into the lamps.
- Cover Installation: Install the facing cover into the motor axis and mount the canopy by tightening two screws.
- Chain Bead and Pendant: Attach the chain bead and pendant to the ceiling fan.
- Operation:
- Direction Switch: Controls airflow. For winter, press the switch to the right for blades to move warm air near the ceiling. For summer, press the switch down for blades to create a breeze.
- Drawstring Switch: Used to turn the fan on/off and change speed.
- Safety Precaution for Direction Switch: Turn the fan off and ensure it has stopped rotating before changing direction to prevent injuries and motor damage.
Maintenance Features:
- Periodic Cleaning: The only required maintenance is periodic cleaning. Use a soft brush or lint-free cloth to avoid scratching the finish. Avoid abrasive cleaning agents and solvents, as they can damage the motor and pose an electrical shock risk.
- Balancing and Wobbling Troubleshooting:
- Check Blade Mounting Screws: Ensure all blade mounting screws are tightened and secure.
- Check Blade Level: Measure the distance from each blade tip to the ceiling. Inconsistent measurements may indicate issues with blade mount screws (too tight or too loose) or an out-of-shape blade.
- Blade Tracking: Use a household ruler to check blade alignment. If a blade is not in alignment, it may be out of shape, warped, or the blade screws are not evenly tightened or are loose.
- Balancing Kit: A balancing kit is provided to assist with reducing wobble. Users are advised to retain the kit for future use, and instructions for its use are included within the kit.
Important Safety Instructions:
- Read all instructions and safety information before installation.
- Disconnect power before installation.
- Ensure electrical connections comply with local codes.
- Verify the installation site allows blades to rotate without obstruction and maintains minimum clearance from the floor.
- Use a metal outlet box secured directly to the building structure if mounting on a ceiling outlet box.
- Ensure the mounting structure can support the fan's weight.
- After installation, ensure all connections are secured.
- Do not insert anything into fan blades while operating.
- Turn the fan off and wait for it to stop before reversing direction.
- Do not install the fan on a sloped ceiling.
- Do not use the fan with any solid-state speed control devices.
- Use only the two steel screws and lock washers provided for mounting the outlet box.
- Verify the clevis screw, downrod support, and set screws are properly installed and tightened to prevent the fan from falling.
- Ensure electricity is turned off at the main fuse box before wiring.
Warranty Registration:
Users are invited to register warranty information at www.tacklifetools.com to enjoy exclusive service.
- Tel: 929-533-7707
- Manufacturer: Shenzhen Take Tools Co., Ltd.
- Website: www.tacklifetools.com
- Facebook: www.facebook.com/Tacklife.US
- Support Email: support@tacklifetools.com
- Address: No.B714, Niulanqian Building, Minzhi Road, Longhua District, Shenzhen, Guangdong, China 518000
- Certifications: RoHS, Intertek (C LISTED)