Do you have a question about the TACKLIFE PCD04C and is the answer not in the manual?
Lists and explains safety and product symbols found on the rating plate.
Keep work area clean and well lit. Cluttered or dark areas invite accidents.
Power tool plugs must match the outlet. Never modify the plug in any way.
Stay alert, watch what you are doing and use common sense when operating a power tool.
Use the correct power tool for your application. The correct power tool will do the job better and safer.
Recharge only with the charger specified by the manufacturer. A charger that is suitable for one type of battery pack may create a fire.
Have your power tool serviced by a qualified repair person using only identical replacement parts.
Li-Ion batteries, if incorrectly used, stored or charged are a fire, burn and explosion hazard.
Use the battery charger correctly. Refer to the section of this manual relating to use of the battery charger.
Remove the Battery from the tool by pressing the Battery Release, then slide the Battery out of the Battery Slot.
Fit a battery by sliding it on to the Battery Slot of the tool until it clicks and locks into position.
Insert the Battery Charger mains plug into a suitable mains socket. The RED LED on the Charger base will on to indicate readiness.
The Battery has a built-in Battery Charge Indicator. Pressing the button indicates charge level via LEDs.
Set the direction of rotation using the Forward/Reverse Switch. Central position locks the drill.
Adjust the torque using the Torque Selector to match the application. Higher number means higher torque.
Select gear 1 for higher torque (screwing) or gear 2 for higher speed (drilling).
Squeeze the Trigger Switch to start the drill. Release the Trigger Switch to stop.
Use gear 1, Mode Selector to Drive, and adjust torque. Never use in drill mode for screws.
Use gear 1, hammer drill position. Apply moderate pressure, use masonry bits. Avoid excessive pressure.
Select appropriate gear and mode. Ensure bits are suitable and within capacity.
Select appropriate gear and mode. Ensure bits are suitable and within capacity. Mark position with center punch.
Regularly check fixing screws are tight and inspect the supply cord for damage.
Keep tool clean. Use soft brush, dry cloth, or damp cloth with mild detergent for casing.
Slightly lubricate all moving parts at regular intervals with a suitable spray lubricant.
Store this tool carefully in a secure, dry place out of the reach of children.
Adhere to national regulations for disposing of power tools and WEEE.
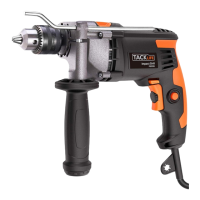
| Type | Cordless Drill |
|---|---|
| Voltage | 20V |
| Max Torque | 30 Nm |
| Speed | 0-400 / 0-1500 RPM |
| Battery Type | Lithium-ion |
| Battery Capacity | 1.5 Ah |
| Charging Time | 1 hour |
| Chuck Size | 10mm |