Vacuum Tube Amplifier Instructions
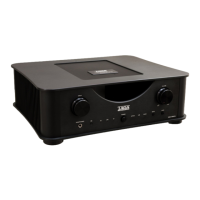
Satellite tuner, etc.CD Player, etc.
Computer / Laptop
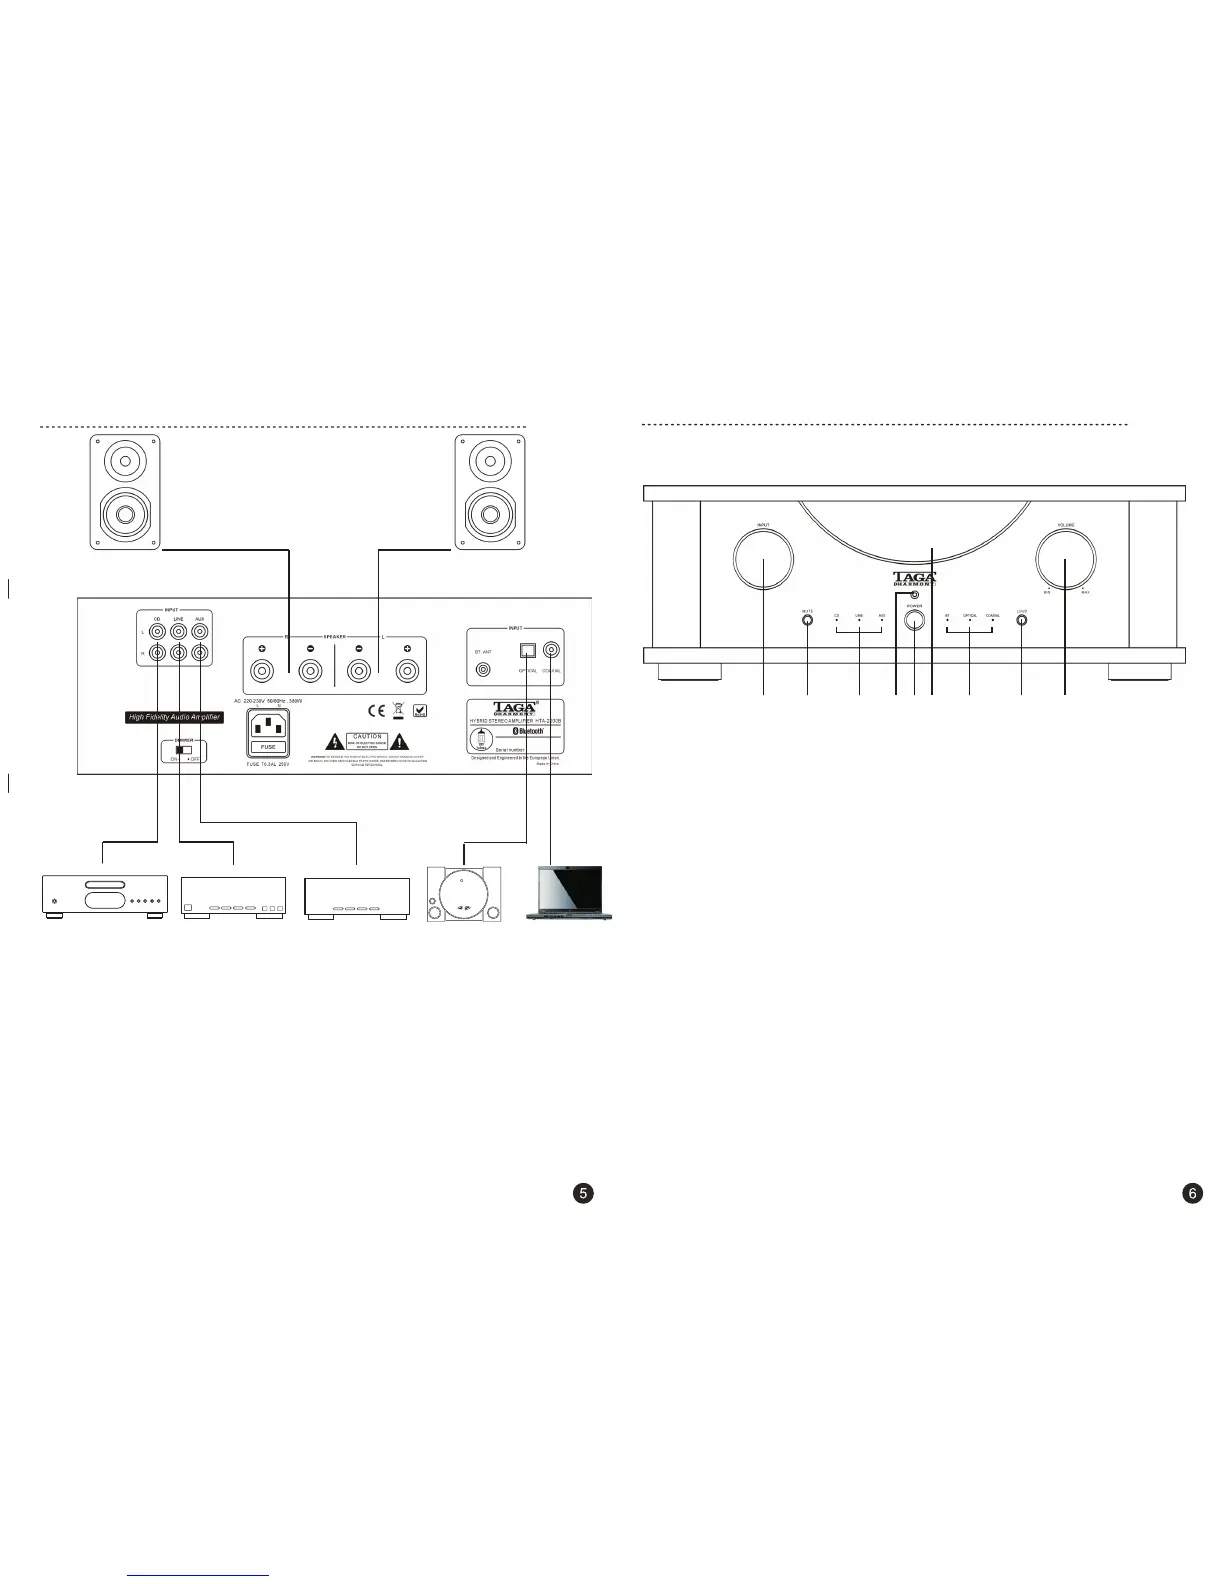
1. INPUT Selector
By rotating this knob you can choose the desired audio source. Make sure the audio source is
properly connected to the rear panel inputs. The selected source is indicated by one of Led
indicators on the front panel.
2. MUTE Button
During playback press this button to stop amplifier audio output (no sound will be audible),
press it again to recover the audio signal output back.
3. CD / LINE / AUX Led Indicators (analog inputs)
After the audio source is selected by the Input knob then the corresponding LED Indicator
will light up.
4. Remote Control Sensor
It receives command signals transmitted by the remote control.
5. Vacuum Tubes Window
Check DIMMER switch description to learn more about the backlight of the vacuum tubes window.
6. POWER Button
Press this button to power on the amplifier, press it again to power it off.
Before powering on the amplifier make sure the system is hooked up properly.
Pay attention to connecting the polarity of speakers correctly (RED + with RED +, BLACK - with BLACK -).
Rotate the Volume knob to its minimum position and power on the amplifier.
7. BT (Bluetooth®) / OPTICAL / COAXIAL Led Indicators (digital inputs)
After the audio source is selected by the Input knob then the corresponding LED Indicator will light up.
8. LOUD Button
Press the Loudness compensation button to increase the level of the high and low frequencies - it is
intended to be used at low listening levels (using at high volume levels can damage the amplifier and/or
speakers - it may void your warranty).
Press the button again to get back to regular amplifier settings.
9. VOLUME Control
By rotating this knob clockwise you can increase output volume level.
By rotating it counterclockwise the output volume level is decreased.
1. 2. 3. 7.6. 8.
9.4. 5.
FM/AM tuner, etc.
Video game
console, etc.
Right speaker
Left speaker
System set-up
Front panel
 Loading...