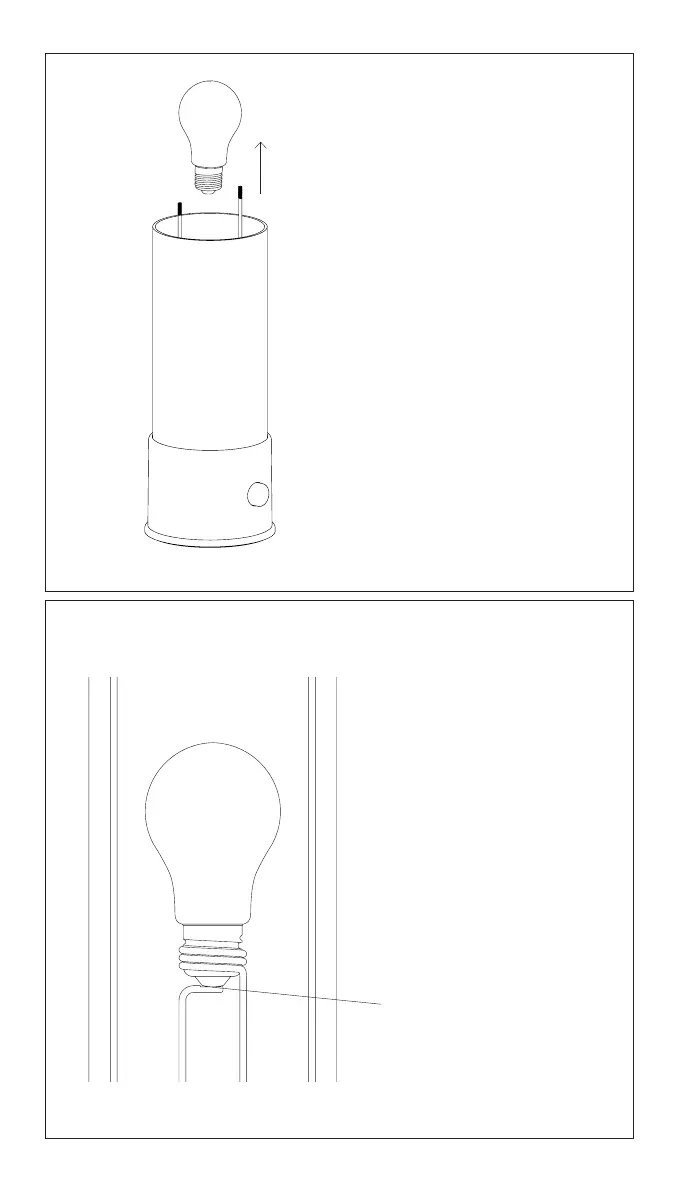
STEP 4
Ensure the bulb is screwed in fully
and contact is made between the
base of the bulb and the housing.
Be careful to align the bulb
properly and do not over-tighten.
Contact point
STEP 3
Remove the bulb from inside the
lamp and replace with the new bulb.
Gently screw the new bulb clockwise
to secure.