
Do you have a question about the Target Paulo Open Desk TGELODSKWH and is the answer not in the manual?
| Brand | Target |
|---|---|
| Model | Paulo Open Desk TGELODSKWH |
| Category | Indoor Furnishing |
| Language | English |
Guidance on checking parts, using the carton, reviewing steps, and gathering tools before assembly.
Illustrations and identification of necessary tools for furniture assembly.
List of all hardware components with their respective labels and quantities for assembly.
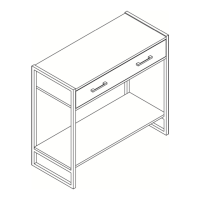
Visual representation of all furniture parts with item labels for identification during assembly.
Detailed instructions and visual guide on operating the cam lock system for panel connection.
Instructions for preparing the left center and right top panels by inserting cam bolts.
Attaching left center, bottom, and back panels using dowels and cam bolts.
Connecting the center frame and right side frame using bolts and washers.
Securing the left panels and left side frame using bolts and washers.
Finalizing the assembly by attaching the left and right back panels.
Instructions for installing the anti-tip hardware to secure the furniture to the wall.
Critical safety alert regarding furniture tipover risks and preventative measures.




 Loading...