Do you have a question about the Tasman Rascali bassinet and is the answer not in the manual?
Lists all components required for assembling the bassinet, including panels, bars, fixings, and accessories.
Start by placing one end panel on a clean, soft work surface. Ensure the panel faces the same way up as in the diagram.
Screw each support bar to the end panel. They have 2 wooden pegs at each end. The 4 bars are identical, but must go on as shown.
Put the second end panel into position, line up the holes, and fasten to the support bars and support rails.
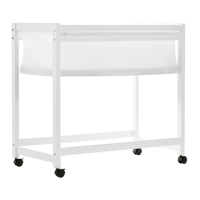
Push the castor wheels into the holes in the bottom of the rails. Ensure they click into place.
Lock the castors by pushing the lever downwards.
Prepare the bassinet for fitting to the frame. Note the location of the velcro strips on the bassinet and frame.
Put the bassinet inside the frame. Use the velcro strips at the end to temporarily hold the bassinet in place.
Feed the bassinet sleeves through the gap between the support bars. Ensure the loop is clear of the bassinet.
Feed the holding rods into the bassinet loops. This will hold the bassinet securely into place.
Place the firm base and mattress into the bassinet. Note the velcro on the ends of the bassinet stretching.
Customer can return product for refund if not satisfied within 3 months, subject to conditions.
Product replacement free of charge if defects found in materials or workmanship within 2 years, subject to conditions.
Register product online at www.tasmaneco.com.au for eligibility. Submit claims via website or store.
| Brand | Tasman |
|---|---|
| Model | Rascali bassinet |
| Category | Indoor Furnishing |
| Language | English |