- This appliance is for household use only, not professio-
nal or industrial use.
- This appliance should be stored out of reach of children
and/or the disabled.
- Check that the moving parts are not misaligned or
locked and make sure there are no broken parts or
anomalies that may prevent the appliance from operating
correctly.
- Use the appliance and its accessories and tools in ac-
cordance with these instructions, taking into account the
working conditions and the work to be performed.
- Do not open the battery/ies under any circumstances
whatsoever.
- Do not use the appliance with pets or animals.
- Pay special attention when assembling and removing
the accessories, as the blades are sharp.
Be careful and avoid direct contact with the blades’
cutting edges.
- A charger that is suitable for one type of battery may
cause explosion or re hazard when used with other
battery/ies.
Service:
- In order to maintain the appliance in a good operation
conditions we suggest greasing the blades every time
you clean it by putting a few drops of oil on the ends of
the blade, and nally switching on the appliance during
a few seconds.
- Make sure that the appliance is serviced only by
specialist personnel, and that only original spare parts
or accessories are used to replace existing parts/acces-
sories.
- Any misuse or failure to follow the instructions for use
renders the guarantee and the manufacturer’s liability
null and void.
Charging the battery
PLEASE NOTE: The new battery does not come com-
pletely charged and must be charged up to the maximum
before using the appliance for the rst time.
- Charge the battery at room temperature between 4 and
40ºC.
- Plug the charger (K) into the mains.
- The load indicator (D) will change to green when the
appliance is completely charged
(The rst charging takes approximately 10 to 12 hours
and subsequent chargings will take about 8 hours. Never
attempt to over-charge the batteries).
- Connect the charger (K) to the jack using the socket on
the appliance. The socket is located at the lower/back
part of the appliance.
- A pilot light will come on to indicate that the charger is
ready to begin charging the battery.
- When the battery is charged disconnect the charger
from the mains supply.
NB: For a long battery life, it is advisable to charge the
battery, only, when it has run out completely.
Instructions for use
Before use:
- Before using this product for the rst time, it is impor-
tant to make a full charge of batteries.
- Prepare the appliance according to the function you
wish to use.
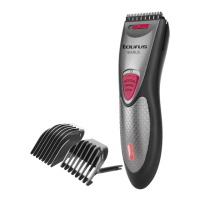
Insertion of a comb guide:
Fit the comb-guide to the appliance
Use the comb size selector (H) to adjust the height of
the cut
To extract the comb guide, just pull out.
Use:
- The appliance can be used directly connected to the
mains, or by using his batteries.
- Unroll the cable completely before plugging it in.
- Ensure that the electronic connector is properly atta-
ched to the appliance.
- Connect the appliance to the mains.
- Turn the appliance on using the on/off switch.
- Select the desired cutting height using the comb height
selector (H). Press it and adjust the height according to
the desired cutting length.
How to cut the hair:
- Situate the person whose hair you are going to cut so
that the top of their head is at your eye level.
- To obtain best results is better to use the appliance on
dry hair, as it is much easier to control the hair and the
result.
- Comb hair well before cutting. Make sure that there are
no tangles or knots.
- Hold the appliance in a calm and relaxed manner
in order to ensure maximum control of the cut and a
uniform result.
- Leave the hair a little longer than desired length as it
can always be altered later.
- While working adapt the comb / comb guide to the
desired result.
- At regular intervals, stop cutting in order to comb the
hair and check the results so far.
Step 1 Nape:
- Attach comb guide size 18-3 mm (E)
- Hold the appliance with the blades facing downwards
and begin to cut the hair from the centre of the head in
the base of the neck.
- Make some upward movements, raising the applian-
ce gradually and away from the head, cutting the hair
gradually until the height of the ears (Fig. 2)
Step 2 The back of the head:
- Attach comb guide size 36-21 mm and continue with
the back of the head (Fig. 3)
Step 3 The side of the head
- Attach a new shorter comb guide size 18-3 mm (E) to
trim the sideburns.
- Attach a longer comb guide size 36-21 mm (F) and
continue until you reach the top of the head.
Step 4 The top of the head:
- Using comb guide size 18-3 mm (E), pass the applian-
ce from the back to the front, against the growth of the
Manual Ikarus/Ikarus premium.indb 13 27/11/15 10:48
 Loading...