12 Ditto X4 Looper User Manual
Multiple FX
It is possible to run more than one eect at the same time. For example, start
playback from a loop, then engage the Reverse eect. The LED will ash red.
Then turn the FX knob to the Half setting and press the FX footswitch again.
The loop will play back in reverse and at half speed, and the LED will ash orange.
To undo either eect, make sure the FX knob is set to the desired eect and press
the FX footswitch. Only the other eect will be heard on the loop.
Note that it is possible to remove all active eects at once, which is handy
when you have added several eects to multiple layers or loops. With playback
stopped, hold the FX footswitch for 2 seconds and all eects will be removed
from the loops.
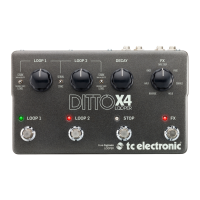
8. Mode Switches
Since loopers are all about creativity and experimentation, the Ditto X4 was
designed with some customization options. The tiny MODE switches on the
back are set to the “down” position by default, but can be ipped with a pen,
toothpick, paper clip, etc. to suit your needs.
Switch 1
The standard workow for most loopers is such that pressing a footswitch starts
the recording, pressing again stops the recording and automatically loops the
audio, and a 3rd press starts an overdub recording. However, this can be switched
so that the rst press begins the initial loop recording, then the second press
immediately starts the rst loop and begins recording the overdub. The 3rd press
stops the overdub and loops both layers. This modied workow allows you to
build stacked loops more quickly.
Switch 2
By default, recording an additional layer over a loop, or recording a second loop in
Sync mode, will start immediately upon pressing one of the LOOP footswitches.
However, ipping switch 2 to the “up” position will cause the associated LED to
rapidly ash red to indicate that the loop is armed for recording. When the cycle
repeats, the LED will light solid red and recording will begin.
This setting also causes “stop” commands (either by double tapping a LOOP
footswitch or press the STOP footswitch) to end the loop at the completion of
its cycle.
*note – in Serial mode, pressing the LOOP 2 footswitch while loop 1 is playing will still arm loop 2 for recording
upon completion of loop 1's cycle.
Switch 3
Serial mode
Serial mode is geared toward having 2 distinct parts to a song that are not
meant to be played simultaneously. Therefore, pressing a LOOP footswitch
during another loop's playback arms the loop for recording. After the rst loop
nishes its cycle, the rst loop stops and the second loop begins recording. This is
convenient for a verse/chorus arrangement, but there may be times when you
don’t want to wait for the rst loop to end before recording. Flip switch 3 to the
“up” position to allow the second loop to begin recording immediately upon
pressing its footswitch.
Sync mode
This mode was primarily designed to allow 2 independent loops to be played
on top of one another in perfect synchronization. However, some players like to
approach looping in a more ambient and experimental way, which is why Sync
mode can be un-synced! Setting switch 3 to the "up" position allows loops 1 and
2 to have dierent lengths, enabling creative "whalesong" layers of audio that
loop at dierent intervals.
Switch 4
True Bypass mode is a hard-wire bypass that gives absolutely no coloration of
tone when the pedal is bypassed. This is the default mode for your eect pedal.
Using True Bypass on all pedals is a perfect choice in setups with a few pedals and
relatively short cables before and after the pedals.
If…
– you use a long cable between your guitar and the rst pedal or
– if you use many pedals on your board or
– if you use a long cable from your board to the amp,
…then the best solution will most likely be to set the rst and the last pedal in
the signal chain to Buered Bypass mode. Can you hear the dierence between
a pedal in True Bypass or Buered Bypass mode? Maybe, maybe not – many
factors apply: active/ passive pick-ups, single coil/humbucker, cable quality, amp
impedance and more. We cannot give a single ultimate answer, so experiment
with switch 4 in the “up” position to hear what sounds best to you.
9. Firmware Updates
TC may provide updates for the built-in software of your pedal, the rmware.
Updating your TC pedal’s rmware requires…
– a computer running Microsoft Windows or OS X with a standard
USB interface
– the specied DC power supply for your pedal.
Preparing the rmware update
1. Download the newest rmware from the “Support” page for your TC pedal.
There are updaters
– for Microsoft Windows (these are ZIP archives containing the
rmware installer) and
– for OS X (these are disk image les containing the rmware installer).
2. Unplug all cables (including the power supply) from your TC pedal.
3. Connect the pedal to your computer using a USB cable.
4. Press and hold the leftmost footswitch on your TC pedal.
5. Insert the DC power supply plug. The leftmost LED on your pedal should
turn green.
6. Release the footswitch.
Your TC pedal will now be recognized as an updatable device.
Applying the rmware update
7. Quit all MIDI-related applications (e.g. your DAW) on your computer and
launch the rmware updater you have downloaded in step 1.
8. In the rmware updater app, select your TC pedal from the drop-down list
under the “STEP 1” heading.
If you are using Windows XP, select “USB Audio Device” from the list.
9. When the “Update” button under the “STEP 2” heading turns green, click it.
The updated rmware will now be transferred to your TC pedal. Wait for the
progress bar to reach 100%. When the update procedure is complete, the pedal
will automatically restart.
 Loading...