!
Step 4
3
4
5
6
7
1
2
3
4
5
REPLACEMENT
INSTRUCTIONS
(CONTINUED)
Set the screw aside for re-use.
Carefully pull the arm straight out from its socket in the drone.
Insert the new arm into the airframe. Push firmly until you feel the connectors
“click”.
NOTE: If you feel any resistance and the arm will not easily click into place,
ensure that you are not attempting to insert a CW arm into a CCW position,
and vice-versa.
Tools Needed:
One (1) T8 Torx Screwdriver
Removal:
One (1) T8 Torx Screw Per
Rotor Arm
Use a Torx T8 screwdriver to tighten the screw to 0.6N*m (0.44 ft-lbs) and
secure the arm into place.
Make sure that the motor functions properly before the next flight.
CAMERA & GIMBAL PAYLOAD REPLACEMENT
Both the FLIR Hadron EOIR camera and gimbal can be replaced in the field. Use the specific tools to ensure
that no components are damaged in the process. Use the following instructions to replace both parts.
REPLACEMENT
INSTRUCTIONS
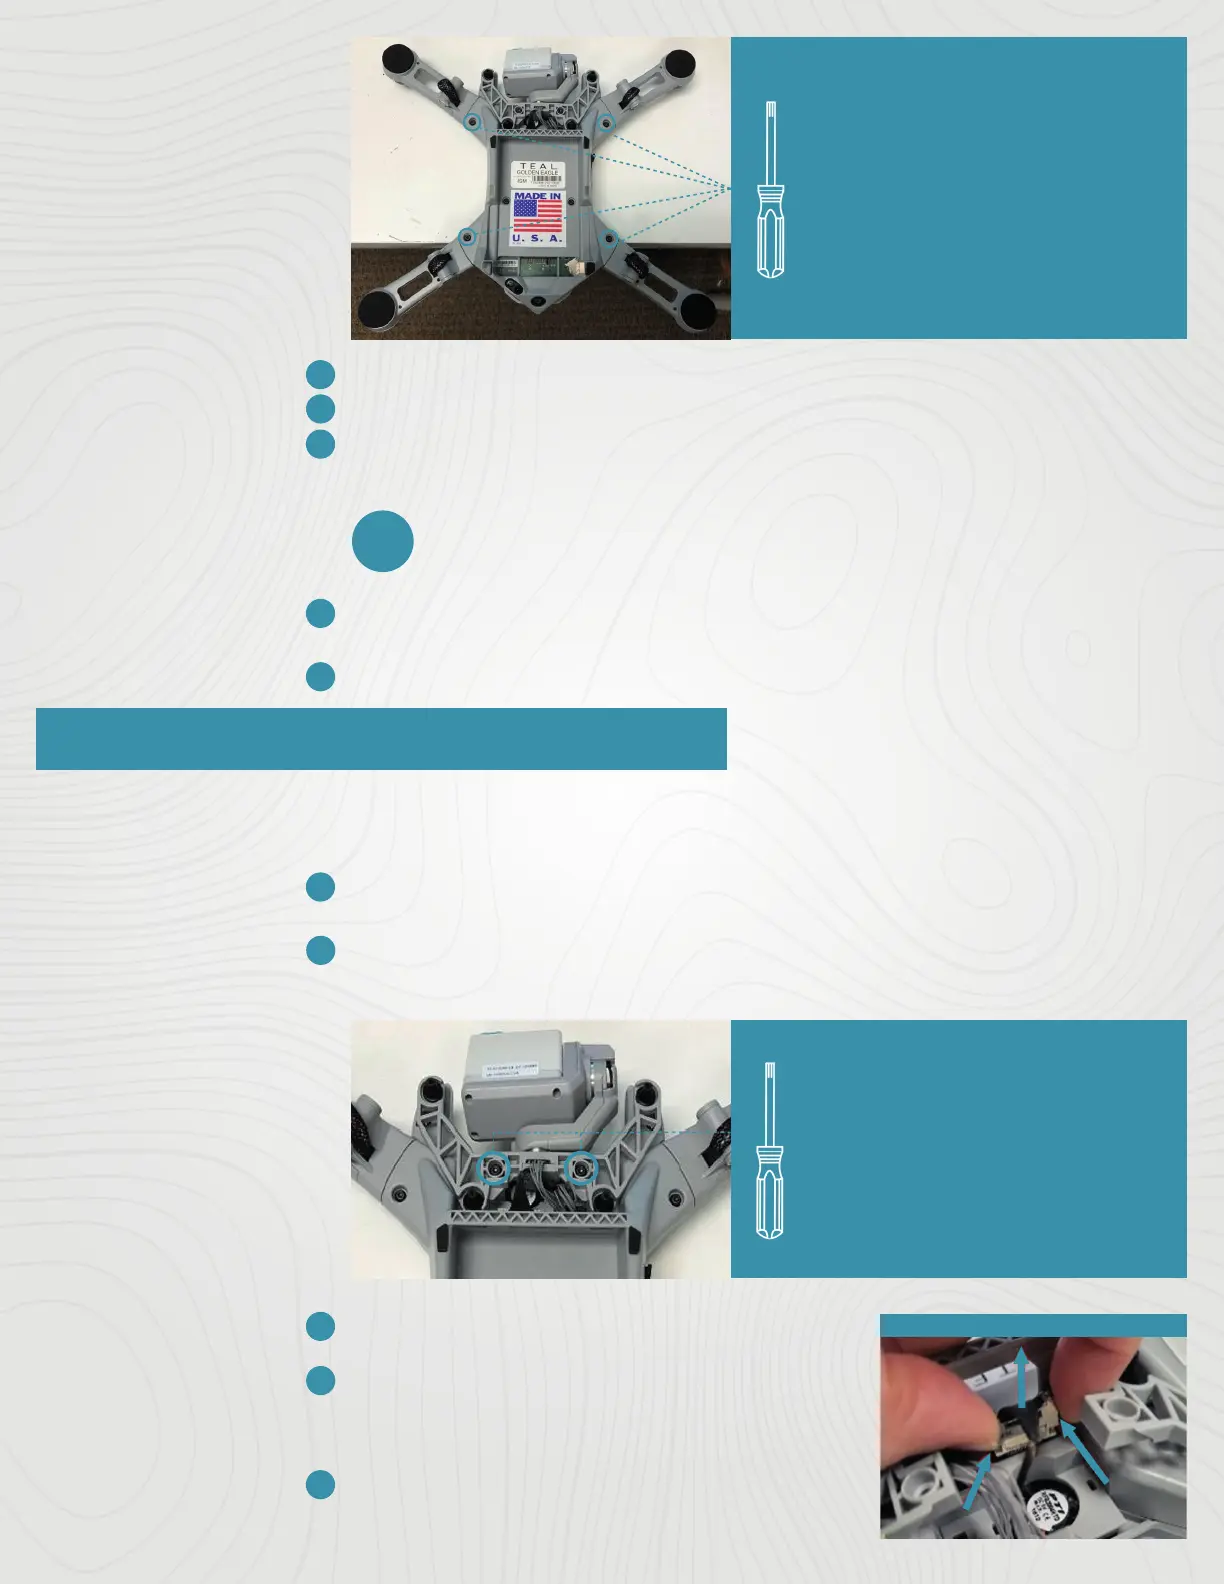
Place the drone on its back on a table or workspace where the antenna can
hang o the edge to prevent being damaged.
Remove the two (2) M3 x 8mm screws on the gimbal brackets using a T8
Torx screwdriver.
Tools Needed:
One (1) T8 Torx Screwdriver
Removal:
Two (2) M3 x 8mm Screws
Set the screws aside for re-use.
Squeeze the side latches of the camera data
cable connector to release the connector (as
shown in the image to the right).
Carefully pull the connector straight up to
disconnect it from its socket in the drone.
02
© 2022 Teal Drones, Inc.
SUP-00005, REV A
 Loading...