Copyright 2013 © Team Orion www.facebook.com/teamorion www.teamorion.com
INSTRUCTION MANUAL AND WARNINGS • READ BEFORE USE!
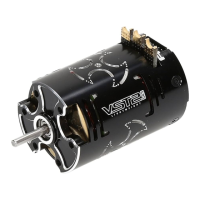
Thank you for choosing this Team Orion VST2 Pro motor. This motor has been
developed using the input of our 2011 and 2012 IFMAR on-road and off-road
world championship winning team. It features the latest developments in
brushless motor technology.
WARNINGS
• This is not a toy; do not let children operate this motor without the super-
vision of an adult.
• Do not leave the system powered when it is not supervised.
• Do not make the motor spin without a load, this can damage the
moving parts.
• Check the recommended gear ratios and input voltage for your motor, fail-
ure to do so may result in damage to the motor.
• Do not use extreme settings/gearing which can make the motor overheat
and become damaged.
FEATURES
• New generation motor design with enhanced performance and improved
cooling
• Dual sensor input for better sensor wire arrangement and
program box connection
• New sensor module design for improved power control
and brake sensitivity
• New high performance stator core and magnet material
• Low resistance stator winding technology
• Innovative stator ring system
• XL gold soldering tabs
• Rotor removal tool included
INSTALLATION
• Attach the motor to chassis using screws with the proper thread and
length, if the screws are too long it could damage the motor’s winding and
lead to permanent damage
• Solder the ESC wires to the motor, respecting the ABC wires order. Do not
overheat the solder tabs.
• Connect the sensor wire to one of the two sensor ports of the motor.
• Make sure you use the proper gearing for your motor (see the chart).
• When installing a new motor, it is recommended you reset or lower your
ESC’s timing settings. You can also adjust the motor’s timing by loosening
the endbell screws and rotating the endbell.
• Higher timing (turning the endbell anti clockwise) increases the motor’s
performance but it also makes the motor run hotter and less efficiently, use
this function with caution.
USE
• Make sure that all connections are ok before powering up the system.
• Make sure that the motor temperature remains around 80°C / 180°F max.
If the motor overheats it will lose power and excessive heat can also dam-
age it.
• The sensor circuitry is very sensitive to water/humidity, if you run in wet/
humid conditions you must protect the motor from exposure to water. Make
sure you always use the sensor port cover on the unused sensor port.
MAINTENANCE
• Brushless motors do not require a lot of maintenance. You can clean out
the motor and oil the ball bearings from time to time.
• To disassemble the motor, 1. remove the endbell screws and the endbell,
2.rotate the sensor module and pull it out, 3. Insert the tool around the ro-
tor and pull the rotor out.
• Be careful not to lose the rotor spacers and re-install them in same order.
Do not attempt to remove the ring which holds the sensor module.
TROUBLESHOOTING
• If the motor is cogging, remove the sensor wire and test the motor in sen-
sorless mode. If it works in sensorless mode, the ESC, sensor wire or sen-
sor module might be defective. Sensor modules can be bought separately.
• If the motor is not spinning, check the ABC wire order, in sensor mode the
order must be respected.
• If the motor is overheating, check the timing settings and gearing.
WARRANTY
Team Orion guarantees this product to be free from manufacturing and work-
manship defects. The warranty does not cover incorrect installation, com-
ponents worn by use, or any other problem resulting from incorrect use or
handling of the product. No liability will be accepted for any damage result-
ing from the use of this product. By the act of connecting and operating this
product, the user accepts all resulting liability.
• Is considered incorrect use:
• Failure to follow instructions.
• Improper use of the product (abusive use, out of spec, etc.).
• Failure to adapt settings for proper function (improper connections, wrong
gearing, installation, setup, etc.).
• Overload, overheating (desoldering, melting, etc.).
• Running in inadequate conditions (damage or rust from rain, humidity, etc.).
• Improper maintenance (presence of dirt, etc.).
• Disassembly, modification by the user (modifying original connectors,
wires, components, etc.).
• Mechanical damage due to external causes.
Usage Voltage 21.5T 17.5T 13.5T 10.5T 9.5T 8.5T 7.5T 6.5T 5.5T 4.5T 4.0T 3.5T
TC (small track) 2S / 7.4V 3.5:1 4.0:1 6.0:1 6.5:1 7.0:1 7.3:1 7.7:1 8.0:1 8.5:1 9.5:1 - -
TC (big track) 2S / 7.4V 6.3:1 7.0:1 7.5:1 8.5:1 9.0:1 9.6:1
1:12 1S / 3.7V 38mm 34mm 32mm 29.5mm
2wd off-road 2S / 7.4V 6.5:1 7.5:1 8.5:1 9.5:1 10.5:1 - - - -
2wd Short Course 2S / 7.4V 8.0:1 9.0:1 10.0:1 11.0:1 - - - - -
4wd off-road 2S / 7.4V 9.0:1 10.0:1 11.0:1 12.0:1 - - -
SPARE PARTS
• ORI41512 Sensor Module w/bearing VST2Pro 540 Modified
• ORI41513 Sensor Module w/bearing VST2Pro 540/550 4P
• ORI41514 Sensor Module w/bearing VST2Pro 690
• ORI41515 Front Bearing VST2Pro 540 2P/4P
• ORI41516 Front Bearing VST2Pro 690
• ORI41517 Rotor VST2Pro 540 2P Stock
• ORI41518 Rotor VST2Pro 540 2P Modified
• ORI41519 Rotor VST2Pro 550 2P
• ORI41520 Rotor VST2Pro 550 4P
• ORI41521 Rotor VST2Pro 540 4P
• ORI41522 Rotor VST2Pro 690 4P
• ORI41523 Sensor cover VST2Pro 10pcs
• ORI41529 Sensor Module w/bearing VST2Pro 540 Stock
• ORI41530 Front Bearing VST2Pro 550 2P/4P
• ORI41531 Soldering tab cover VST2Pro 540/550
• ORI41532 Soldering tab cover VST2Pro 690
• ORI41533 Rotor removal tool VST2Pro 540/550 2P
• ORI41534 Stator with winding for 540 2P,x.5T
• ORI41535 Aluminum End bell w/screws VST2Pro 540/550
• ORI41536 Plastic End bell w/screws VST2Pro 540/550
• ORI41537 Screws VST2Pro 540/550 case / VST2 690 End-
bell (10pcs)
• ORI41538 Screws VST2Pro 540/550 Endbell (10pcs)
• ORI41539 Screws VST2Pro 690 case (10pcs)
• ORI41540 Screws Neon 8 WP case (10pcs)
• ORI41541 Screws Vortex RTR motor case (10pcs)