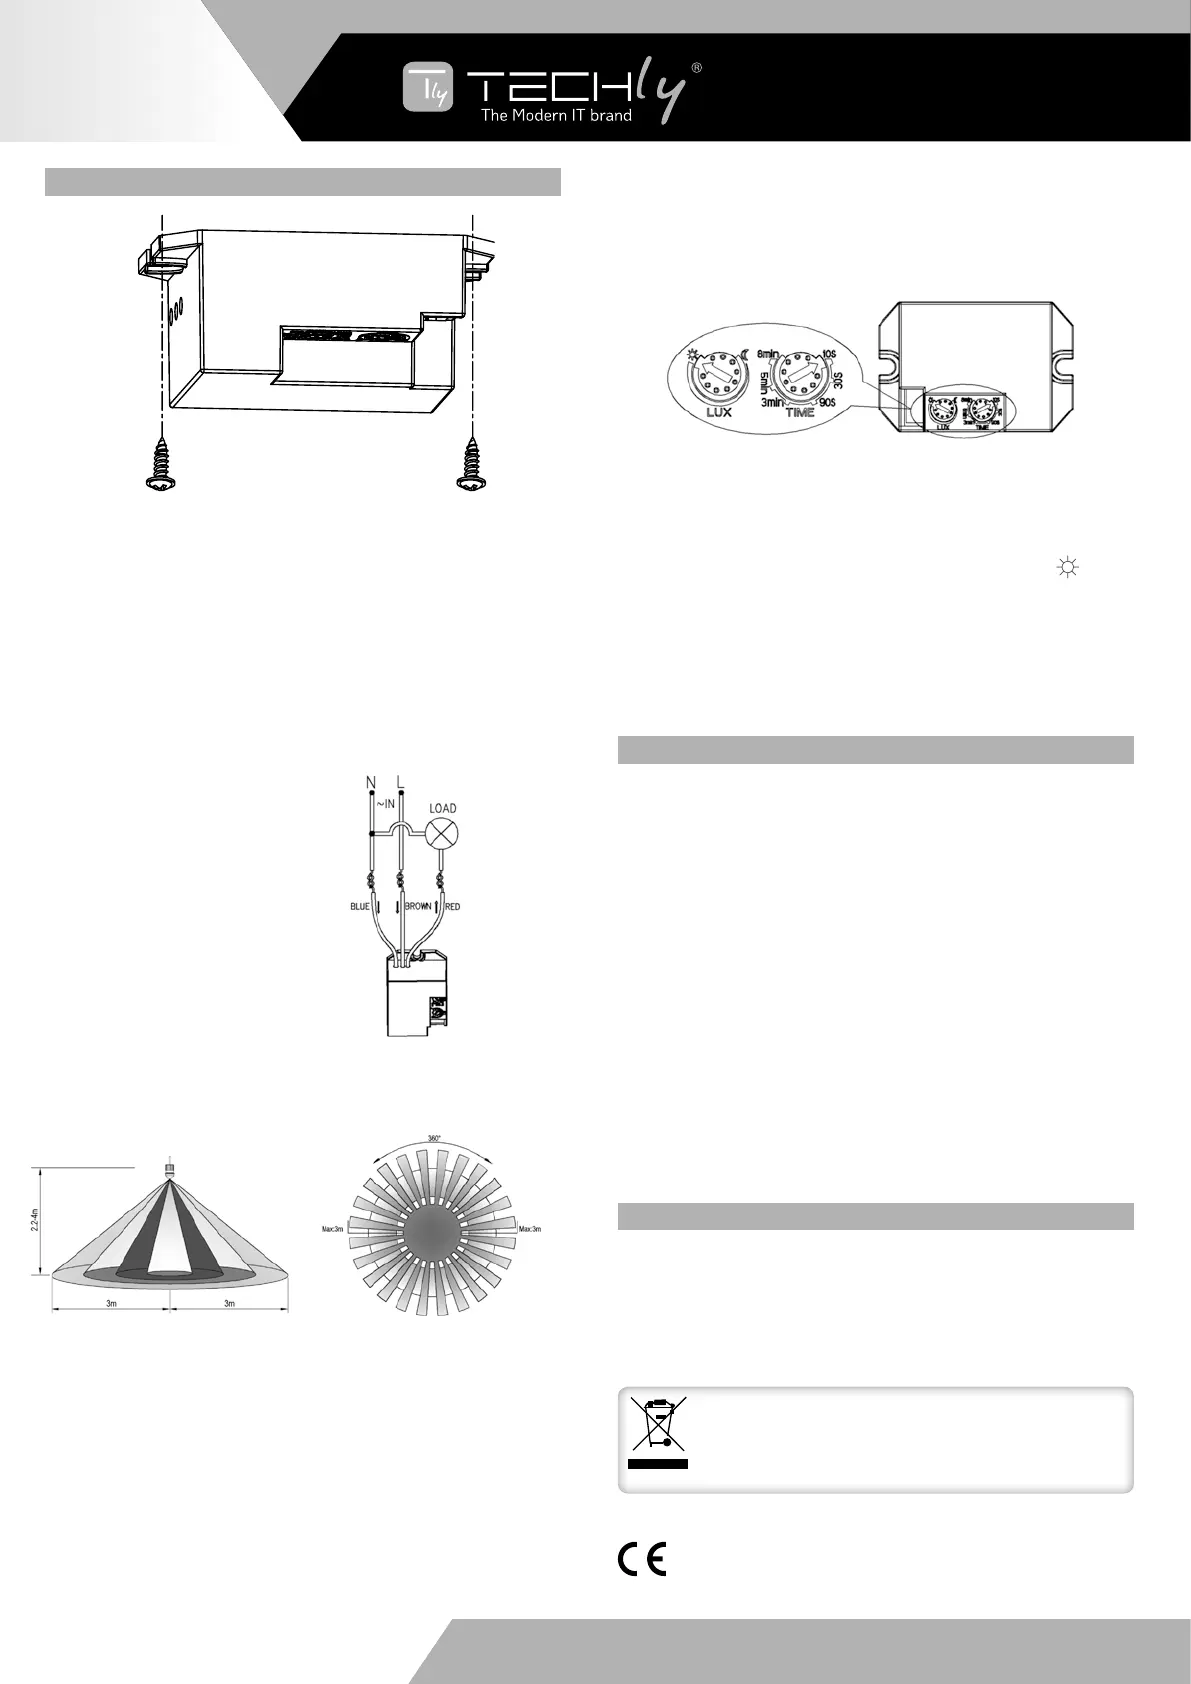
SENSOR INFORMATION:
TEST:
✔Turn the LUXknob clockwise on the maximum (sun). Turn the
TIMEknobanti-clockwiseontheminimum(10s)
✔Switchonthepower;thesensoranditsconnectedlampwillhave
nosignalatthebeginning.AfterWarm-up30sec,thesensorcan
startwork.Ifthesensorreceivestheinductionsignal,thelamp
willturnon.Whilethereisnoanotherinductionsignalanymore,
the load should stop working within 10sec±3sec and the lamp
would turn off.
✔Turn LUX knob anti-clockwise on the minimum (moon). If the
ambientlightismorethan3LUX,thesensorwouldnotworkand
thelampstopworkingtoo.Iftheambientlightislessthan3LUX
(darkness), the sensor would work. Under no induction signal
condition,thesensorshouldstopworkingwithin10sec±3sec.
TIME: Adjustthelightingtime(10sto7min)
LUX:Adjustthephotosensitivity(3-2000Lx)
Note:whentestingindaylight,pleaseturnLUXknobto
(SUN)
position,otherwisethesensorlampcouldnotwork!Ifthelampis
morethan60W,thedistancebetweenlampandsensorshouldbe
60cmatleast.
Motionsensorworksby dayand night.For daylightuse,setLUX
knobtomaximum(SUN)forcorrectwork.
SOME PROBLEM AND SOLVED WAY
✔ The product does not work:
a.Please check if the connection of power source and load is
correct.
b.Pleasecheckfunctionofthelampandswitchonmainfuseafter
complete installation.
c.Please check if the settings of working light correspond to
ambientlight.
✔ The sensitivity is poor:
a.Pleaseremoveobjectsoutfromthedetectionarea.
b.Pleasecheckiftheambienttemperatureistoohigh.
c.Please check if the induction signal source is in the detection
field.
d.Pleasecheckiftheinstallationheightcorrespondstotheheight
required in the instruction.
✔ The lighting time is not compliance with needed:
a.If the sensor can’t shut off the lamp, please check if the time
delayissettomaximumposition
b.Pleaseadjustthelightingtimeasyouneed.
WARRANTY
No guarantee or liability can be accepted for any changes and
modifications of the product or damage caused due to incorrect
use of this product.
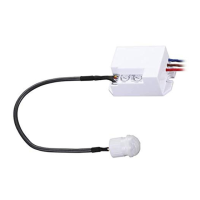
CONNECTION
•Switchoffthemainfuse.
•Checkwithavoltagetestertobesurealllinesarereallystress-
free.
• Installthesensortowallorceilingusingtheinstallationmaterial
includedintothepackage(seebelowtheinstallationdiagram).At
this,attendtothecablelocationanditsalignment.Alsoattendto
thedetectionareaandmaxdistance.
• Connect the power and the load according to the connection-
wirediagrambelow.
Testthesensorasbelowindicated.
CONNECTION-WIRE DIAGRAM:
WiththeCEsign,Techly
®
ensures that the product is conformed to
thebasicEuropeanstandardsanddirectives.
In accordance with the WEEE regulation, electrical and
electronicequipmentmustnotbedisposedofwithhousehold
waste. It means that used electrical and electronic products
shouldnotbemixedwithgeneralhouseholdwaste.Thereisa
separate collections system for these products.
Heightofinstallation:2.2-4m DetectionDistance:Max.6m
EN - 2
WWW.TECHLY.COM
INFRARED MOTION
SENSOR
 Loading...