EN2
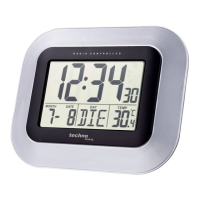
Part A - Positive LCD
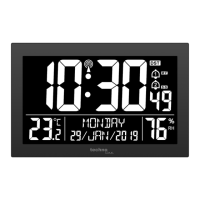
A1: RCC icon A2: Time
A3: Alarm1 icon A4: Alarm2 icon
A5: Weekday A6: Temperature
A7: Date A8: Humidity
A9: Year A10: Month
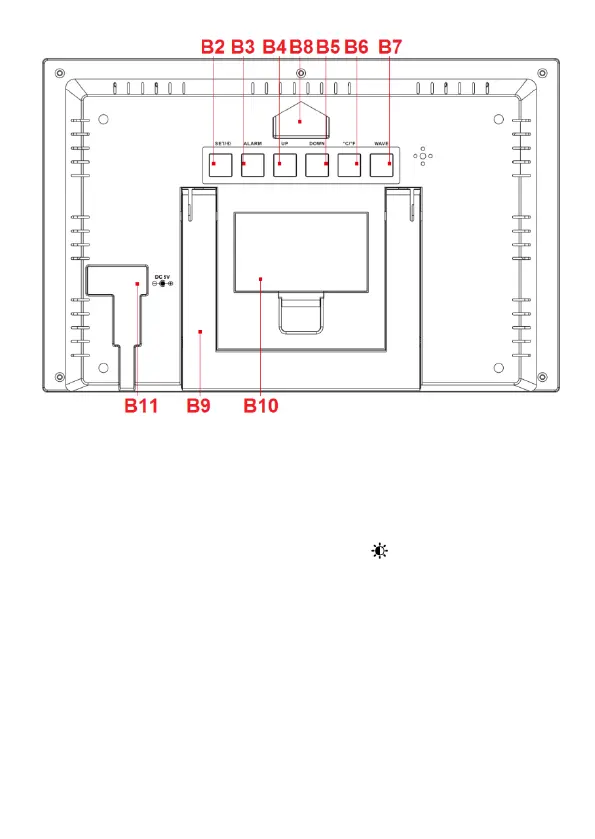
Part B – Buttons and Framework
B1: “SNOOZE/LIGHT” touch sensor B2: “SET/ ” button
B3: “Alarm” button B4: “UP” button
B5: “DOWN” button B6: “°C/°F” button
B7: “WAVE” button B8: Hanging hole
B9: Support frame B10: Battery compartment
B11:Power supply socket
Initial operation
Use the power adapter to connect the clock with an household power socket.
All the icon on the LCD display will briefly light up for 3 seconds, you will hear a beep tone and
the clock begins the search for the radio signal.
Inserting back-up batteries (optional)
Open the battery compartment cover on the backside of the clock.
Insert 2 x AA batteries observing correct polarity [ “+” and “-” marks]
Close the battery compartment cover again.