The TECO N3 AC Inverter is a variable frequency drive designed for controlling the speed of AC motors. This Quick Start Guide provides essential steps for verifying proper operation, basic setup, and motor control.
Function Description
The N3 AC Inverter functions as a motor speed controller, allowing users to adjust the output frequency and voltage to an AC motor, thereby controlling its rotational speed. It supports both 1-phase and 3-phase AC input power, making it versatile for various industrial and commercial applications. The drive features a keypad for local control, including starting, stopping, and setting the motor speed. It also includes indicators for operational status such as Hz/RPM, Volts, and Amps. The N3 is designed to work with motors requiring 230V or 460V output.
Important Technical Specifications
- Input Voltage: Supports both 1-phase and 3-phase AC input. Specific voltage ratings (e.g., 230V, 460V) are indicated on the inverter's nameplate.
- Output Voltage: Provides 230V or 460V output to the motor, depending on the model.
- Horsepower/Kilowatt Range:
- 220V Class 1Ø: 0.5-3HP (0.4-2.2KW)
- 230V Class 3Ø: 0.5-40HP (0.4-30KW)
- 460V Class 3Ø: 1-75HP (0.7-55KW)
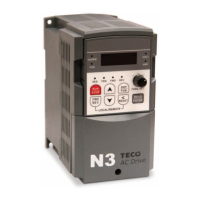
- Control Interface: Features a keypad with buttons for "RUN," "STOP," "SEQ," "FRQ," "FWD," "REV," "DSP/FUN," "FREQ. SET," "FWD/REV," "<<," "RESET," and "READ/ENTER." It also has LED indicators for Hz/RPM, VOLT, AMP, and FWD.
- Safety Features: Includes warnings against applying higher than rated input voltage and using unmatched motor/inverter ratings to prevent damage and personal injury. It also advises against applying additional load to the machine when checking motor rotation without load.
Usage Features
- Inverter Nameplate Verification: Before installation, users must compare the N3 AC Inverter's nameplate Volts and Amps ratings with the motor's nameplate to ensure compatibility. Mismatching can lead to motor or drive failure.
- Physical Installation:
- Cover Removal: The front cover and lower access plate must be removed to access the terminal strips.
- AC Input Wiring: Connect the 1-phase or 3-phase AC input wires to the power terminal strip. This step requires qualified personnel due to electrical safety concerns. The terminal markings (L1, L2, L3) are visible in raised moldings.
- Motor Lead Wiring: Connect the three motor leads (T1(U), T2(V), T3(W)) to the motor terminal strip. Ensure the wiring matches the required 230V or 460V output.
- Power Application and Initial Display:
- Upon applying AC power, the keypad initially displays the AC input voltage (e.g., 230V or 460V) for the first 5 seconds.
- After 5 seconds, it displays the input frequency, typically 05.00Hz (low RPM), with the HZ LED remaining lit and the FWD LED blinking.
- Motor Operation without Load:
- To prevent damage from reverse rotation, the drive should first be started without the motor connected to machinery. If the motor is connected, no additional load should be applied.
- Pressing the "RUN" button initiates motor operation. The display will change from 0 to 05.00Hz, and the FWD LED will light up.
- Users must check the motor shaft rotation. If correct, press the "STOP" button.
- Correcting Wrong Motor Direction:
- If the motor rotates in the wrong direction, press "STOP."
- Remove AC power to the inverter and wait until the LED display turns off.
- Reverse the motor leads T1(U) and T2(V).
- Re-apply AC power and press "RUN" again to check the rotation. Once correct, press "STOP."
- Adjusting Inverter Speed (e.g., to 60Hz):
- With the drive stopped (e.g., at 05.00Hz), press "RESET" to enter the frequency adjustment mode.
- Use the "<<" button to shift the cursor to the desired digit.
- Use the "UP" arrow to increase the frequency (e.g., to 60.00Hz).
- Use the "DOWN" arrow to decrease the frequency (e.g., to "0").
- Press "ENTER" to confirm the setting.
- Press "RUN" to accelerate the drive to the newly set speed (e.g., 60Hz).
- Stopping the Inverter: Press the "STOP" button to halt the motor operation.
Maintenance Features
- Troubleshooting Guide: The manual includes an "ATTENTION" section for troubleshooting if the N3 AC Inverter does not start properly.
- Users are instructed to re-verify steps 1 through 8 of the Quick Start Guide.
- If the issue persists, remove power and contact TECO-Westinghouse Drives Support Group for technical assistance.
- Instruction Manual Reference: After completing the quick start steps, users are encouraged to refer to the comprehensive TECO N3 Instruction Manual for detailed information on installation, environmental considerations, advanced setup adjustments, and remote control options. This suggests that the full manual contains more in-depth maintenance and configuration details.
The TECO N3 AC Inverter is a robust and user-friendly device designed for efficient motor control, with clear instructions for initial setup and operation, emphasizing safety and proper electrical connections.