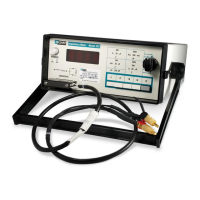
4.1.1 Power Supply Check
Setup – turn on instrument and allow ten minute warm-up period; then remove cover. Check –
Power supply voltages at C44 and C45 should be + and -5V +/-5% (4.75V to 5.25V). Use
rear panel COM terminal for voltmeter low input.
4.1.2 Oscillator Adjust
Setup – Press R function button. Set RANGE switch to 2000 ohms and short test leads
together. Connect voltmeter high input to Test Socket (J5) pin (2) and frequency counter
input to J5 pin (1). Use rear panel COM terminal for circuit common. Adjustment
– Set trimmer
S for DVM reading of 0V (+/-0.2V). Counter reading should be 1000Hz (+/-10Hz).
4.1.3 L,C,R,G Alignment
1. R, G PHASE DETECTOR ZERO TRIM. Setup – Press R function button and set RANGE
switch to 2000 ohms and short test leads together. Connect DVM input to J5 pin (6).
Adjustment
– Set trimmer P for +0.3mV ±0.1mV on DVM.
2. UNKNOWN AMP COMMON MODE TRIM. Setup – Press R function button and set
RANGE switch to 2 ohms and short test leads together. Adjustment - Adjust trimmer J for
DVM reading of 0V +/-0.3mV at J5 pin (6).
3. L, C PHASE DETECTOR ZERO TRIM. Setup – Press L function button and set RANGE
switch to 200mH. Short test leads together and connect DVM input to J5 pin (5).
Adjustment – Set trimmer M for +0.3mV +/-0.1V on DVM.
4. L, C, R, G OUTPUT AMP ZERO TRIM. Setup – Same as step 3 except connect DVM
input J5 pin (4). Adjustment – Set trimmer V for 0V +/-0.3mV on DVM.
5. UNKNOWN AND RANGE AMP PHASE TRIM. Setup – Press C function button and set
RANGE switch to 200nF. Connect decade capacitor to unknown test leads and set at
160nF (±5%). Adjustment – Note voltage at J5 pin (6) and then push L function button,
again noting J5 pin (6) voltage. The two should be equal (±0.3mV). If not, adjust
trimmer X until they are. Next adjust trimmer D for 0V ±0.3mV output at J5 pin (6) for
both L and C functions.
6. QUADRATURE GATE PHASE TRIM. Setup
– Press R function button and set RANGE
switch to 2000Ω. Connect 1000Ω (±0.05%) standard to unknown test leads. Adjustment –
Set trimmer L for DVM reading of 0V ±0.3mV at J5 pin (5).
7. R, G FULL SCALE TRIM. Setup
– Same as step 6. Adjustment – Set trimmer K for front
panel digital reading of 1000. With DVM, read voltage at J5 pin (4) and adjust trimmer R for
+1.0V (±0.5mV).
8. L, C FULL SCALE TRIM. Setup
– Press C function button and set RANGE switch to 200nF.
Connect 100nF (±0.05%) standard to the unknown test leads. Adjustment
– Set trimmer N
for front panel reading of 1000.
4-2
 Loading...