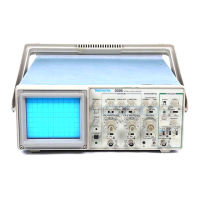
Theory of Operation-2225
Service
for preregulator U910. The Preregulator oscillates at
a nominal 39 kHz, as determined by timing
components C908 and
R908. The square-wave
output is level-shifted by
(2911, and fed to the
Darlington pair circuit formed by
Q912 and power
transistor
Q913. When Q913 is conducting, current
ramps up through
L910. When Q913 is off, the
current ramps down while flowing in through the
flywheel diode
CR912. Preregulator U910 varies the
duty cycle of conduction of
(2913, so that the
voltage on filter capacitor C914 is a nominal 39.5 V.
The network
R917, R922, R932, R934, and CR915
monitors the voltage across Q923; and, if that
voltage is lower than the nominal 1.4 V,
U910
increases the voltage across C914 until Q923 has
the correct voltage.
If
Q923 is open circuited, CR915 clamps the lower
supply voltage to 31 V. The ratio of R932 and R922
across R934 together with
R917, is chosen so that if
Q923 is short circuited, the maximum voltage across
C914 is 41
V.
Thus the Preregulator supplies a
sensible output under all conditions of the circuitry
which it drives except during an overload condition.
In this case the voltage developed across the
current sense resistor
(R907) reaches the offset
voltage of 180
mV developed by R910 and R911,
and U910 current limits the output to about 900 mA.
Series Pass
The function of Series Pass transistor (2923, is to
reject ripple current having a frequency of twice the
power-line frequency. The nominal DC voltage
across it is only 1.4 V. Base current is supplied to
Q923 via R923 and
CR923 in the absence of drive
from
Q921, when the instrument is first switched on.
Transistor Q923 is driven by both halves of U920
through
(2921. The output at pin 7 of U920 serves to
reject hum on the 38-V supply by comparing the
output of potential divider R930 and
R929, with the
reference diode
VR931. The output at pin 1 of U920,
slightly varies the value of the reference as seen at
pin 6 via attenuator resistors R925 and
R926. This
variation maintains the -8.6-V supply at the value
set by the -8.6-V Set potentiometer,
R933.
Inverter
Inverter oscillator U940 is driven via Q918 and R946,
at the same frequency as U910. U940 supplies two
non-overlapping complimentary square-wave out-
puts to Q930 and
Q960. These transistors are in
feedback loops, one of which is formed by the filter
R953, CR953, reservoir capacitor C953, and level
shifter
VR939. The feedback is such that the base of
Q940 is adjusted to drive
Q950 sufficiently hard that
the emitter swings to within 3 V of ground, but not
hard enough to saturate it. The output voltages of
transformer
1902 secondary windings are full-wave
rectified. The 100-V supply voltage is derived from
an auto-transformer winding in series with the pri-
mary winding. Resistors R942 and R941 feed a
sample of the 38-V supply voltage into the error
amplifier connected to pins 1 and 2 of
U940. If the
38-V supply should go high, U940 will shut down.
Probe Adjust
The Probe Adjust circuitry, shown on diagram 4, is a
square-wave generator and diode switching network
that produces a negative-going
,
square-wave signal
at the PROBE ADJUST terminal,
J590. Amplifier
U580A forms a multivibrator that has an oscillation
period set by the time constant of R587 and
C587.
When the output of the multivibrator is at the positive
supply voltage,
CR588 is forward biased. This
reverse biases
CR589, and the PROBE ADJUST
signal is held at ground potential by
R590. When the
multivibrator output switches states, and is at the
negative supply voltage level,
CR588 is reverse
biased. Diode
CR589 becomes forward biased, and
the circuit output level drops to approximately
-0.5
V.
i
Power Distribution
Power routing from the power supply to the other
circuit board is shown in diagram 8. The schematic
shows jumpers that may be used to isolate
suspected loads from the power supply when
troubleshooting power supply problems.
Circuit Board Interconnections
I
The signal interconnections between circuit boards
are shown in diagram 9. This diagram may be used
I
as an aid in signal tracing between the boards. The
connectors are also convenient locations to check
for the signals between boards when
i
troubleshooting.
Scam
by
ARTEK
MEDLQ
=>
 Loading...