eClock Installation 5
C. eClock Installation
Materials required:
Flush backbox (2421-BBF for 2.5", 2431-BBF for 4") (purchased separately) or
Surface backbox (2421-BBS for 2.5", 2431-BBS for 4") (purchased separately)
Four backbox mounting screws (and anchors for surface mount backbox) appropriate for
wall surface (not provided)
Four #8 x 1" screws (provided)
One #4 x 5/8" self-tap locking screw (provided, used with 2431-BBF or 2431-BBS)
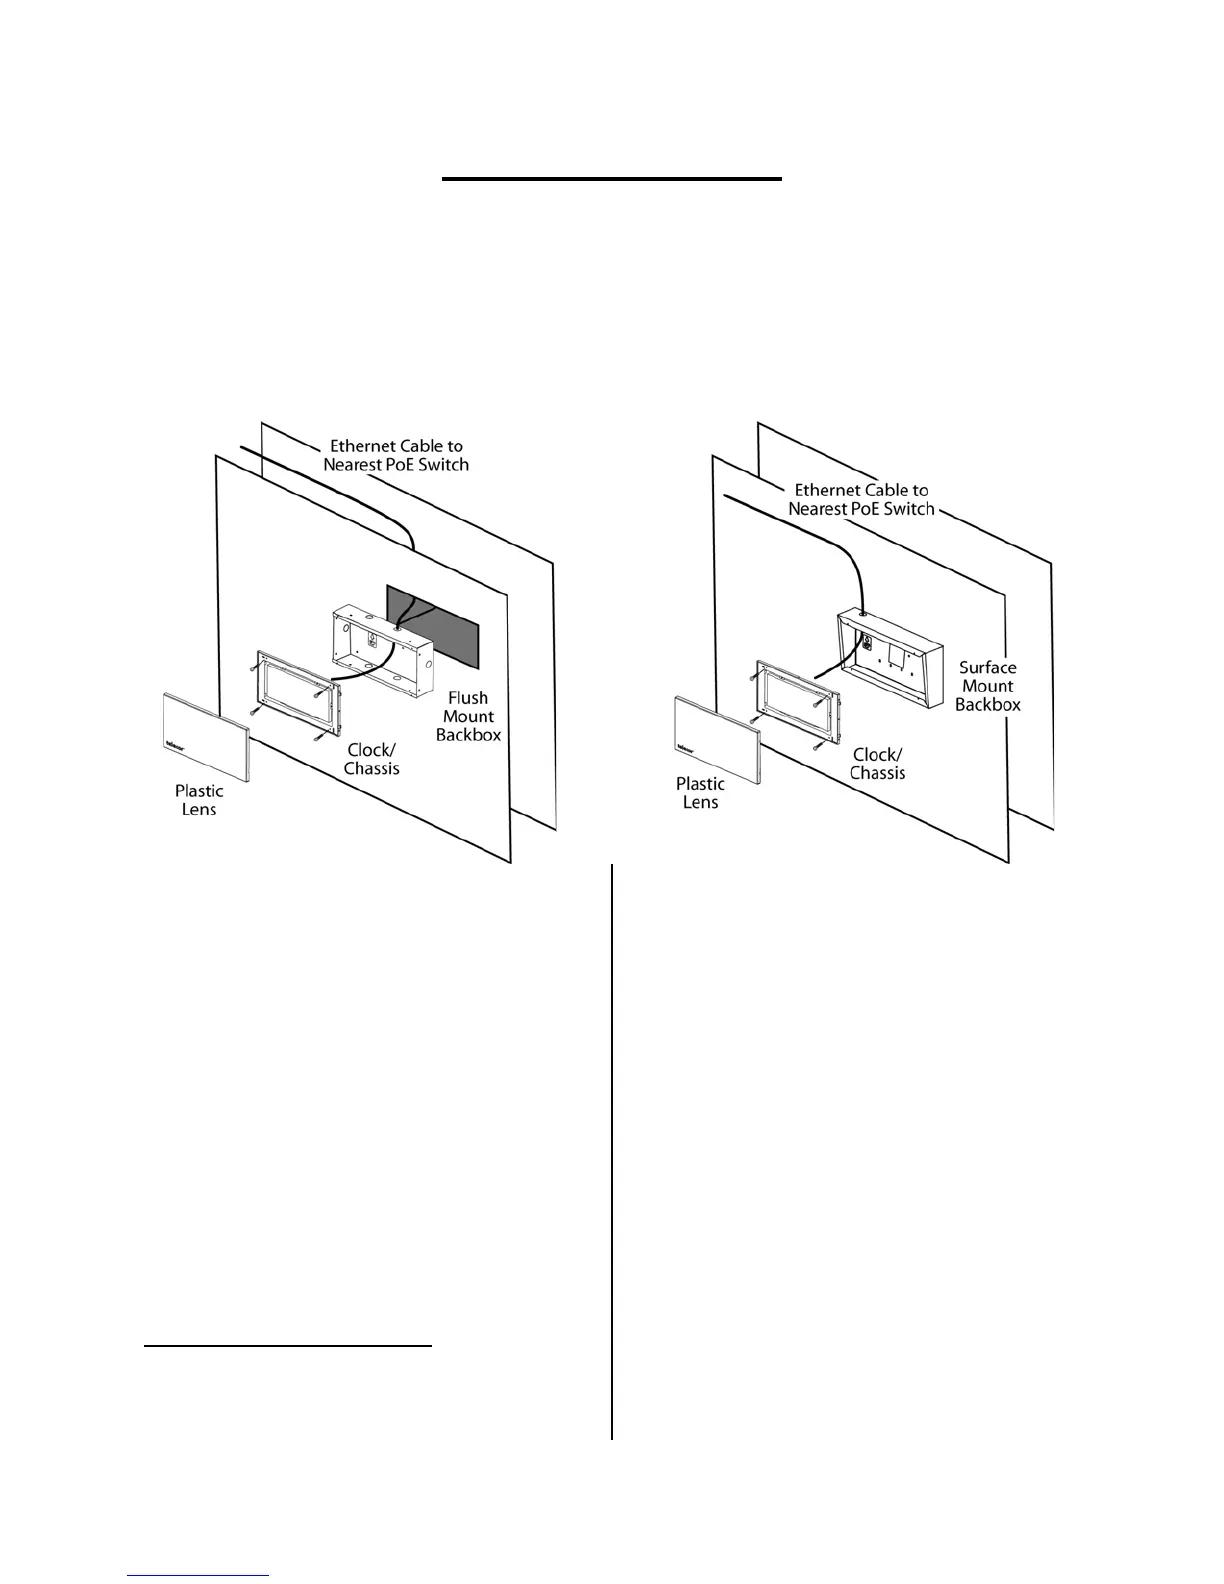
1. Install a flush or surface mount
backbox to the wall where the
eClock will be installed.1
a. Install Flush Backbox (2421-BBF or
2431-BBF)
i. Ensure the recessed portion of
the wall is the appropriate size
for the flush backbox. Refer to
Appendix 1 – Backbox
Dimensions.
ii. Punch out the appropriate
knockout on the backbox for
desired cable entry.
iii. Secure the backbox within the
wall using four screws.
1
CAT5 Ethernet cables have a maximum effective length of
328 ft (100m). Ensure that the eClock will not be located at a
distance from the PoE network switch that requires a cable
length greater than 328 ft.
b. Install Surface Backbox (2421-BBS
or 2431-BBS)
i. Ensure there is ample space on
the wall surface for the surface
backbox. Refer to
Appendix 1 –
Backbox Dimensions.
ii. Punch out the appropriate
knockout on the backbox for
desired cable entry.
iii. Place the backbox onto the wall
surface and mark the four
mounting screw locations.
iv. Install anchors at the four mark
locations
v. Secure the backbox to the
anchors/wall using four screws.