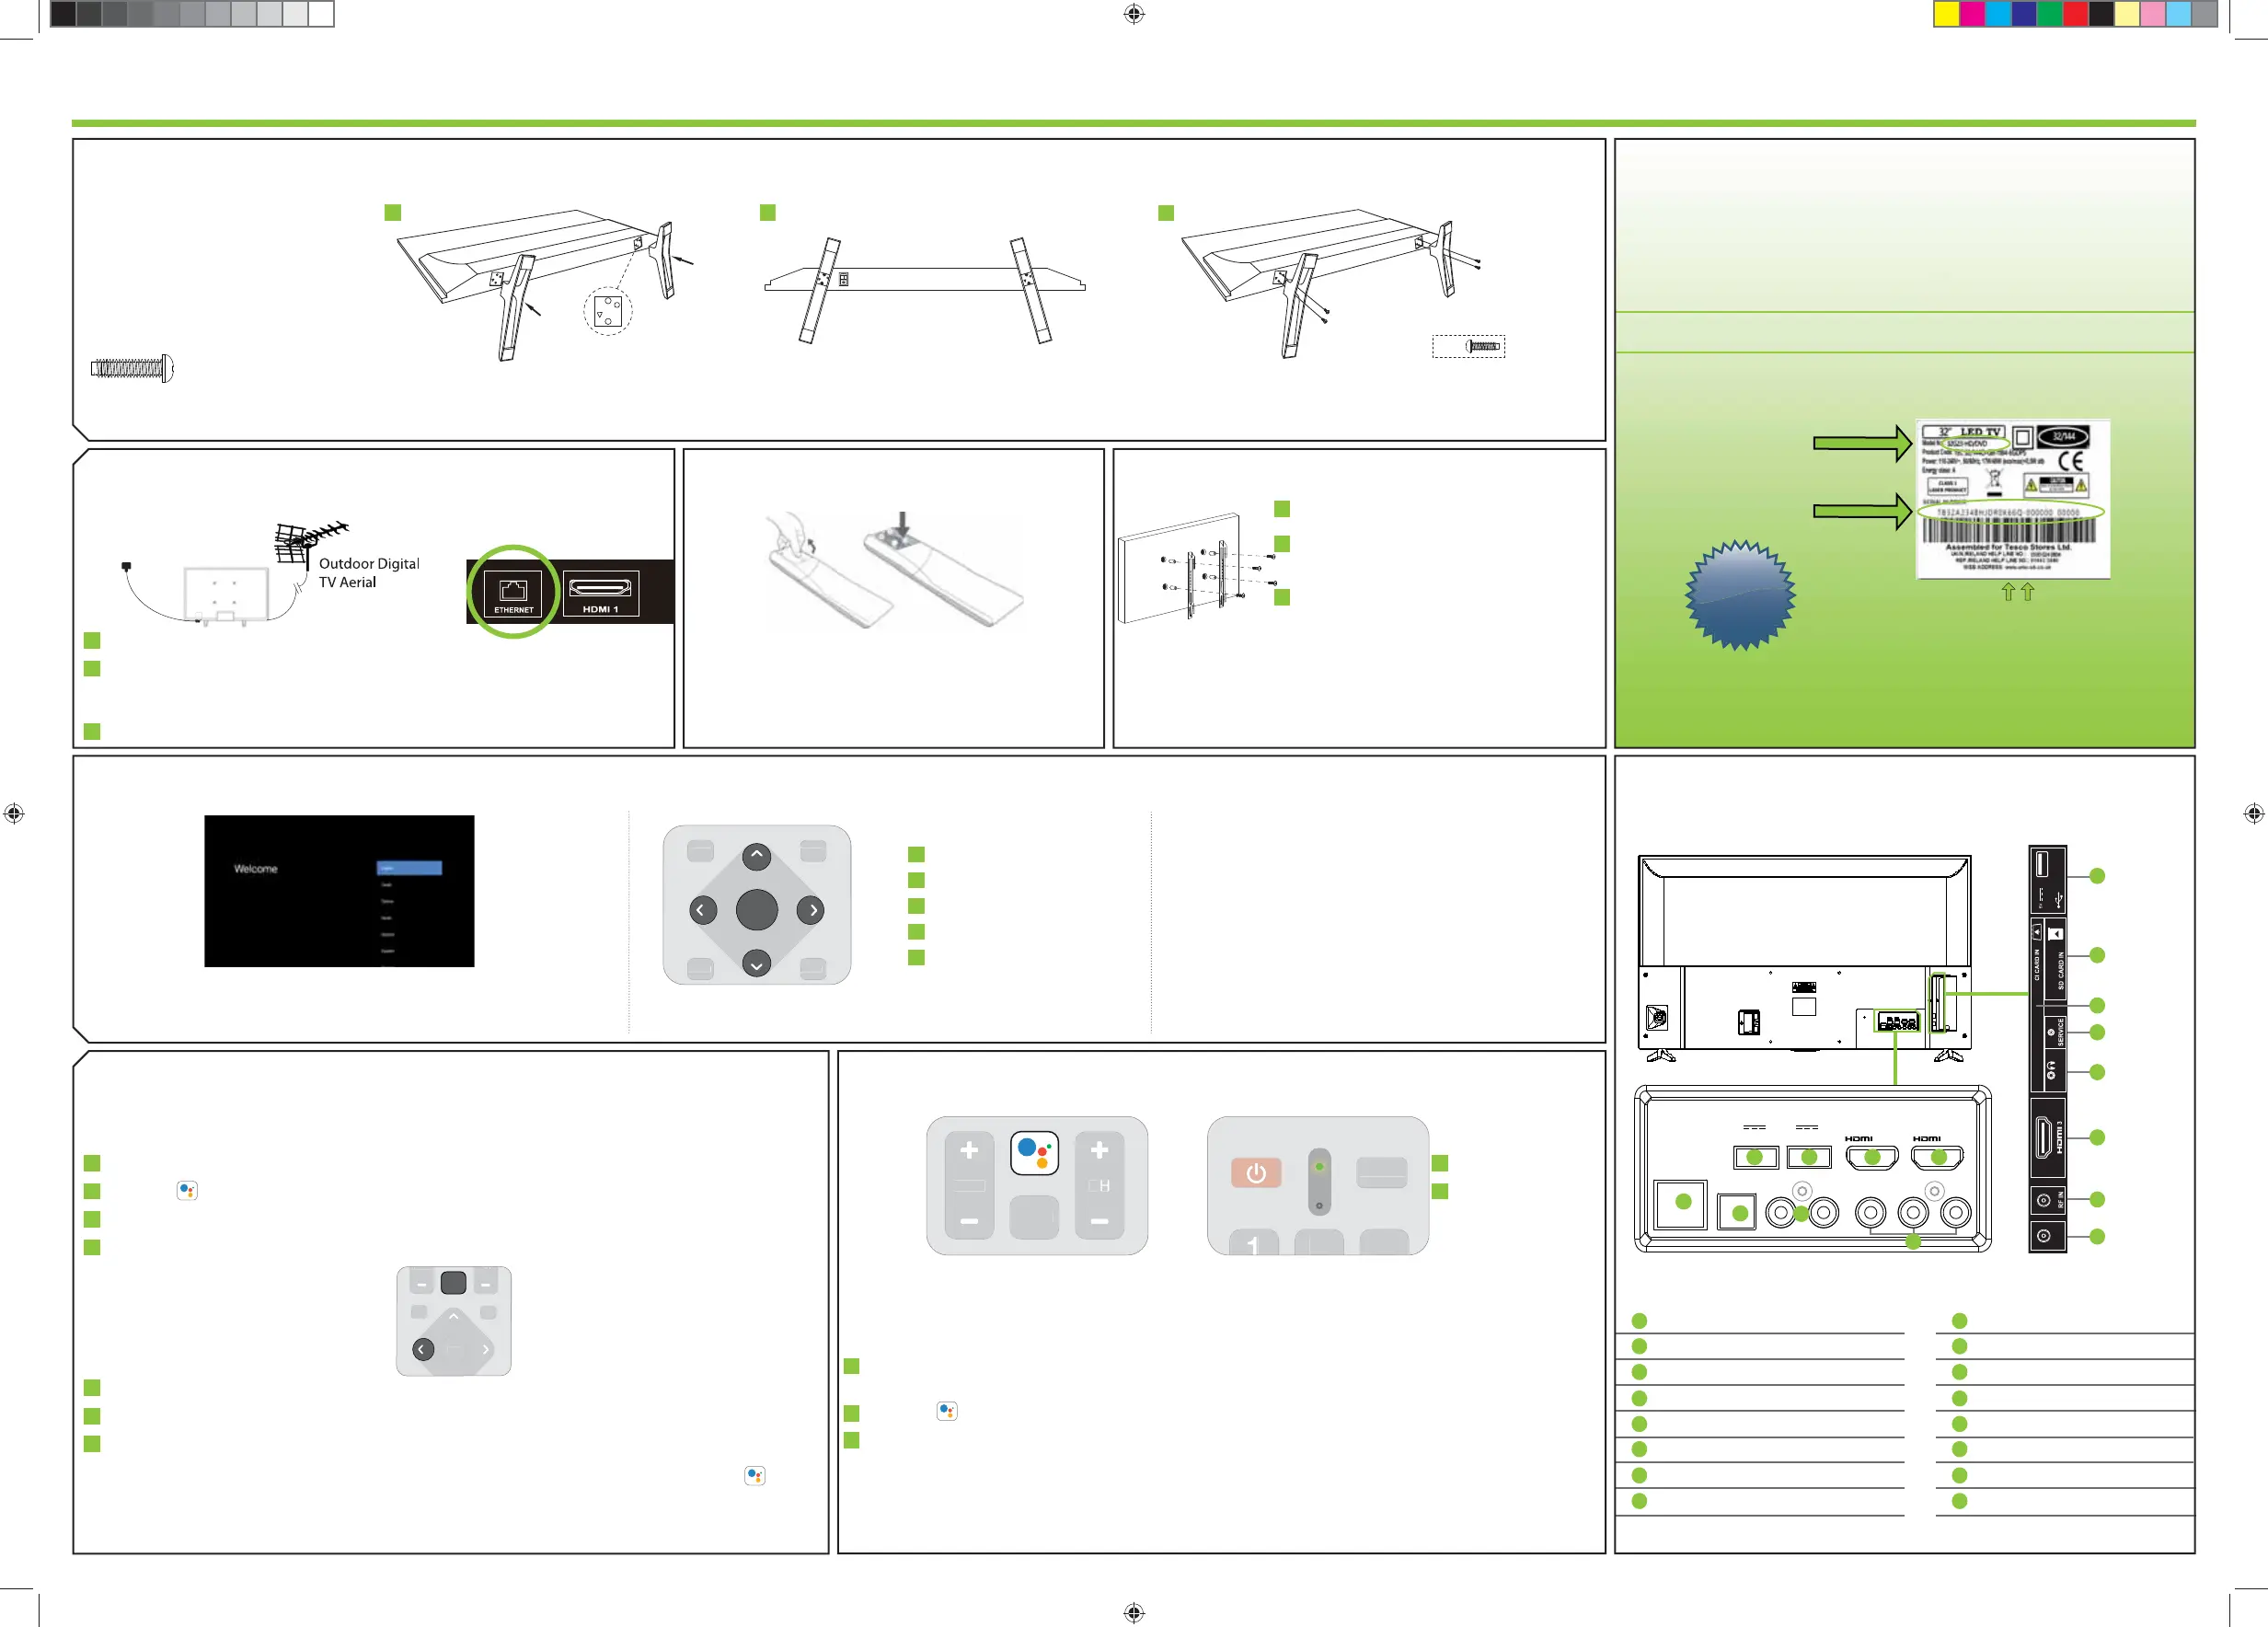
Connectivity
4 Wall Mounting the TV2 Connecting your set
7 The Google Assistant
5 First time installation
6 Pairing the remote
3 Installing batteries
1 Fitting the stand
ACT
NOW
!
1 2
ETHERNET
DIGITAL AUDIO
OUT OPTICAL
L R VIDEO/Y
Pb Pr
5V
500mA MAX
USB 1 (2.0)
5V
500mA MAX
USB 2 (2.0)
EARPHONE
SAT IN
USB 3(2.0)
900mA MAX
ARC
4 x
J
Follow steps 1 - 3 to safely install the TV stand
Remove the battery cover from the rear of the remote
control and insert the AAA batteries which are supplied in
the accessory pack.
Ensure that the polarity of the batteries is as shown above
in the battery compartment. Replace the battery cover. The
remote control is ready for use.
Thesmallprint...
ThisofferisONLYavailableonline.
Registeryourproductat
www.umc-uk.co.uk/
free6
within14daysofpurchaseand
youwillreceiveanextra6monthsmanufacturersguaranteeFREEofcharge,giving
you18monthsinsteadoftheusual12months
SERIALNUMBER
Between26-33characterslong
MODELNO.
Example:32G23-HD/DVD
ExampleoflabelonrearofTV
Pleasehaveyourproofofpurchase/receiptaswellasthemodel/refandserial
numbertohandasyouwillneedthisduringregistration.Youcanfindthe
model/refandserialnumbereitheronthebox/packagingoronthelabelonthe
rearoftheTV.
Registration must be performed online
Registration must be performed online
www.umc-uk.co.uk/free6
Register your product online within 14
Register your product online within 14
days of purchase and get 6 months
days of purchase and get 6 months
extra guarantee for FREE at:
extra guarantee for FREE at:
(Optional)
Use this connectivity guide to identify the
location of the TVs inputs and outputs.
1
2
3
1 2
3
To obtain a copy of your Operating Instructions, please go to: http://www.umc-uk.co.uk/instruction-manuals/Technika.phpSetting up the TV set for the rst time
LED indicator
Microphone
For the dimensions of the VESA mounting, please refer to the
Technical Specifi cations section of this document.
Remove the four screws that are supplied
in the wall mounting holes.
The wall mount can now be easily
attached to the mounting holes on
the rear of the TV.
Install the wall mounting bracket to the
television as advised by the bracket
manufacturer.
The picture shows the use of spacers, which
are not applicable to all sets/installations.
Image for illustration only.
* The Ethernet/LAN port is used for Digital TV services and smart functions.
Connect the TV to your power socket.
If you wish to use the TV to receive Freeview/Saorview channels, connect the RF
input from the TV to your outdoor Digital TV aerial. If you do not wish to receive
Freeview/Saorview, skip this step.
Connect to the internet. Ethernet provides the most stable connection.
Used for attaching the stand neck
to the TV ( g.1)
x4
For stand installation, there are two types
of screws provided as shown below. To
complete the stand installation you will
require a cross head screw driver.
Place the TV set on a fl at and clean surface
with the panel facing downwards to avoid
damage.
If during the fi rst time installation process the remote was not paired or skipped, then follow the process
below to pair your remote with the television.
Turn the set on.
Press the button on the remote control.
The LED indicator on the remote will illuminate and the pairing screen will appear on the TV.
Now press and hold the ”Left” and “Home” buttons on the remote simultaneously.
The LED indicator on the remote control will start to fl ash.
Select the detected remote control shown on the screen and press OK.
Once paired the pairing screen will disappear.
This process will only need to be carried out if the remote is not paired. Once paired, when the button
is pressed it will open the Google Assistant screen on the set and activate voice functionality.
The remote is paired when the LED indicator illuminates green when a button is pressed.
Using the Google Assistant with your voice
Remote controls with the Google Assistant have a Google Assistant dedicated button and a built-in
microphone. To use this feature with the Google Assistant remote control, follow the instructions as
below.
Before using the Google Assistant, you will need to pair the remote. Please follow step 7 of this
guide to pair your remote to enable the Google Assistant.
Press the button. The LED indicator on the remote control will illuminate.
Wait for the on-screen message from the Google Assistant, then speak into the microphone. A good
rule of thumb is to have the microphone positioned about 15-30 centimetres away from your mouth
By speaking into the microphone, you can search for various content or control your connected smart
home devices. Speech examples may be displayed on the television screen depending on your model.
Android Phone users
During the set-up process, you will be prompted to
sign-in to your Google account using your pre-installed
“Google” app. This set up process will depend upon
which model TV you are setting up. Please ensure you
have your account details to hand.
Basic installation steps are shown below. These may vary slightly depending on your model. Due to Android software updates,the look and feel of the TV start up
procedure and subsequent menus can be subject to chage.
When the set fi rst turns on, it will ask you to select your preferred on-screen
display language. This will change the language in which the menus and
associated information is displayed in.
E
H
DC
F G
B
A
1
2
3
4
5
6
7
Press to navigate down
Press to navigate right
Press to confi rm selection
Press to navigate left
Press to navigate up
1
2
3
4
5
1
2
3
4
5
1
2
3
1
2
1
2
1
2
3
123
Video Input (green) and
HD input (Ypbpr)
Audio shared for Video/Composite
and component/ YPbPr
Input is used only
by service centres
Ethernet* Network Connection
Digital Audio Digital Optical Audio Output
USB 1 USB Port 2.0
USB 2 USB Port 2.0
L/R
HDMI 1 HDMI Input
HDMI 2 HDMI Input
Video/YPbPr
SAT IN Satellite Input
RF IN RF/TV Aerial Input
HDMI 3 HDMI Input (ARC)
Earphones Earphones Input
Service Input
CI Card Input
SD Card Input SD Card Input
USB 3 USB Port 2.0
P
O
N
M
L
K
I
H
F
B
I
J
K
L
M
N
O
P
G
E
D
C
A
Common interface
Module
Place the TV set on a fl at and clean surface
with the panel facing downwards to avoid
damage.
When the stand feet are installed correctly the
stand feet will be longest at the front of the TV
and shortest at the feet pointing away from each
other.
When the stand feet are in the correct position,
secure the stand feet to the TV set using the 4 screws
provided.
TEC-QSW-0011.indd 2TEC-QSW-0011.indd 2 28/09/2021 14:04:2428/09/2021 14:04:24
 Loading...