Chapter 2 – Installation
TestEquity 115A Temperature Chamber Page 2-1
Chapter 2 – Installation
Uncrating
Inspect the shipping container for any signs of visible damage. Notify the carrier and TestEquity
immediately if there are signs of shipping damage.
1. Cut the bands that hold the packaging together.
2. Remove the top cover and top foam inserts.
3. Remove the outer box.
4. Remove the front and one side 2x4 retainer from the base of the pallet.
5. Remove the foam inserts from the base of the pallet.
6. Carefully roll (for model 115A-F) and/or lift the chamber off the pallet. This should be done
with at least four people.
Preparation For Use
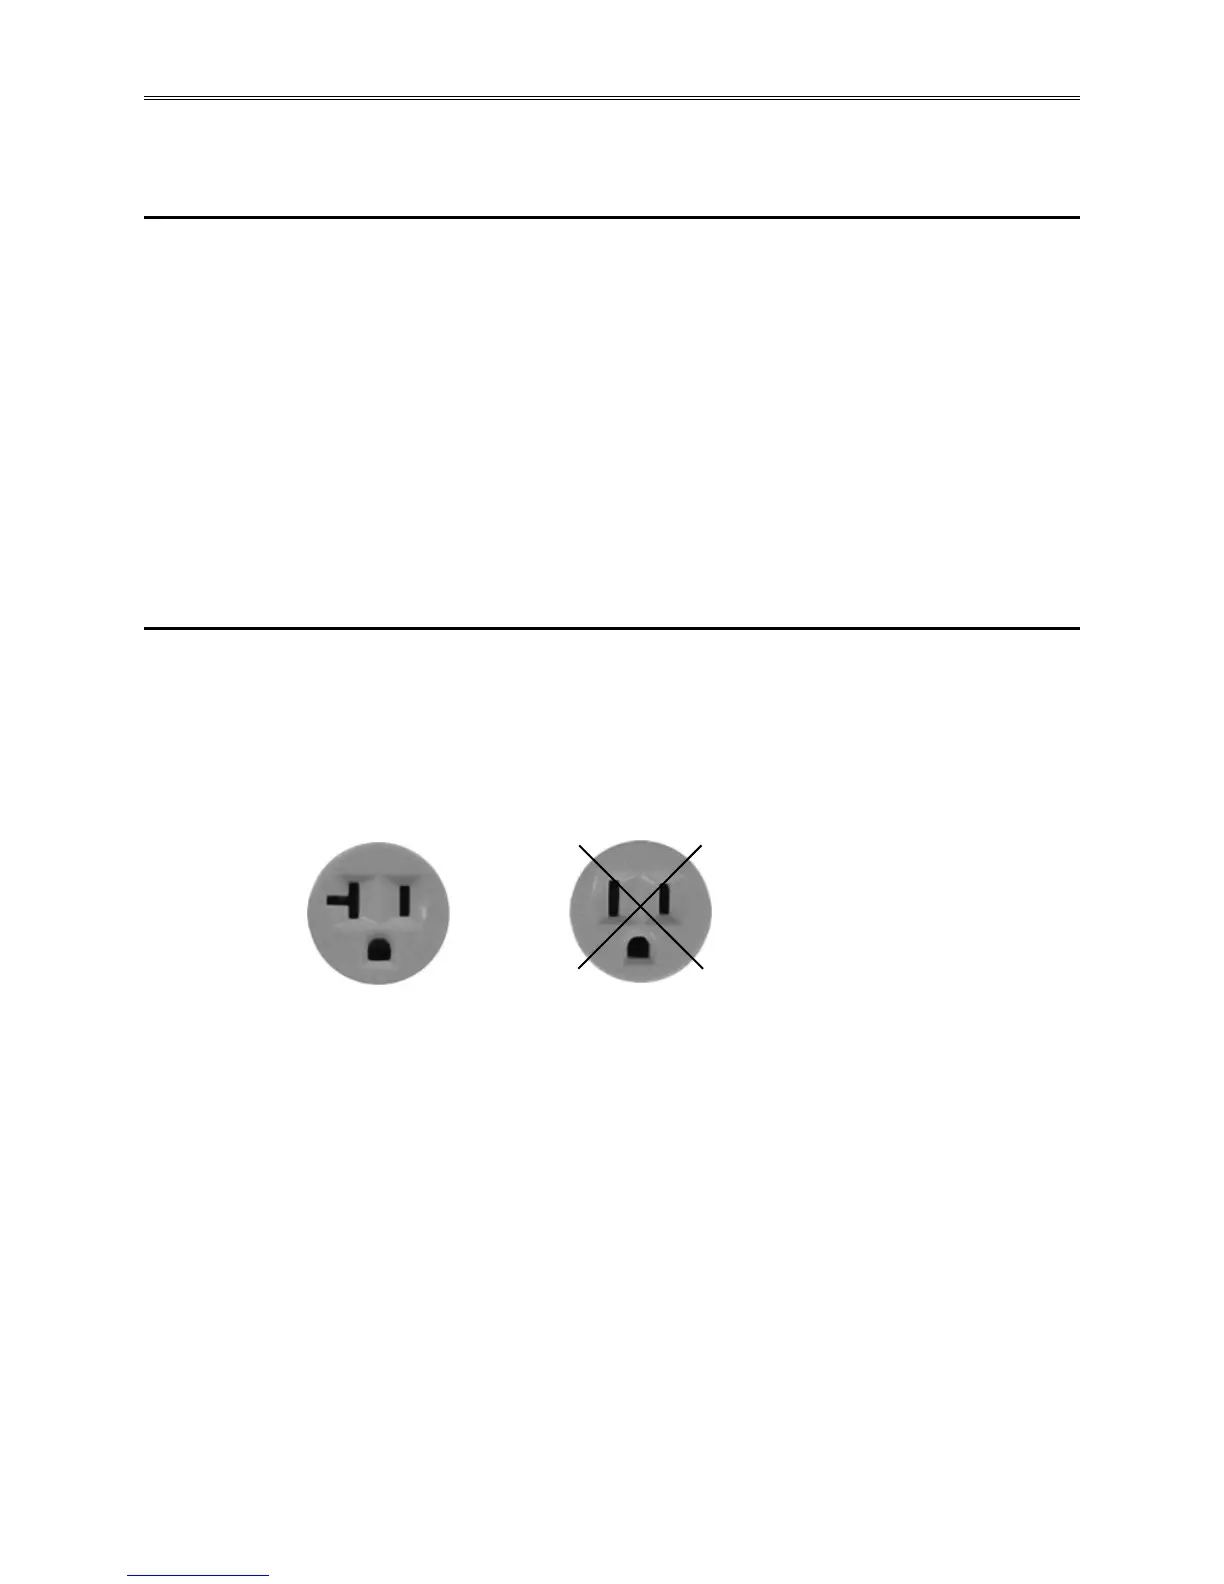
2 WARNING: The power cord is equipped with a NEMA 5-20P grounded/polarized plug. To
prevent a shock hazard, DO NOT defeat the ground or polarization feature.
This device MUST be plugged DIRECTLY into a properly grounded and
polarized NEMA 5-20R receptacle. Due to high current demand on start-up,
use of an extension cord is NOT recommended.
YES NO!
NEMA 5-20R NEMA 5-15R
20 Amp Receptacle 15 Amp Receptacle
1. Inspect the chamber for signs of shipping damage.
2. Read this entire manual.
3. Select a suitable location to install the chamber.
4. Connect to a 120 VAC, 60 Hz power source with a minimum 20 Amp breaker.
5. Perform the procedure “How to verify the chamber performance” in the Maintenance chapter
of this manual to make sure that no damage has occurred in shipment.
 Loading...