7
This is only an approximation and must only be used as a rough guide to the state of the battery charge. You should be looking
to recharge your batteries as soon as there is only one light showing. When this light flashes re-charge at the very earliest
opportunity. Never run the batteries totally flat or you may experience problems with re-charging.
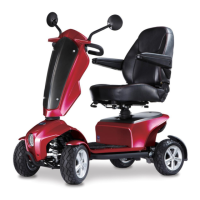
SPEED SWITCH - Facing you on the control console you
will see 2 switches (fig 9). The left hand one of these is the
2 position speed switch. The slow speed mode indicated
by a turtle is approximately 2 mph and should be used
when learning the scooter and is also ideal for shopping
and driving indoors etc (fig 9-2). The fast driving mode is
activated by pressing the other side of the switch shown by
the hare. This is the 4mph speed and when activated the
switch will light up (fig 9-3).
Fig 9
LIGHT SWITCH - For extra safety Buddy is fitted with
front and rear lights. This is operated by the switch on the
right of the speed switch (fig 10-1).
HORN - This is on the instrument panel and shown at fig
10-2). Please use only for your own safety and that of
others. It is also used as a reversing warning to others. It
is automatically activated when using reverse and sounds
intermittently.
Fig 10
BRAKES - These are fully automatic and will apply when either of the speed control levers are released. As soon as the
machine has come to a standstill the parking brake will come on. This will stop Buddy from moving even when parked on hills
and inclines. The parking brake stays on all of the time Buddy is not in use, even when the ignition is switched off.
PARKING BRAKE MANUAL RELEASE - If for whatever
reasons you have the need to push your scooter, the
parking brake can be released manually. To achieve this
turn the knob at the front right hand side of the tiller to the
end of its travel which is about one third of a full turn (fig
11). Buddy is now in a freewheel mode and can be moved
about manually. This should all be carried out with the
ignition switched off. For obvious safety reasons the
scooter is unable to be driven in this state. In addition if the
ignition is turned on whilst the brake is in the release
position the horn will sound continuously indicating the
machine is in an unsafe condition.
Fig 11
Care! Warning – Always return the manual release knob back to its drive position when you have finished pushing the scooter.
Never leave the brake off when parked on a hill.
CAUTION – In the very unlikely event of your scooter not reducing speed when you let go of the forward/reverse lever, switch
off immediately with the ON/OFF key. The parking brake will activate immediately and stop the scooter. Beware the machine
will stop very suddenly so brace yourself with the handlebars and sit back in your seat.
Care! Warning – This operation should only ever be carried out in an emergency. Continual use of this procedure will cause
damage to the electronics, motor, transmission and electronic brake.
SPEED CONTROL LEVERS – These are located on the handlebars and shown in fig 8-4 & 5. The right hand lever controls the
forward speed and the left hand is for the reverse speed. These are used by gently squeezing them in with your fingers. The
more you squeeze the lever towards you the quicker you will go. Never use by squeezing the lever fully home straight away.
Always use the lever as a gradual process. To stop simply release the lever, the brakes will automatically be applied and Buddy
will come to a gentle stop. The speed control levers are universal and forward and reverse modes can be controlled by each
lever. By moving the right hand lever towards you the machine will drive forwards. By pushing the lever away from you the