TIP
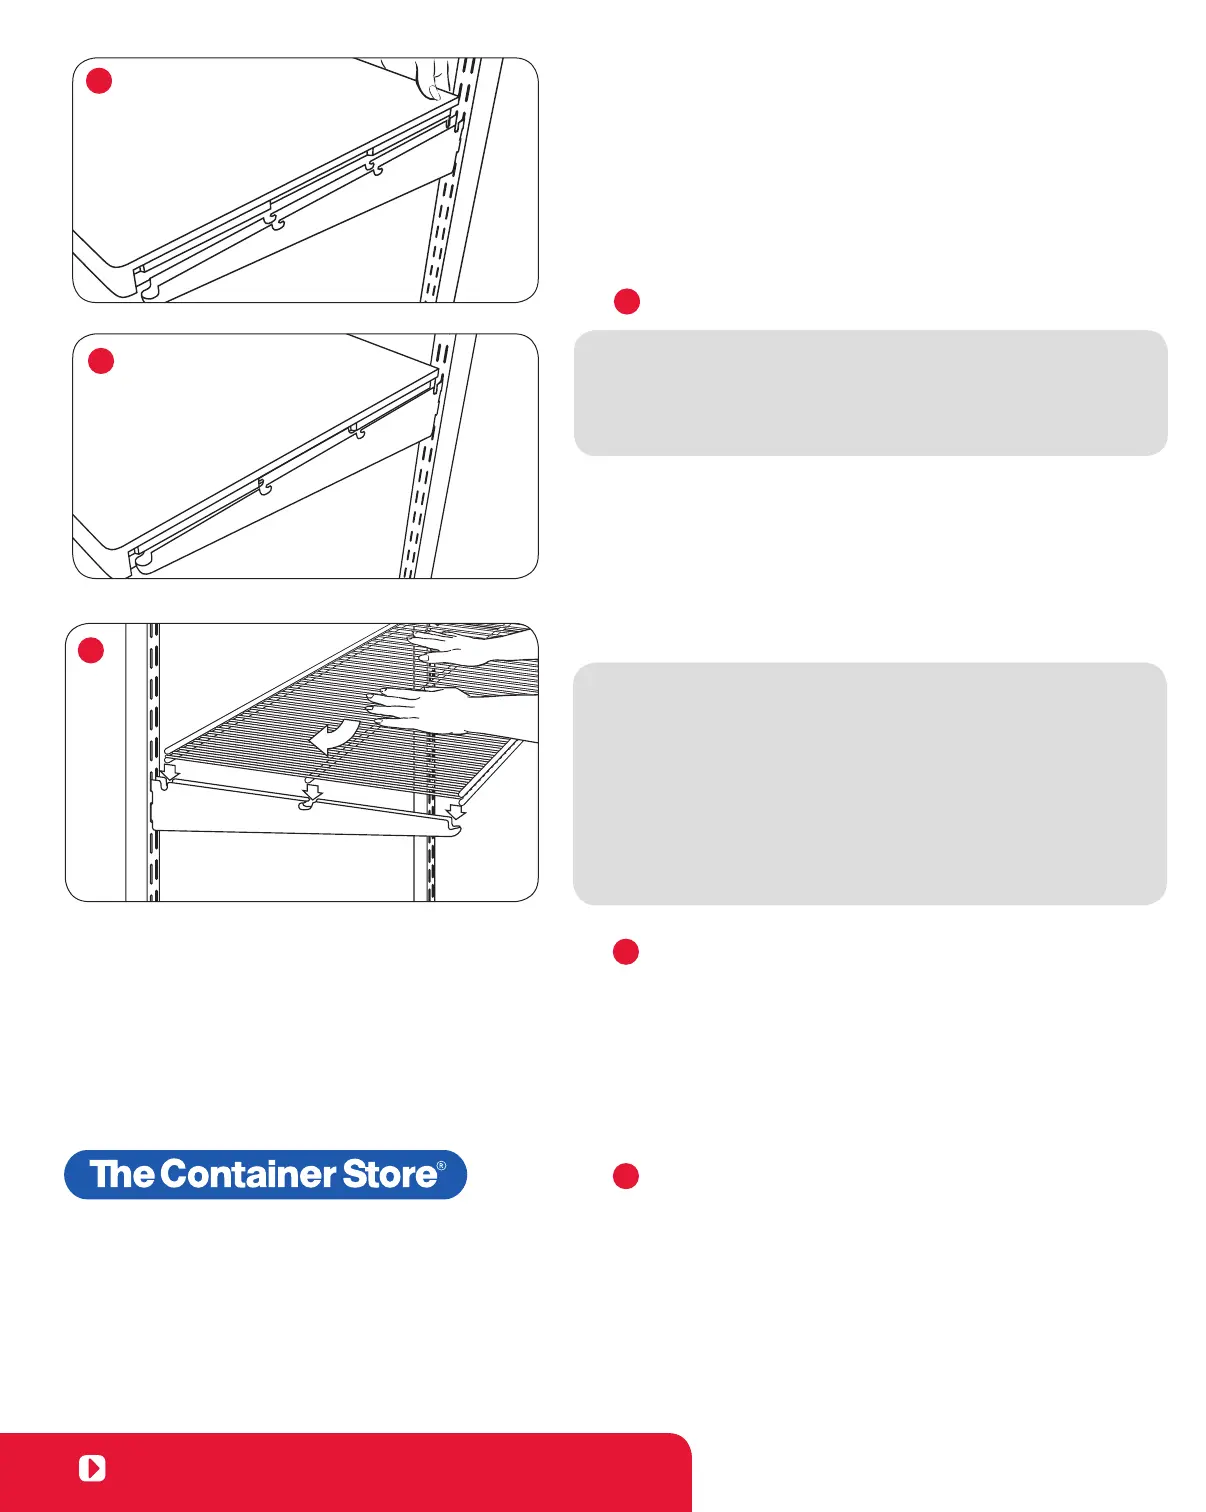
A
B
STEP 1
décor Shelves
– Insert Ventilated Shelf Brackets into the Hanging Standards at the
desired height.
– Place the décor Shelf over the Brackets (Figure A) and press down
to snap into place. (Figure B)
Ventilated Shelves
Install the Ventilated Shelves
• Install the Ventilated Shelves from shortest to longest, regardless
of their location in the space.
• Ventilated Shelves have a top and a bottom. The middle support
wire(s) is connected to the bottom of the Shelf.
– Place the Shelf wires over Shelf Bracket notches.
– Install the Shelf with end wires inside the Brackets.
– Lock the Shelf into place by pressing down on the middle of the
Shelf and pushing toward the wall. (Figure C)
TIP
• To REPOSITION a Ventilated Shelf after it’s been attached to
the Brackets: Hold by the Brackets, and lift the front of the shelf
toward the ceiling and outward to release the entire unit from the
Hanging Standards. (Works on all Shelves except 20" depth.)
• To REMOVE a Ventilated Shelf from a Bracket while on the
Hanging Standards: Hold the Hanging Standard steady with one
hand. Place the other hand at the back of the Shelf. Pull up and
forward to release.
Install the Shelf Baskets (not shown)
– With the double wire front lip of the Shelf Basket facing forward, place
the Shelf Basket wires over the Shelf Bracket notches.
– Install the Shelf Basket with the end wires inside the Bracket.
– Lock the Shelf Basket into place by pressing down on the middle of
the Shelf Basket and pushing toward the wall.
– Insert Shelf Basket Dividers where desired, if applicable.
Install the Shelf Basket Fascia
(not shown)
– Position the Shelf Basket fascia underneath your Shelf Baskets with
the curved edges of the Shelf Basket fascia face down and parallel to
the floor.
– Lift the Shelf Basket fascia up to the underside of the front edge of the
installed Shelf Baskets and push back towards the wall until it clips
into place.
STEP 2
C
Our time-saving Installation Service is available in all
stores. Visit containerstore.com/installationservice
for details.
Let Us Do the Work for You!
Installation Service
10
Visit containerstore.com/installation to view video instructions.
STEP 3
 Loading...