Press the / button to turn on the unit.
Press and hold the
u
button of the wireless microphone to turn on
the microphone, the light will be solid.
Press the
w
or
v
button to adjust the volume of both
wireless microphones.
NOTES:
• Working distance of up to 66 feet/20 meters in open space.
• If there is no audio input for 20 minutes, the wireless mics
connection will automatically turn off. Press the button to
reactivate the connection.
Making the Connections
Operation
The Responsible Party
Company Name : The Singing Machine Company, Inc.
Address : 6301 NW 5th Way, Suite 2900,
Fort Lauderdale, FL33309, USA
Telephone : 954 -596-1000
Website : www.singingmachine.com
The Bluetooth® word mark and logos are registered trademarks owned by Bluetooth SIG,
Inc. and any use of such marks and logos by The Singing Machine Company, Inc. is under
license. Other trademarks and trade names are those of their respective owners.
CAUTION:
- Replace all batteries at the same time.
- Do not mix old batteries with new batteries.
BATTERY OPERATION FOR WIRELESS MICROPHONE
1
Slide the battery door in the direction of the arrow to
reveal the battery compartment.
2
Replace the batteries with 2 x "AA" size/LR6 battery
(not included).
3
Replace cover tightly before operating.
When the wireless microphone batteries are low the battery
indicator will flash. Change the batteries as above.
Battery Precautions
The precautions below should be followed when using batteries inthis device:
1. Use only the size and type of batteries specified.
2. Be sure to follow the correct polarity when
installing thebatteries as indicated in the battery
compartment. Reversedbatteries may cause
damage to the device.
3. Do not mix different types of batteries together
(e.g. Alkalineand Carbon Zinc) or old batteries
with fresh ones.
4. If the device is not to be used for a long period
of time,remove the batteries to prevent damage
or injury from possible battery leakage.
5. Do not try to recharge batteries not intended to be
recharged,they can overheat and rupture. (Follow
battery manufacturer’sdirections.)
6. Rechargeable batteries are to be removed from
the productbefore being charged.
7. Rechargeable batteries are only to be charged
under adult supervision.
8. Exhausted batteries are to be removed from the
product.
9. Batteries shall not be exposed to excessive heat
such assunshine, fire or the like.
Connect the wired microphone (not included) into Mic jack
u
(when desired).
NOTE: Maximum of three microphones (wired or wireless) can be connected to the unit at one time.
Connect the external unit to the AUX IN jack
v
on back of this unit. When connected, the Aux In function is automatically selected. You
can also record and playback your singing and the music (see “Operation points 6 & 7” for details).
NOTES:
• It is highly recommended to set the volume on the external unit to 1/3 or lower to avoid distortion.
• Skipping tracks is not possible to perform on this unit when using an external device.
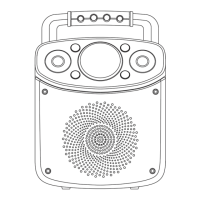
CONNECTING TO POWER
Insert the USB cable (included) into USB Type-C port
w
on rear of the unit. Plug the other end of the cable into computer USB port or
other USB charging device (not included)
NOTE : When the unit is being hanged up and does not response to any key function, please use a pin to press the reset button. (located
inside the aux in jack)
v
.
u
w
v
u
x
y
U
V
w
v v
w
W
at
X X
at
Energy Saving Mode (Auto Power System-APS)
This unit will automatically turn off after 20 minutes of inactivity. To resume use of the unit press the / button.
APS is for energy saving purposes.
u
w
v
1
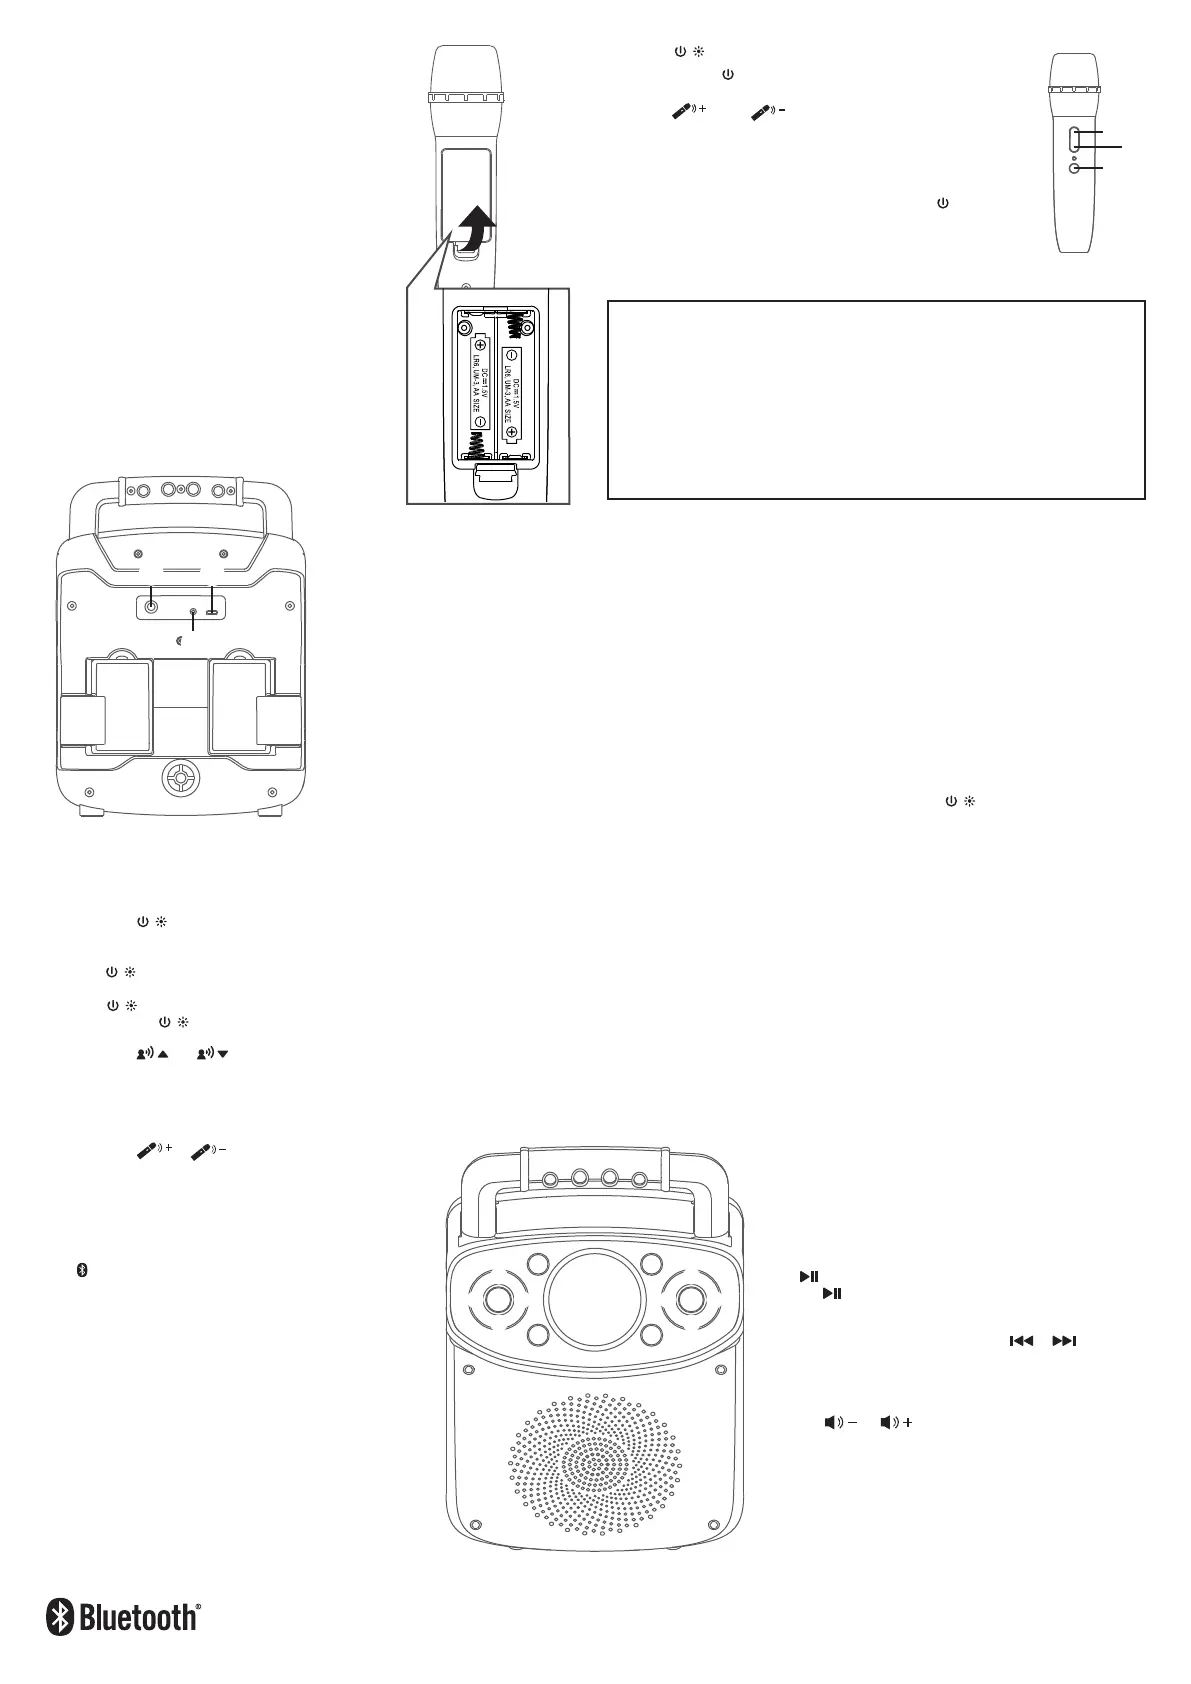
Press the / button to turn the unit on. When the unit is turned on, the Light mode 1
is automatically activated. The lights will light up and will synchronize with the sound
when you speak or sing into the microphone.
Press the / button for Light mode 2 which will display the light show but will not respond
to the microphone.
Press the / button once again to turn off the Lights.
Press and hold the / button to turn the unit off.
2
Press the or (VOICE EFFECTS) button to select different vocal effect, the
mic guy icon light will change for a few seconds:
Purple light - ECHO; Pink light - FEMALE; Orange light - MALE;
Lime light - CHIPMUNK; Cyan light - ROBOT; Blue light - RADIO
Select white (NONE) to sing without any voice effect.
3
Press the or button on the unit. Increasing this
control will increase the volume of both microphones.
4
When the unit is turned on and the cable is not connected to
the AUX IN jack, the unit will automatically search for and
pairs a previously paired Bluetooth device (if previously
paired). If no previously paired devices are present, press the
button to disconnect any paired devices in order to pair
another device.
Turn on your device’s Bluetooth option in settings to search for a
discoverable device with a Bluetooth signal. Select “SINGING
MACHINE” from the device results on the Bluetooth menu.
NOTES:
• Also refer to the user manual of your Bluetooth device for
detailed instructions.
• If your Bluetooth prompts you for a passcode during the pairing
process, please enter “0000” to connect.
• On some Bluetooth devices, once pairing is completed, select
your Bluetooth device as “Use as Audio Device” or similar.
• If connection is lost after successful pairing, check to make sure
the distance between speaker and Bluetooth-enabled device
does not exceed 30 feet/10 meters.
The light will turn solid and a chime will sound indicating pairing
was successful.
7
To playback your voice recording, you can press the
RECORD PLAYBACK button;
the mic guy icon will turn solid
red
. Press again to stop. Press and hold to clear the
recording.
8
To control your Bluetooth device from this unit, press the
button to start playback (music app must be open). Press
the button during playback to pause the song.
9
In Bluetooth mode, press the button or to advance
or go back one track.
10
Adjust the volume to a comfortable level using the
or button on this unit as well as the volume
on your Bluetooth device.
5
To sing without the lead singer on the recording, press the VOCALS OFF button. To
resume the lead singer, press the VOCALS OFF button again.
NOTE: The Vocal off function might not work perfectly. It is song dependent.
6
During music playback, press the RECORD button to record your singing and the music,
the mic guy icon will flash red
. You can press the RECORD button again to stop
recording, the red light will turn off.
This unit is able to record for 260 seconds. It will stop recording automatically after 260
seconds and the record indicator will turn off.
NOTES:
• Please note that each time when the new recording is being recorded, the existing recording
will be deleted.
• The volume of your singing is affected by the volume setting. Do not record if the volume is
set to minimum.
u
 Loading...