Do you have a question about the Thermador T36IF905SP and is the answer not in the manual?
Precautions to prevent electric shock during installation and operation.
Warnings about tipping, cuts, suffocation, and preventing appliance damage.
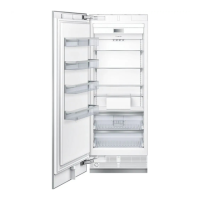
Specific dimensions and clearances for the 18-inch appliance installation.
Specific dimensions and clearances for the 24-inch appliance installation.
Specific dimensions and clearances for the 30-inch appliance installation.
Specific dimensions and clearances for the 36-inch appliance installation.
Step-by-step guide for attaching anti-tip brackets to the appliance and wall.
Instructions for safely moving the appliance using a hand truck.
Guidance on fitting brackets and clearances for the 18-inch appliance.
Guidance on fitting brackets and clearances for the 24-inch appliance.
Guidance on fitting brackets and clearances for the 30-inch appliance.
Guidance on fitting brackets and clearances for the 36-inch appliance.
Procedure for adjusting appliance hinges using a T30 screwdriver for proper alignment.
Visual steps for aligning the appliance door using adjustment screws.
Steps for attaching Set A brackets with screws.
Steps for attaching Set C components with washers.
Steps for attaching Set D components with washers.
Step-by-step guide for assembling the rail system components.
Procedure for securing the assembled rail system with a click mechanism.
Instructions for inserting and securing internal sliding components.
Procedure for mounting the guide rails onto the appliance.
Steps for installing components specific to 18-inch and 24-inch models.
Steps for installing components specific to 30-inch and 36-inch models.
Procedure for attaching brackets to 18-inch and 24-inch appliances.
Steps for installing brackets on 30-inch and 36-inch models.
Steps for assembling the first set of components for the 18-inch unit.
Steps for installing components for the 24-inch appliance.
Procedure for attaching components for 30-inch and 36-inch appliances.
Procedure for inserting the top component onto the appliance.
Steps for securing the component with a click mechanism.
Steps for fastening upper components with a click lock.
Steps for attaching primary mounting brackets.
Steps for attaching brackets (B) using washers and screws.
Steps for installing brackets (C) with washers and screws.
Steps for attaching components (D) using washers and screws.
Steps for installing the appliance hinges using a T30 screwdriver.
Visual guide for adjusting the hinges after installation.
Steps for attaching upper brackets using M5x16 screws.
Steps for attaching lower brackets using M5x16 screws.
Procedure for fitting top corner brackets using M5x16 screws.
Procedure for fitting bottom corner brackets using M5x16 screws.
Steps for attaching the appliance hinges.
Steps for connecting the water supply hose using specific fittings.
Procedure for properly tightening the water line connection.
Important safety precautions regarding electrical connections.
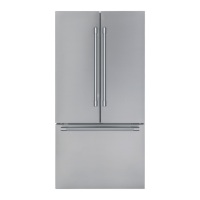
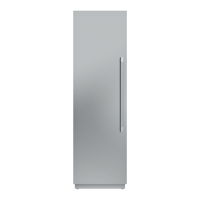
| Type | built in |
|---|---|
| Style | column |
| Color | panel ready; stainless steel |
| Total Capacity | 19.4 cu. ft. |
| Defrost System | frost-free |
| Quick Freeze | yes |
| Undercounter | no |
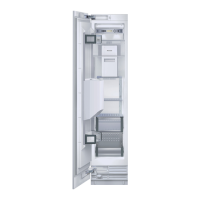
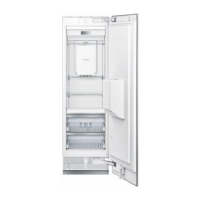
| Shelves Type | glass w/aluminum profile |
| Number of Shelves | 4 |
| Number of Adjustable Shelves | 3 |
| Number of Drawers | 2 |
| Interior Light | led sidewall and theater lighting; yes |
| Ice Maker | yes |
| Door Alarm | yes |
| Child Lock | no |
| Smart Home | yes; home connect |
| Remote Control | yes |
| Wi-Fi | yes |
| Voltage | 120 volts |
| Frequency | 60 hz |
| Current | 15 a |
| Depth | 24 inch |
|---|---|
| Height | 83 3/4 inch |
| Width | 35 3/4 inch |