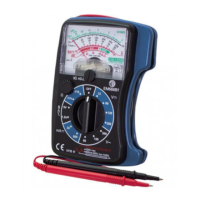
1. Set the function switch to position V~ and the appropriate AC voltage
rating; if unknown, start with the highest rating and work your way down.
2. Connect the test plungers to the circuit.
3. Read the value indicated by the needle
once it has stabilised.
11
1. Set the function switch to position V and the appropriate DC voltage
rating; if unknown, start with the highest rating and work your way down.
2. Connect the test plungers to the circuit.
Red plunger on +, black plunger on -.
3. Read the value indicated by the needle
once it has stabilised.
1. Set the function switch to position mA and the appropriate DC voltage
rating; if unknown, start with the highest rating and work your way down.
2. Connect the test plungers to the circuit. Red plunger on +, black plunger on -.
3. Read the value indicated by the needle once it has stabilised.
1.
Set the function switch to position BAT and 1.5V or 9V rating depending on
the battery to be tested
.
2. Connect the test plungers to the battery terminals. Red plunger on +, black
plunger on -.
3. Read the BAD (bad, red zone) or GOOD (good, green zone) indication shown
by the needle once it has stabilised. The batteries indicated as BAD (red) are
discharged and must be replaced.
1. Set the function switch to
Ω
and one of the 2 ratings.
2. Before starting the measurement, position the needle on 0 at the right end
of the upper scale with the potentiometer and bring the 2 plungers into
contact.
3.
Connect the test plungers to the resistance.
4. To obtain a correct resistance value, and
if you have set the switch to x10, multiply
the value indicated by the needle
by 10 once it has stabilised.
Rating Read the Multiply Divide
adjustment
following scale
by by
30 0-300 - 10
600 0-60 10 -
Rating Read the Multiply
adjustment following scale by
x10 10
x1k
0-1kΩ
1000
Rating Read the Multiply
adjustment following scale by
12 0-12 1
60 0-60 1
120 0-12 10
300 0-300 1
Rating Read the Multiply
adjustment following scale by
60 0-60 1
120 0-12 10
300 0-300 1
 Loading...