Page 8
Installing RadianceRail
®
Stairs with Balusters
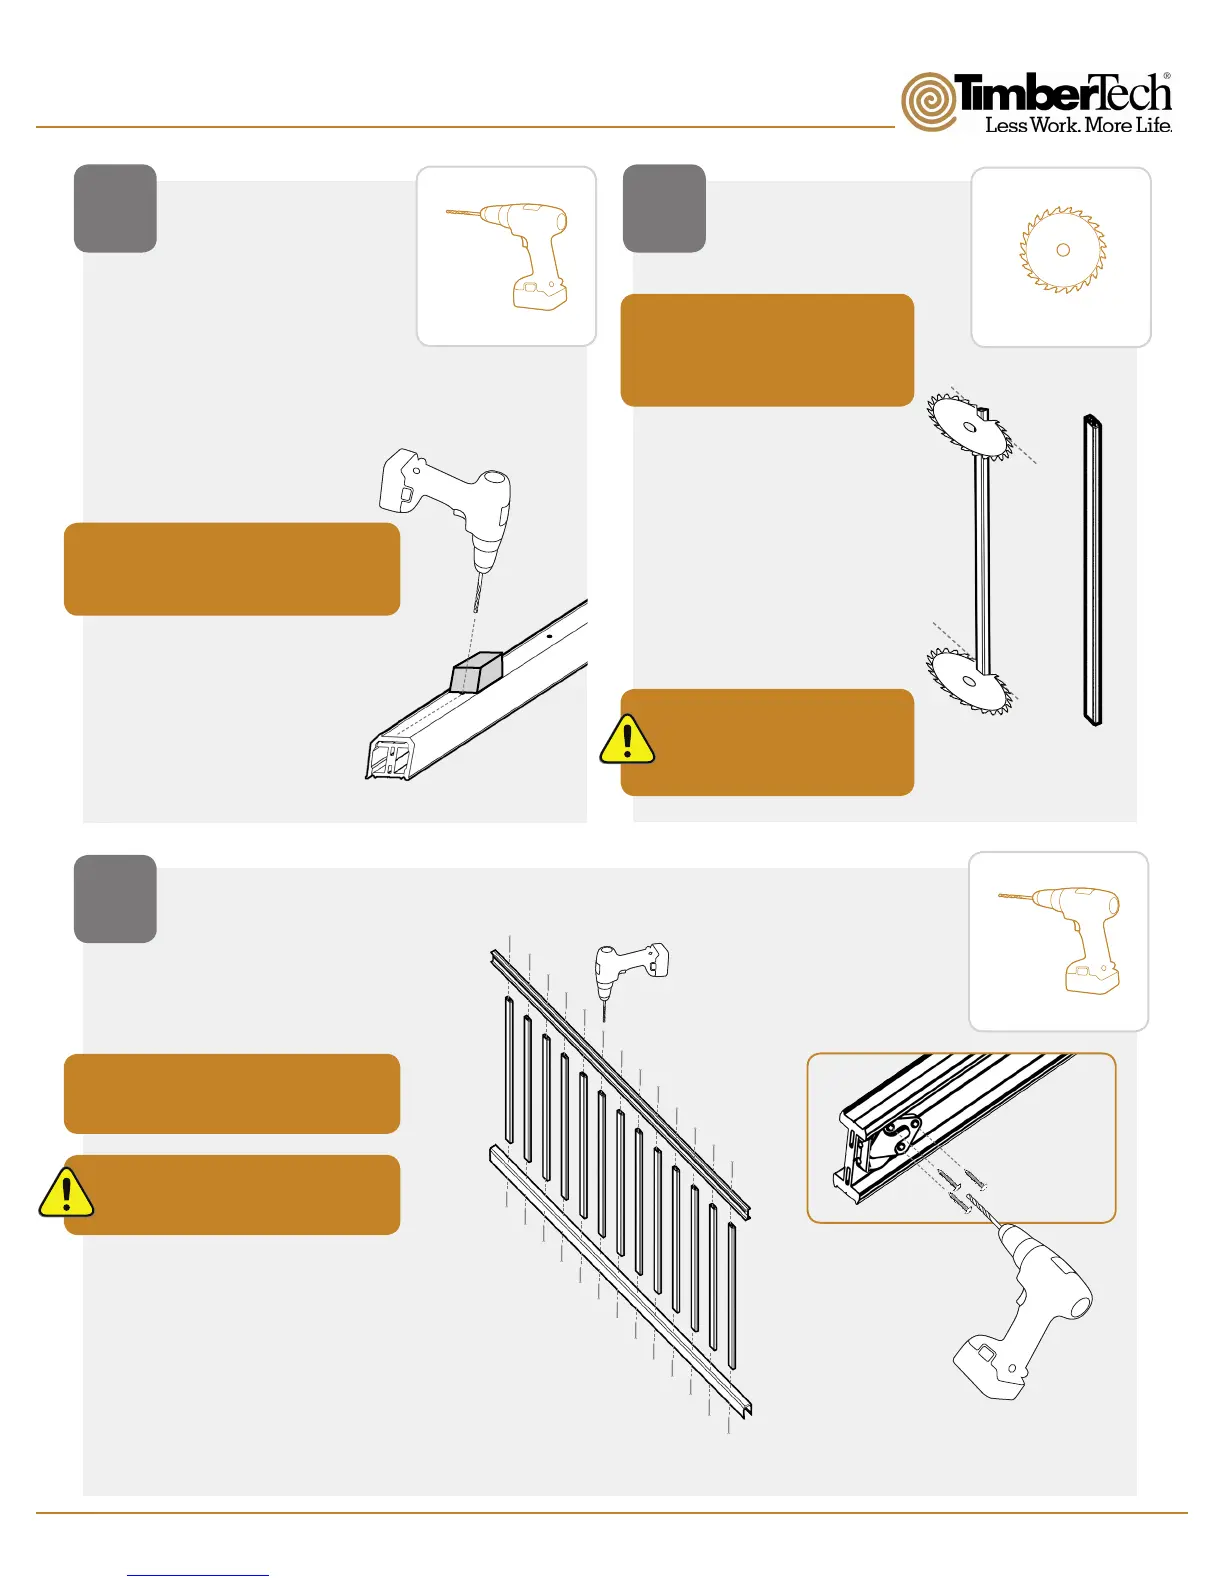
4 5
Drill Baluster
Holes
TRIM BALUSTERS
ASSEMBLE
BALUSTER
SECTION
6
• Place the Bottom Rail
and the Top Support Rail
together as shown to
keep the holes aligned.
• Separate the
two rails, once
all holes are
drilled.
Drill 3/16” hole through the top Support
Rail using the Bottom Rail holes for
alignment, drilling at the same angle
used to cut rail ends.
Bottom Rail
and Top
Support rail
Pre-Drill 3/16”
Important: Start cut at top edge to
maximize the length.
Trim Baluster ends to required angle
as shown.
Aluminum stair Balusters are pre-cut
to a stair angle and are not to be cut
on the job site.
Bottom Rail
Top Support
Rail
Lip
(facing out)
Tip for Bottom Rail: Partially drive
screws into all Balusters before driving
them in completely.
Brackets must be on the side of the rail
facing the stairs.
• Attach Brackets to Top
Support Rail.
Pre-Drill 7/64”
#8 x 3/4” Coated
Screws
Center screw
aligned with rail
centerline
Scrap Piece of
Wood Cut to
Stair Angle
#8 x 3” Coated Screws
#8 x 2” Coated Screws
 Loading...