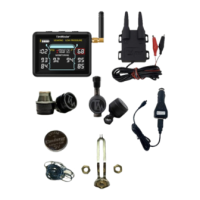
TireMinder i10 Service Installation Guide
Step 1: Install Transmitters into Rim – Must be
done prior to installing tire on rim:
1. Insert transmitter through rim hole. Rubber
Grommet should be on the inside of the
rim.
2. Screw Locking Nut onto Valve Stem until
hand tight.
3. Tighten the Locking Nut using a 12mm
wrench until tight (between 35 - 55 inch-
pounds of torque).
4. Screw on Valve Cap.
Step 2: Install the Signal Booster
1. Locate the best 12V or 24V power source near the front of the trailer or 5TH wheel.
a. The Signal Booster functions best when located on the frame or undercarriage of the
trailer.
2. Connect or splice the Signal Booster into a 12V or 24V power source.
3. Once connected, you should see a green LED. This notates that the Signal Booster is on.
4. Screw the Signal Booster onto the frame or undercarriage of the trailer. Alternatively, you may
use the included zip ties to secure the booster.
Step 2: Program Transmitters to Bluetooth Adapter
1. Turn on the Bluetooth® adapter. If adapter will not turn on, use the included USB charger to
charge the monitor for 30 minutes.
2. Download the TireMinder TPMS app by going to the Google Play or Apple App Store and
searching for “TireMinder TPMS”.
3. Once the adapter is on and the app is installed, open the app. Once opened, the app should
automatically connect to the adapter.