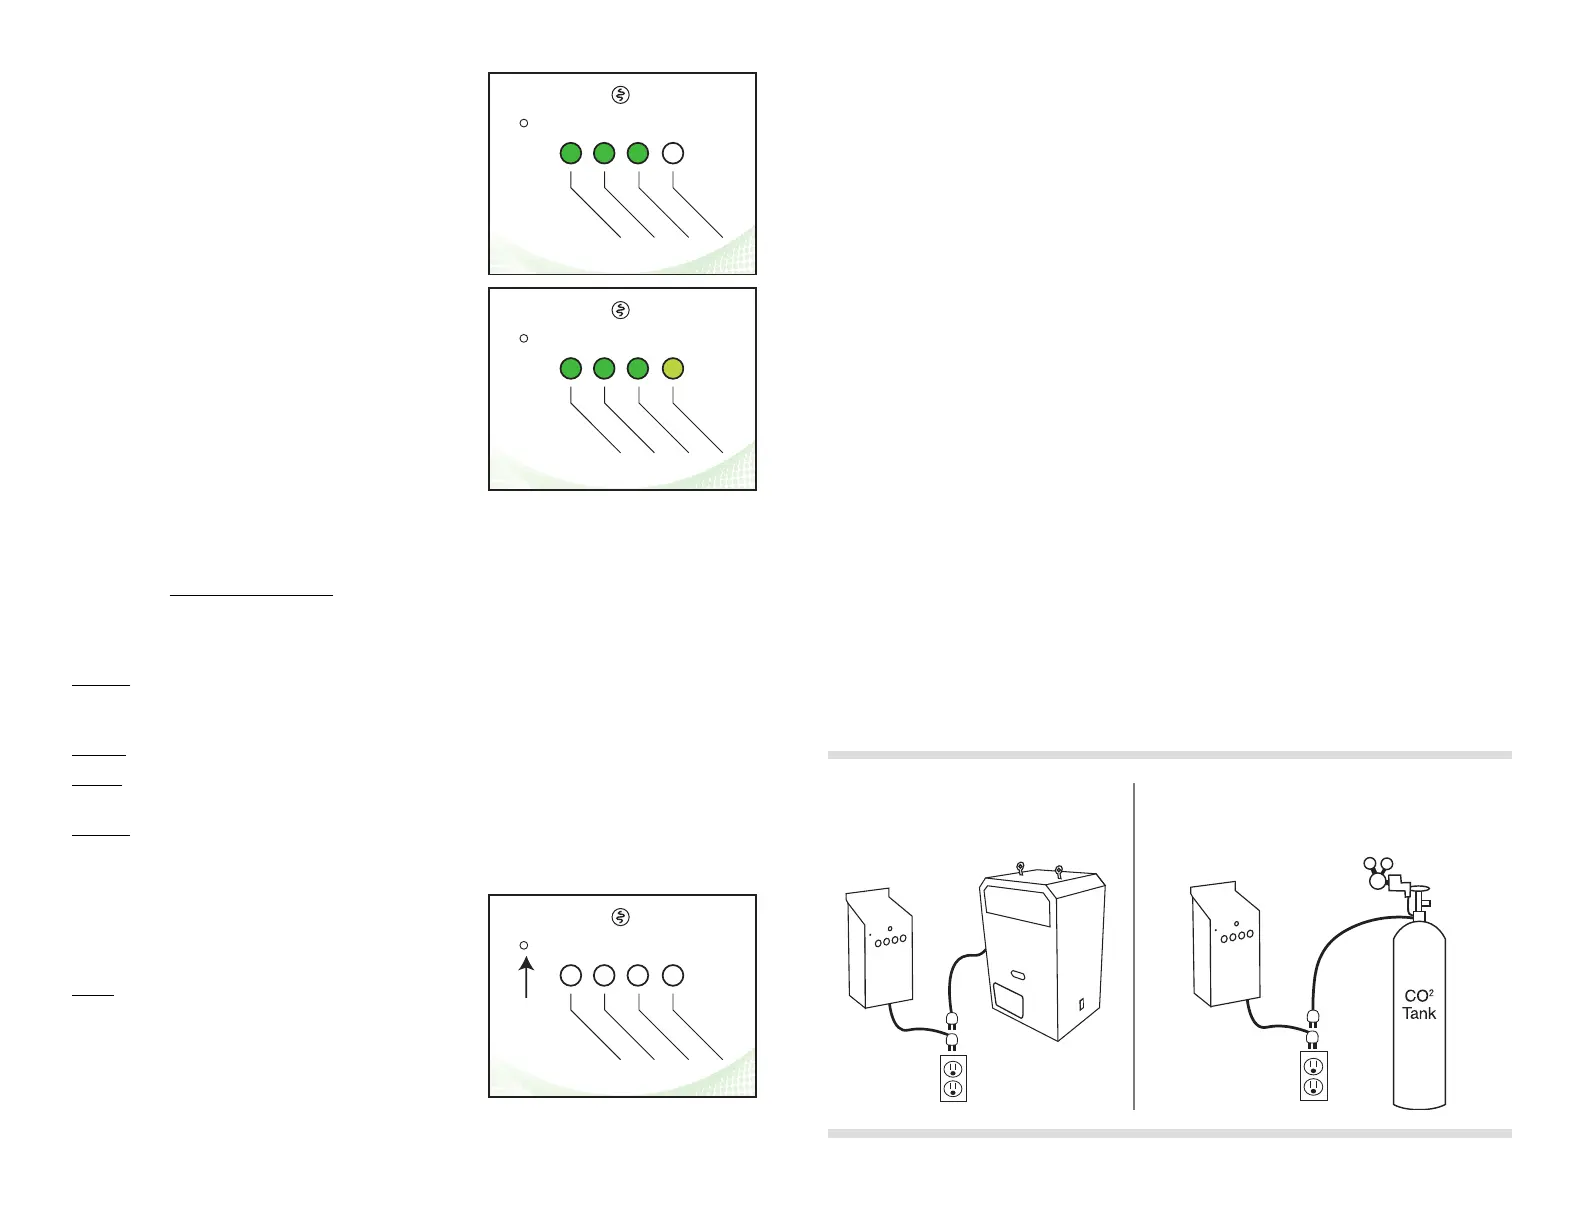
Display CO2 between 1500 PPM and 2499 PPM
Figure 4 shows how the CO2 will be displayed if the CO2 is
above 1500 PPM but below 2500 PPM. The LED’s will be
illuminated but will remain solid.
Display CO2 above 2500 PPM
Figure 5 shows how the CO2 will be displayed if the CO2
is above 2500 PPM. Note: the 2500 PPM LED is a different
shade of green to indicate a higher concentration of CO2
than normal. If this LED is illuminated, you may want to take
a break from working in your room and seek fresh air.
Calibration Mode:
The Atlas 2® is ‘FACTORY CALIBRATED’ and does not require calibration out of the box. Occasionally, it
needs periodic calibration due to ‘drift ‘ in the sensor. This should occur every three (3) years or so. The
Atlas 2® has a single button that is used to place the controller into calibration mode. It will automatically
calibrate itself to the outside air. To properly calibrate the Atlas 2®, follow these simple steps:
Step # 1: Take the Atlas 2® to an outside area where CO2 pollution is at a minimum (avoid areas where
animals, machinery, autos, etc. are located). Try not to breath directly on the Atlas 2®, it will confuse the
calibration process.
Step #2: Power up the Atlas 2®.
Step #3: Allow the Atlas 2® a minimum of ve (5) minutes to stabilize in the outside area. For best
accuracy, be sure to avoid breathing directly on the controller during this time and while it’s calibrating.
Step # 4: Press and hold the “CALIBRATION” button (Figure 6) for approximately three (3) seconds using a
toothpick or matchstick. (Use a non-metallic item to avoid potential shock.) Once the LED’s begin to cycle
back and forth, release the button and allow the unit to complete the calibration process. The calibration
process should take less than two (2) minutes.
After completion of the calibration process, the Atlas 2® will
return to normal operation and the LED’s will display the
current CO2 PPM concentration of the ambient air.
NOTE: Calibrating to outside air provides a good approximate
calibration. The accuracy of the CO2 calibration will be
dependent on the quality of the air that the Atlas 2® sensor
has been exposed to during the calibration process.
Error Mode:
The Atlas 2® will go into an ERROR MODE if the following conditions occur:
• The Atlas 2® is unable to get readings from the CO2 sensor module.
• The Atlas 2® is unable to complete the calibration process properly.
While in the ERROR MODE, the Atlas 2® will disable the ‘load’ output and ash LED’s on, then off, then on,
then off, etc.
To RESET your Atlas 2®, simply unplug from power source, count to 10 and then plug back into power
source. This normally corrects the problem.
Controller Specifications:
• Size = 8”H x 4.5”W x 2.5”D
• Weight = 1 lbs.
• Output Amperage = 15 Amps Resistive
• Voltage Input = 120 VAC
• Voltage Output = 120 VAC
• Hertz = 60Hz
• Electrical Relay Operations = 10,000 Cycles
• RoHS compliant = Yes
• Storage Temperature = 32°F (0°C) to 135°F (57°C)
• Operating Temperature = 40°F (5°C) to 125°F (52°C)
Installation Examples:
Controlling a CO
2
Generator Controlling a CO
2
Tank with Generator
Atlas 2
CO
2
Generator
Atlas 2
PHOTOCELL
10
0
0
P
P
M
1250 PPM
1500 PPM
2
500
P
P
M
CALIBRATION
FIGURE 4
PHOTOCELL
10
0
0
P
P
M
1250 PPM
1500 PPM
2
500
P
P
M
CALIBRATION
FIGURE 5
PHOTOCELL
10
0
0
P
P
M
1250 PPM
1500 PPM
2
500
P
P
M
CALIBRATION
FIGURE 6
 Loading...