Page 7;&(%$*4.8"4,7%<'*#$"&8#=%/7*,#*%4,77%>?@@@?@AA?BCDC1Item 58059
EF;6GHIJ6KFGLIMNFLMG6MFMO6 EJ6OL;LOFGLIME
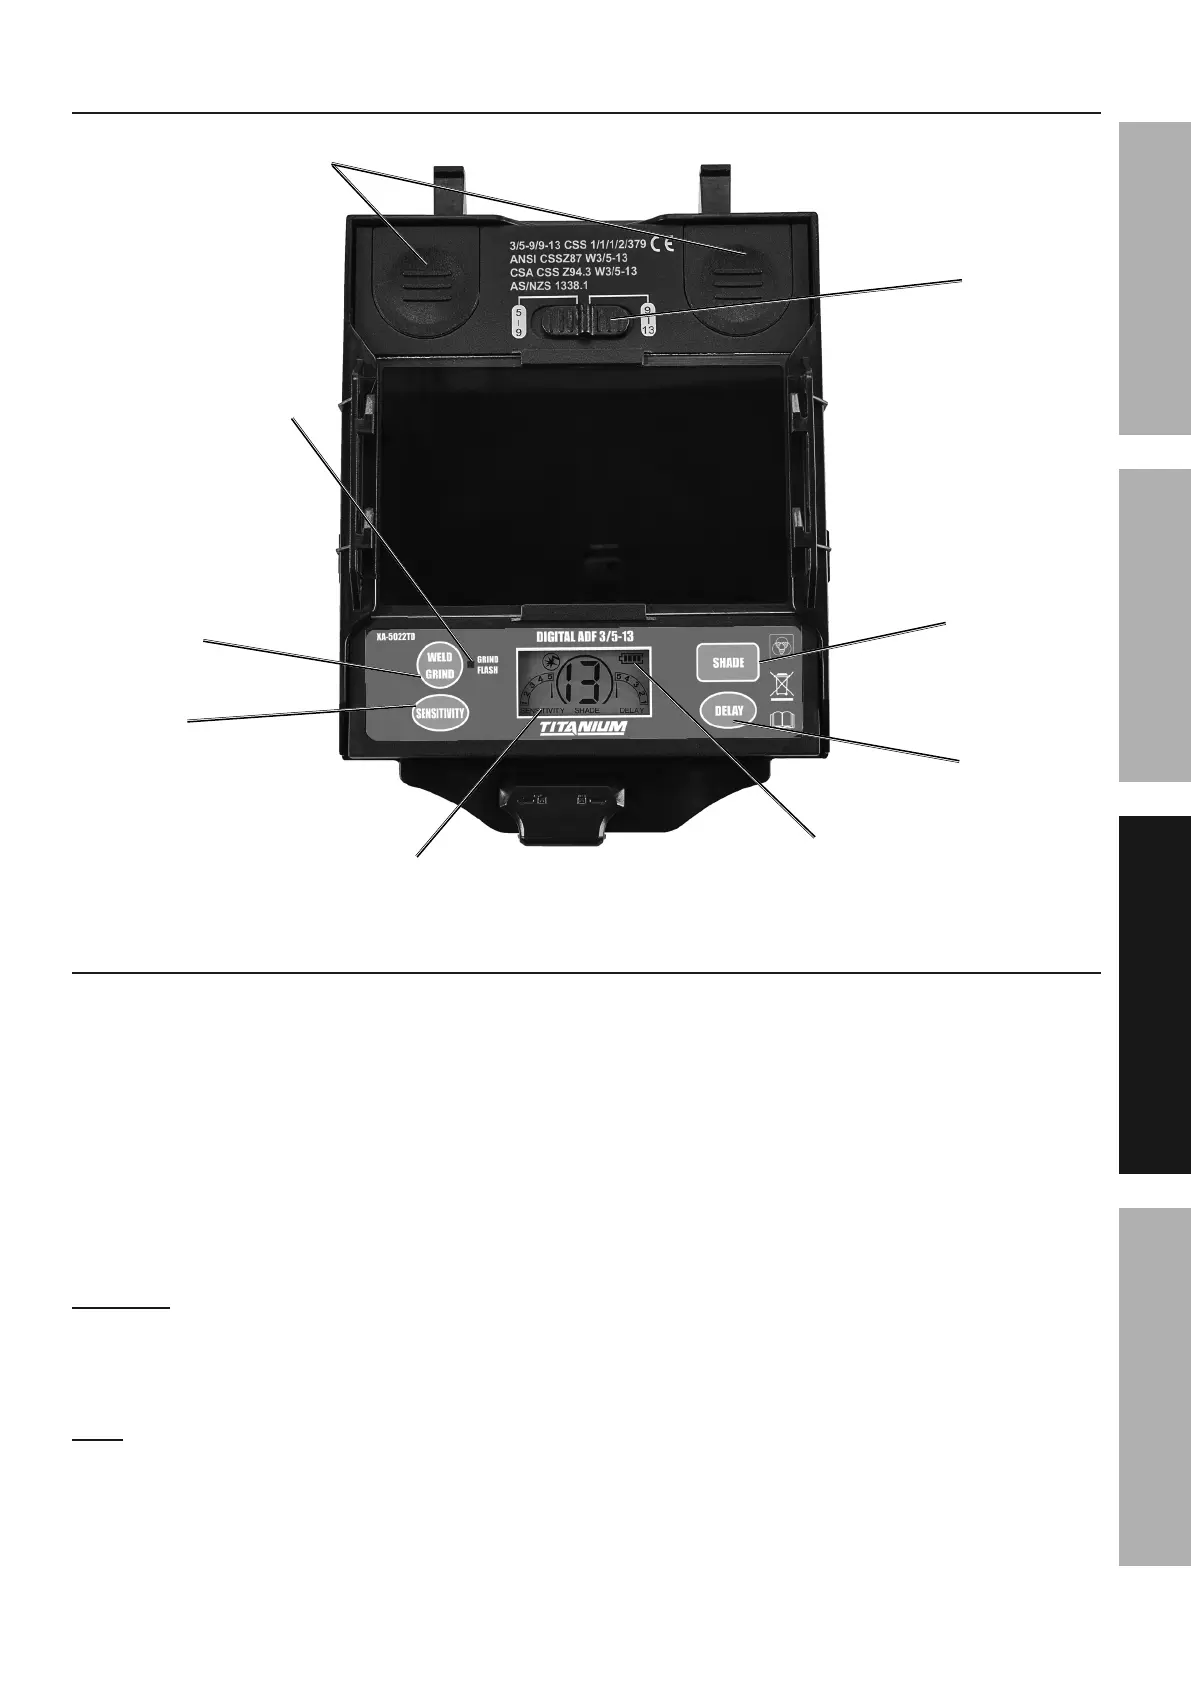
O&8$(&7#
;"3'(*%R-%%%O&8$(&7%S,U&'$
N&9*%E*7*4$"&8%,89%E.,9*%M'5+*(
1. Use the Weld/Grind Button to select the
appropriate mode of operation.
• In Weld Mode, the Auto-Darkening Filter
automatically changes from a clear state to a
dark state when an arc is struck. Select shade
level, time delay and sensitivity as required.
• In Grind Mode, the Shade function is turned off
the shade function so the helmet lens stays clear.
Grind Indicator Light will flash and Grind Mode
Icon will also appear on the display screen. Use
this function to provide protection while grinding.
OF\GLIMY F2$*(%'#"83%$.*%Q("89%N&9*%#*$%$.*%Z*75*$%
$&%$.*%/(&/*(%#.,9*%#*$$"83%+*2&(*%)*79"83%,3,"81%
2. U s i n g t h e S h a d e G u i d e C h a r t o n p a g e 5 , s e l e c t t h e
shade range required using the Shade Range Switch.
M&$*- If a selection of shades are recommended
for your application, try the darkest setting first.
3. The shade number can be set from 5 to 9 or
from 9 to 13 depending on the shade range
selected. Use the Shade Button to select
the shade number required. Your selection
will be shown on the Display Screen.
4. Remember to check with the Shade Guide
Chart on page 5 to determine the proper
shade number for your application.
Battery Cover Plate
Shade
Range
Switch
Weld/Grind
Switch Button
Sensitivity
Button
Shade
Button
Delay
Button
Grind Indicator Light
Battery
Indicator
Display
Screen

 Loading...