4. INSTALLATION AND CONNECTION
Note
Localcodesmayrequireotherinstallationmethods.Checkwith
authority having jurisdiction to determine acceptability of the
mountingmethodsshownhere.
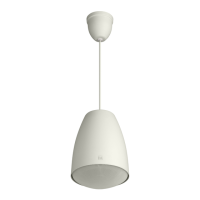
Step 1. ConrmthatGRIPPLE
®
No.1(smallone)isinstalledon
asafetywire(thinone)andGRIPLLE
®
No.2(bigone)on
ahangingwire(thickone).
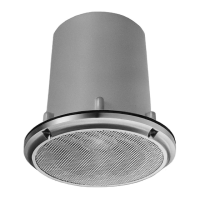
Step 2. Passthehangingwireovertheceilinganchorpointsuch
asbeamorpurlin,thenpassitthroughtheotherholein
theGRIPPLE
®
No.2.
Step 3. Adjust the length of the hanging wire for the optimum
speakermountingheight.
Step 4. Installthesafetywirefollowingthesameprocedureas
inSteps2and3.Besuretopassthesafetywireovera
differentceilinganchorpointfromtheonethehanging
wirewaspassedoverinStep2.
GRIPPLE
®
No. 1 or No. 2
(accessory, preinstalled)
Safety wire or hanging wire
(accessory, preinstalled)
GRIPPLE
®
No. 2
Followtheinstructionsbelow.
Doing otherwise may cause the speaker fall, resulting in
personalinjury.
• Neverhangthespeakerwiththesafetywire.
• The surplus length of the safety wire must be within
30 cm (11.81") from the state that the safety wire is
tight.
• Install the hanging wire rst, then the safety wire.
(Neverreversethisorder.)
CAUTION
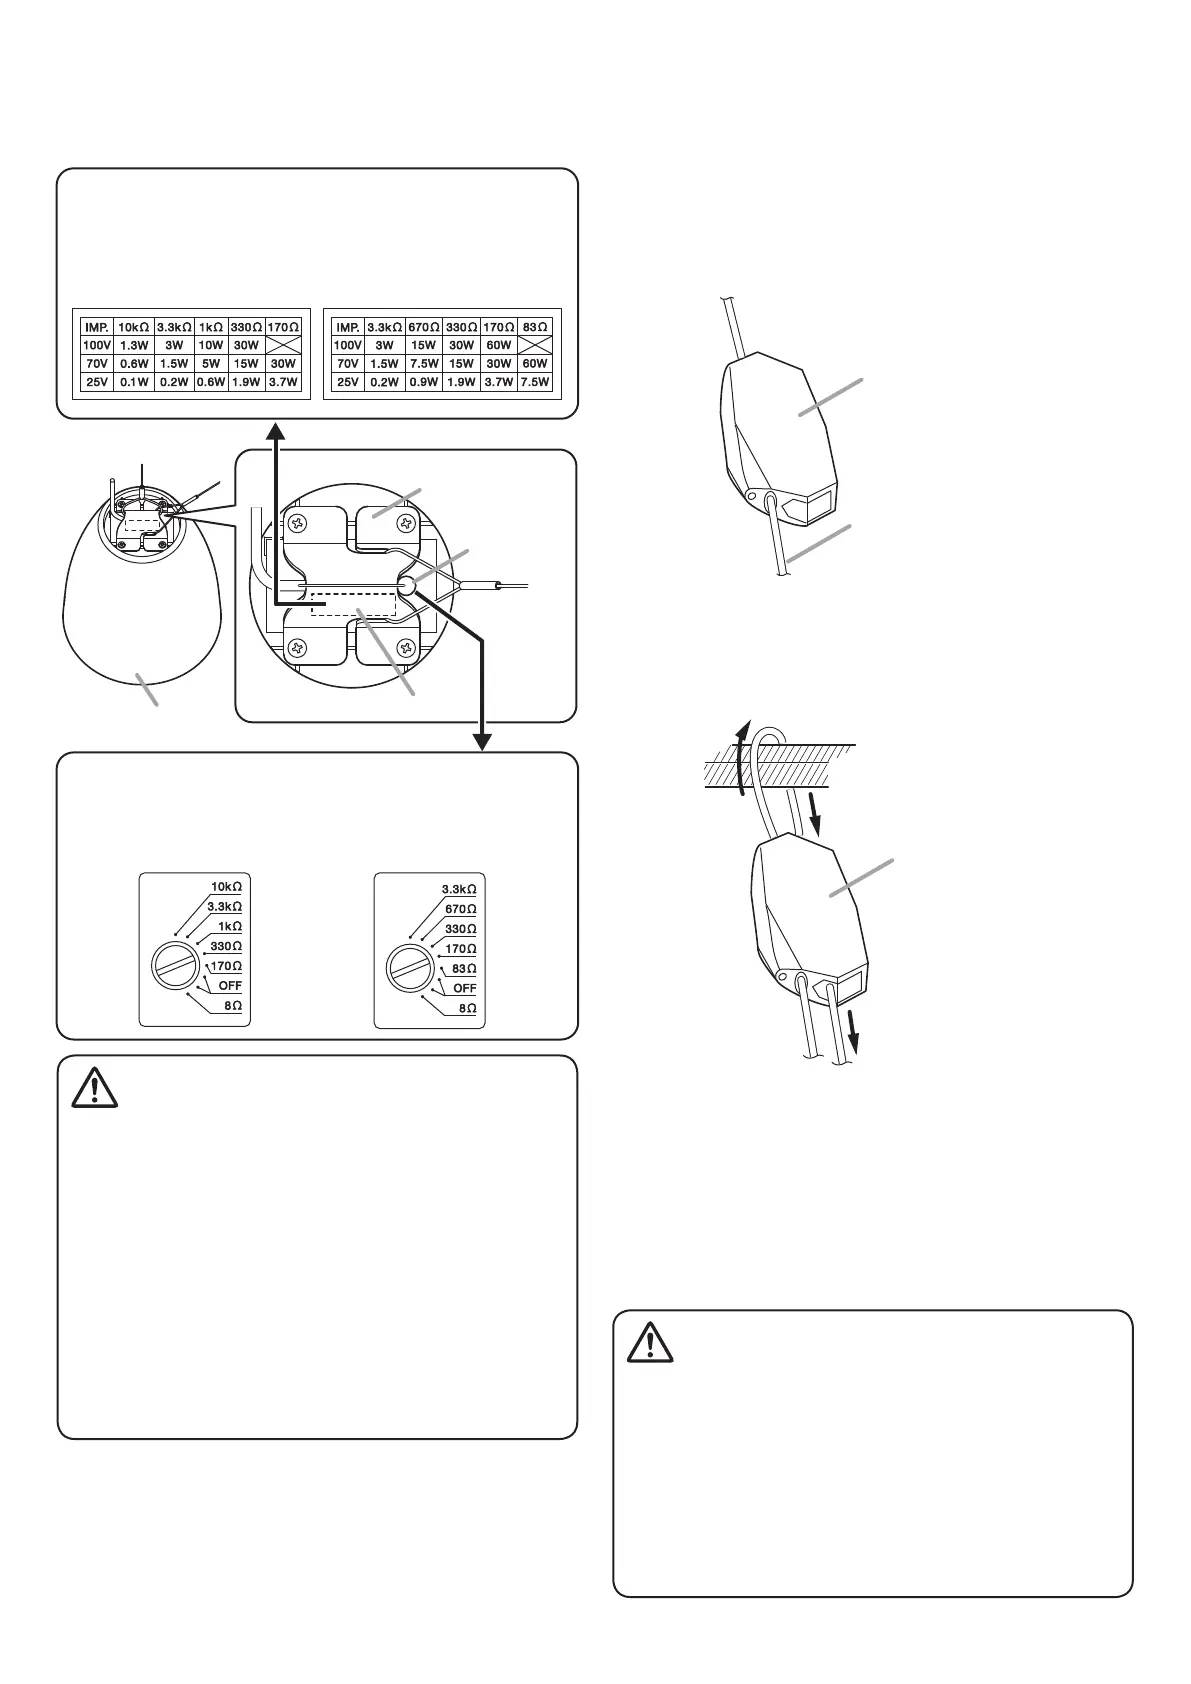
3. INPUT POWER (IMPEDANCE) CHANGE
Turntherotaryswitch(ontherearsideofthespeaker)tosetitto
thedesiredinputimpedanceusingaslottedscrewdriver.
Note: Settherotaryswitchwithoutremovingthehangingbracket.
• Switch off the amplier’s power when changing the
inputpower.
• Neversettherotaryswitchtothe"170Ω"(PE-304BU,
PE-304WU)or"83Ω"(PE-604BU,PE-604WU)position
whenoperatingthespeakeron100Vline.
Failuretofollowthisinstructioncouldresultindamage
tothespeakeroramplier.
• Never set this switch to the "8 Ω" position when
connectingtotheamplier’shigh-impedancespeaker
line(25V,70Vor100V),asdoingsomaydamagethe
speakeroramplier.
Besuretosetthisswitchtothe“8Ω”positionwhen
connectingtotheamplier’slow-impedanceline.
CAUTION
Speaker
The label showing Impedance vs. Input power table is affixed
to the hanging bracket.
"100 V," "70 V," and "25 V" indications in the leftmost column
are "100 V line," "70 V line," "25 V line," respectively.
[PE-604BU, PE-604WU]
[PE-304BU, PE-304WU]
[PE-304BU, PE-304WU]
• Rotary switch
[PE-604BU, PE-604WU]
The switch is factory-preset
to 330 Ω.
The switch is factory-preset
to 170 Ω.
[Rear view]
Hanging bracket
Label
Rotary switch