2
Assembling the shas
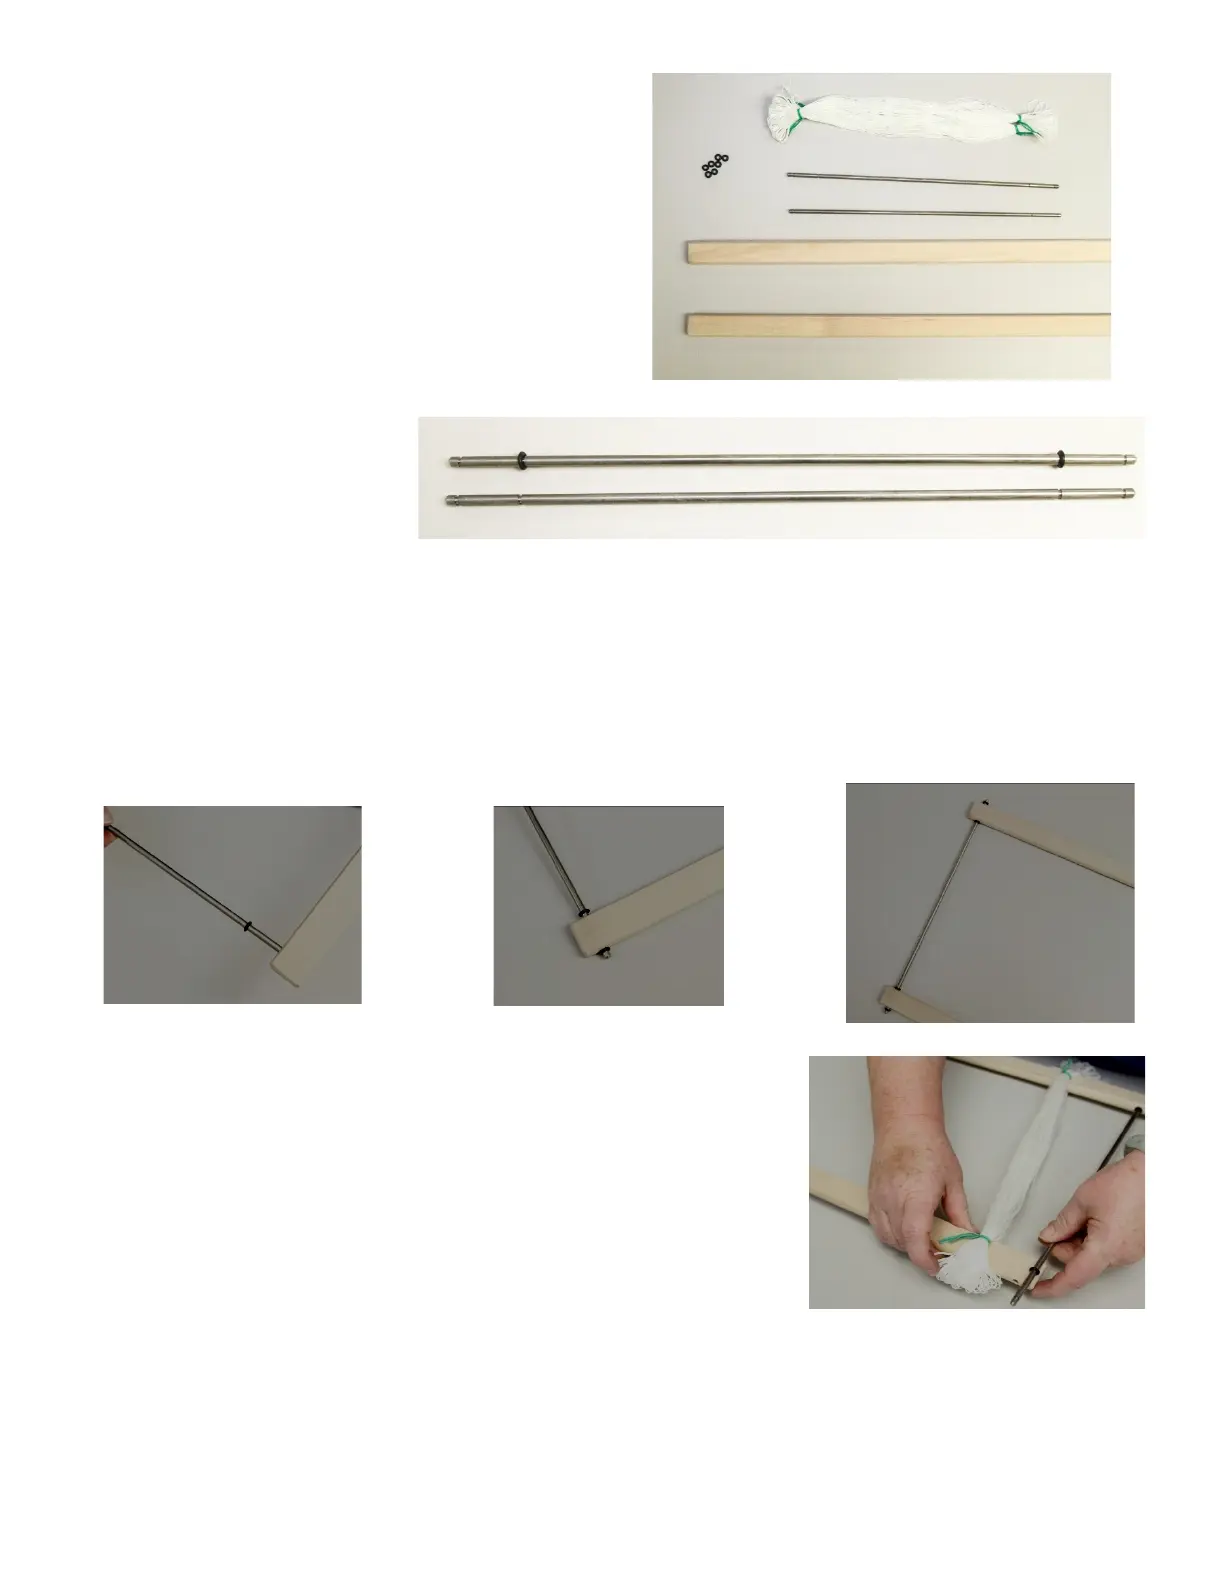
The parts you'll need are the sha bars, the
small metal rods, texsolv heddles, and the bag of
lile “O” rings.
Even though the sha bars are smooth sanded
at the factory, many weavers prefer to do a lile
extra sanding to help the heddles slide more
smoothly. If you are so inclined, lightly sand the
sha bars with some very ne sand paper.
Look at the metal rods and you
will note that each rod has two
indentaons on each end. Take an
O-ring, slide it on the end of the
rod and roll it down to the inner
indentaon. Turn the rod over and do the same for the other side – slide an O ring down to the inner inden-
taon.
Do this for each of the metal rods.
Now take a sha bar and insert the end of the rod into the hole at the end of the bar. Slide another O-ring
into the sha bar, leng it sit in the second indentaon. This secures the rod onto the sha bar. Now take
another sha bar and slide it onto the other end of the metal rod and secure that with an O-ring. At this point
the sha will sll be open at one end.
The next step is to take a bundle of Texsolv heddles and slide the heddle
openings onto the open ends of the two parallel sha bars. Slide them all
the way over to where the metal rod connects the two bars.
Take another metal rod and push the ends through the heddle bar holes
from the inside at the open end of the sha. Now secure the metal bar
against the heddle bar with an O-ring in the outer indentaon on top and
boom of the rod. You now have a complete sha.
Build the rest of the shas for your unit by repeang the above steps.
The loops that connect each of the heddles should be cut apart to allow the
heddles to move independently of each other. This is easiest to do at this stage
before the shas are hung.
 Loading...