If your knees touch the handlebars or if you experience back discomfort while pedalling
for extended periods of time, the height of the handlebars can be adjusted. Turn the front
adjustment knob counter clockwise, slide the handle-bar post up or down, and then retighten
the adjustment knob.
Changing your hand position can change the angle of your back, neck, and arms. To minimize
the stress on your muscles during your workouts, change your hand position frequently.
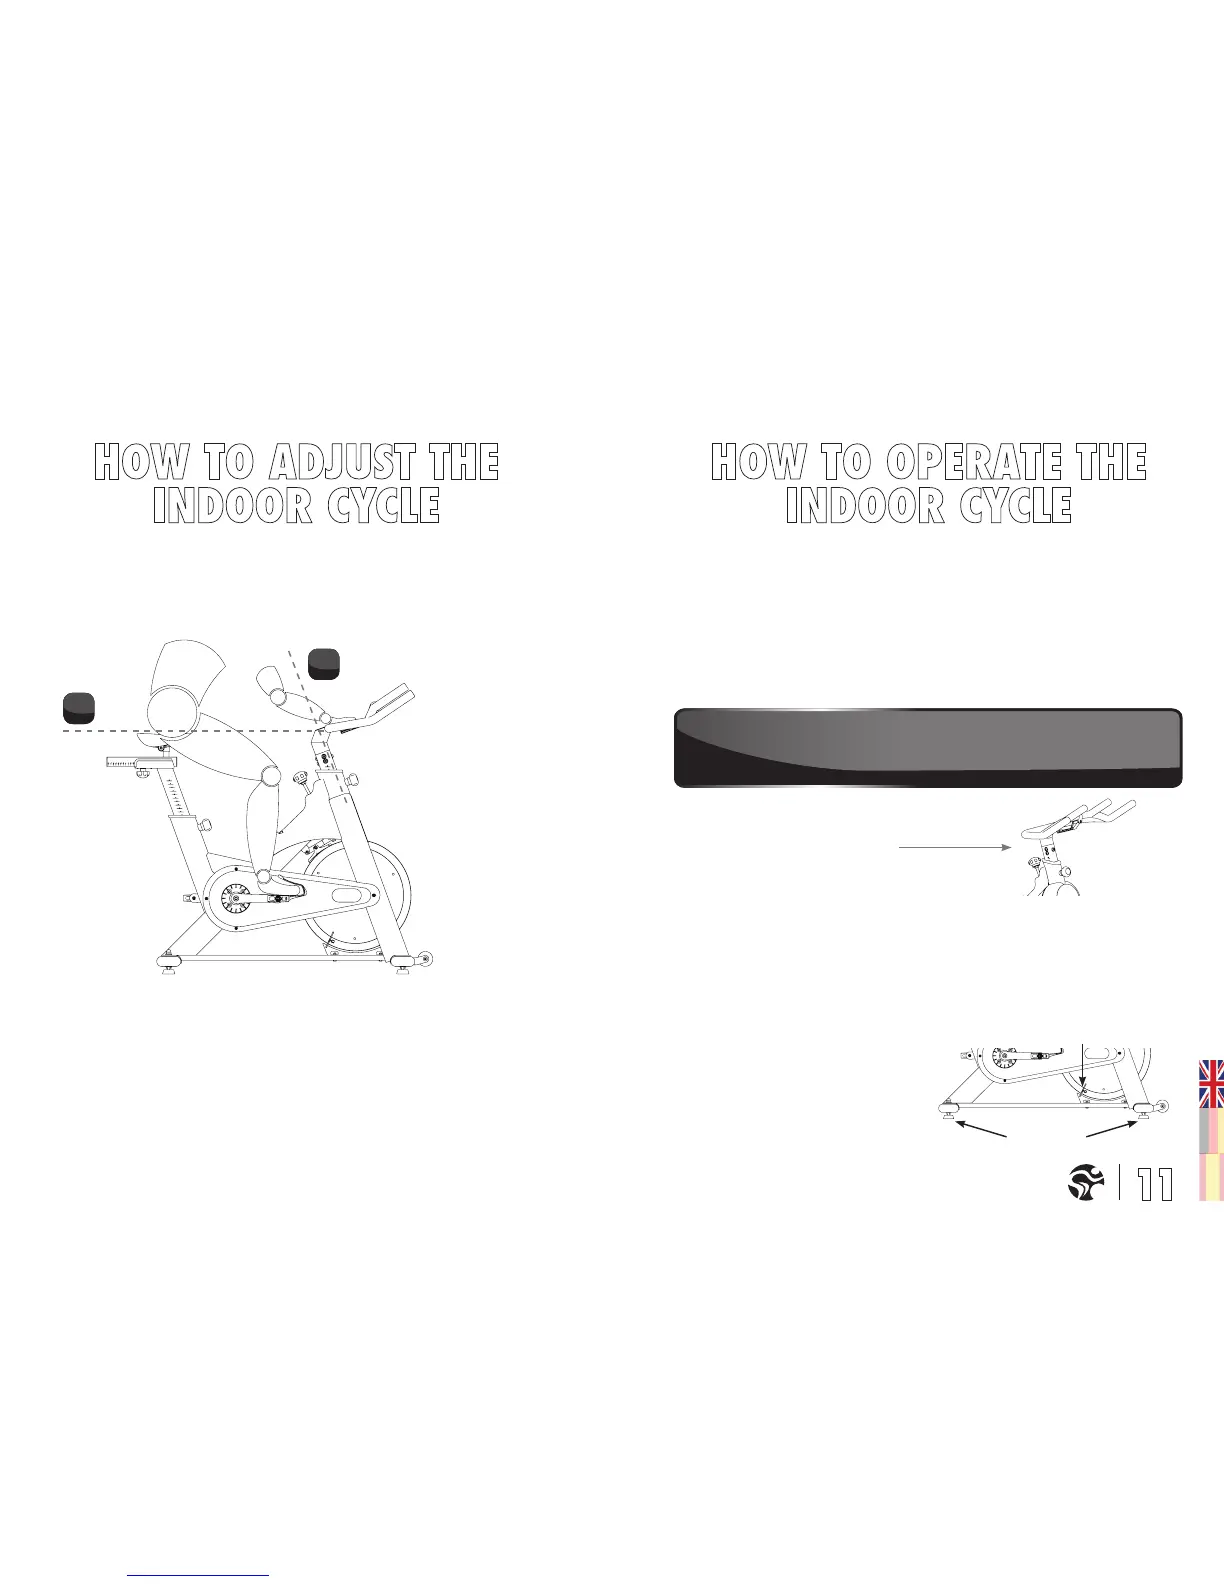
HANDLEBAR ADJUSTMENT:
Begin with the top of the handlebar at relatively the same height or just slightly higher than
the top of the saddle (dotted horizontal line A in the drawing below) and at a neutral fore/aft
position (see dotted vertical line B in drawing below).
RESISTANCE ADJUSTMENT
The preferred level of diculty in pedalling (resistance) can be regulated in ne increments
by use of the resistance knob. To increase the resistance, turn the resistance knob
clockwise. To decrease the resistance, turn the knob counter clockwise.
IMPORTANT: To stop the ywheel (wheel) while pedalling, push down on the red brake
knob. The ywheel should quickly come to a complete stop. Please make sure your shoes
are xed into the toe clip or in case cycling shoes are used your shoe cleat is connected
to the pedal binding while riding. Please apply full resistance load when bike is not in
use to prevent from injuries due to moving drive gear components.
HOW TO MOVE THE INDOOR CYCLE:
Due to the weight of the TOMAHAWK Home Series Indoor Cycle, it is recommended that two
persons move it. While one person lifts the back of the indoor cycle, the second person rmly
holds the handlebar and tips the indoor cycle forward until it rolls on the wheels. Carefullymo-
ve the Indoor Cycle to the desired location and then lower it. CAUTION: To reduce the risk of
injury, use extreme caution while moving the TOMAHAWK Home Series Indoor Cycle. Do not
attempt to move it over uneven surfaces and make sure there’s a safety space of 20 inch (mini-
mum) to the nearest equipment is (recommended).
If the indoor cycle rocks on the oor after
being set down, turn the leveling feet
underneath the front or rear stabilizer until
the rocking motion is eliminated. Important:
Please do not unscrew the leveling feet more
then 1⁄2 inch.
RED RESISTANCE KNOB
EMERGENCY BRAKE
LEVELING FEET
FLYWHEEL LOCK
WARNING! The TOMAHAWK Home Series Indoor Cycle does not have a dirct driven ywheel (wheel); the pedals
will continue to move together with the ywheel until the ywheel stops. Reducing speed in a controlled manner is
required. To stop the ywheel immediately, push down the red emergency break knob. Always pedal in a controlled
manner and adjust your desired cadence according to your own abilities.
PUSH THE RED KNOB DOWN = EMERGENCY STOP
A.
B.
 Loading...