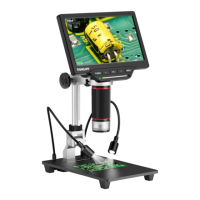
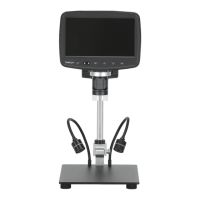
The Tomlov DM201 SE is an LCD Digital Microscope designed for detailed observation and recording of magnified images and videos. It offers a range of features for both standalone use and connectivity with computers.
Function Description
The primary function of the Tomlov DM201 SE is to provide magnified views of objects, capture still images, and record videos. It features a built-in LCD monitor for direct viewing and can also connect to a PC or Mac for larger display and further analysis. The microscope is equipped with multiple LED light sources to ensure proper illumination of specimens, including main LED lights around the camera lens and two adjustable side LED lights on the base. It supports storage of captured media on a Micro SD card and offers various settings for image and video quality, color, and exposure.
Important Technical Specifications
- Screen Size: 7 Inches
- Screen Resolution: 1024x600
- Photo Resolution:
- 12MP (4032x3024)
- 10MP (3648x2736)
- 8MP (3264x2448)
- 5MP (2592x1944)
- 3MP (2048x1536)
- 2MP (1920x1080)
- 1.3MP (1280x960)
- Video Resolution: 1080FHD, 720P, VGA (AVI format)
- Battery: Rechargeable 2000mAh Battery (built into the monitor)
- Focus Range: 1cm-21cm
- Storage: Micro-SD card, 32GB (recommended) or 64GB supported
- PC View: Supported
- IR Remote: Max 5 meters range
- Light Source: 6 white-light LEDs integrated in the lens, and 2 Side LEDs
- Warranty: 1 Year Warranty
- System Language Options: Chinese, Japanese, English, Korean, French, German, Italian, Dutch, Portuguese, Spanish, Czech, Polish, Russian, Turkish, Hebrew, Thai
Usage Features
The microscope is designed for ease of use with several operational modes and settings.
Installation and Setup:
- The device requires careful assembly of the bracket, base plate, and microscope unit. Specific attention should be paid to tightening screws at positions A, B, C, and D to ensure stability.
- An anti-reflective hood can be screwed onto the lens to reduce light reflection, improving image quality.
Power and Charging:
- The monitor contains a rechargeable 2000mAh battery, taking 2-3 hours for a full charge. A red power indicator light signifies charging, turning off when complete.
- The microscope can be powered by connecting the USB-C slot on the monitor to an AC charger.
- The side LED lights can be powered either directly from a wall charger or from the monitor's built-in battery via a USB cable.
Lighting Control:
- The main LED lights' brightness can be adjusted using the Left/Right buttons on the monitor or remote control during Photo/Video mode.
- The two side LED lights on the base are controlled separately by a scroll wheel on the base.
Magnification and Focus:
- Digital magnification from 1x to 4x is available by holding the Left/Right button for 2 seconds.
- Focus is adjusted using the Lens Focusing Knob, and the height of the microscope can be changed with the Height Adjusting Screw to achieve a clear image.
Modes of Operation:
- The microscope has three main modes: Photo, Video, and Playback. Users can switch between these modes by holding the MENU button for 3 seconds.
- Photo Mode: Allows capturing still images. Pressing the OK button saves a picture, indicated by the photo icon turning yellow.
- Video Mode: Enables video recording. Pressing the OK button starts recording, and pressing it again stops. The recording duration is displayed on the top right corner.
- Playback Mode: For reviewing captured photos and videos. Users can navigate through media using the Left and Right buttons and play videos by pressing the OK button.
Menu Settings:
- Photo Settings: Includes options for Capture Mode (single shot, 2s/5s/10s delay), Resolution, Continuous Shooting (on/off, takes 3 photos), Quality (Fine/Normal/Economy), Sharpness (Strong/Normal/Soft), Color (Normal/Black and white/Sepia), ISO (Auto/100/200/400), Exposure (+3 to -3), Anti-shaking (on/off), and Date Stamp (on/off).
- Video Settings: Offers Resolution (1080FHD/720P/VGA), Cyclic Record (off/3/5/10 minutes), High Dynamic Range (on/off), Exposure (+3 to -3), and Date Stamp (on/off).
- System Settings: Provides Auxiliary Line (off/center/cross), Fill Light brightness (off/1/2/3/4/5), Screen Light Off (off/30s/1min/2min), Auto Power Off (off/3min/10min), Frequency (50HZ/60HZ), Language selection, Date/Time setting, Format memory card, Default Setting (restore factory settings), and Version display.
Connectivity with Computers:
- The microscope can be connected to a PC or Mac via a USB-C cable.
- When connected, the screen offers "Mass Storage," "PC Camera," and "REC_mode" options. Selecting "PC Camera" enables PC mode.
- Windows: Requires "Windows Camera" software (available from Windows/Microsoft Store or Google). Once connected and in UVC mode (by pressing OK button), the software displays the live image, allowing for video recording, photo capture, and playback directly on the computer.
- Mac/iMac: Requires "Photo Booth" software (available from APP store). After connecting, select "USB PHY 2.0 (default)" in Photo Booth's menu bar to view the microscope's feed.
- Note: When connected to a computer, the monitor's Left/Right/Menu buttons and remote control do not function. Photos and videos are saved directly to the computer, not the microscope's Micro SD card.
Maintenance Features
- Cleaning: The protective UV filter under the lens should be cleaned with a soft, clean cotton cloth (like an eyeglass cloth) moistened with alcohol if image quality deteriorates. The monitor should be cleaned with a dry and soft cloth as it is not waterproof.
- Troubleshooting:
- If the microscope doesn't turn on, check cable connections, power supply, and try resetting the device by pressing the reset hole with a ballpoint pen for 1-2 seconds.
- If pictures cannot be taken, ensure the device is in Photo mode (hold OK button for 3 seconds to switch).
- For unclear pictures, verify LED lights are working, adjust light, object distance, and focus. Clean the lens if necessary.
- Repeated restarts may indicate an issue with the power adapter; use a high-quality 5V 2A adapter.
- "Card error" or "full memory card" messages require formatting the Micro SD card via the microscope's menu (SETTING > FORMAT) or by connecting to a computer and formatting it there.
- To reduce image reflection, try dimming/turning off white LEDs, installing the anti-reflective hood, or adjusting the angle between the object and lens.
- If side lights are not working, ensure they are powered correctly (refer to page 11 of the manual) and the battery is fully charged.
Customer Support: Tomlov offers a one-year manufacturing warranty and life-long technical support. Users can contact support via email (support@tomlov.com), Facebook (@Tomlov), WhatsApp (+8618123716479), or their website (www.tomlov.com). It is recommended to include photos or videos of issues for quicker resolution. Support typically responds within 12 business hours.