E
K
F
Before using your steriliser, please ensure that you read these instructions thoroughly.
Please read and retain this important information for future reference.
IMPORTANT INSTRUCTIONS FOR SETTING UP YOUR STERILISER BEFORE USE:
TO CLEAN YOUR STERILISER BEFORE FIRST USE REFER TO PARTS GUIDE AND DIAGRAM
Do not connect to power at this stage.
Remove all items from inside the steriliser base.
Pour exactly 80ml of water into the steriliser base.
Assemble the white lower tray (A), central stem (C) and upper tray (B) and place in the steriliser base.
Add the lid.
Connect the lead and plug into the mains supply. The start switch and sterilising light should come on automatically. If it does not then press
the switch and it will light up amber to show that sterilising has begun.
The light will switch off when sterilising has finished.
Allow to cool for 3 minutes before turning off at the mains, removing the plug and disconnecting the lead from the steriliser.
Remove lower tray, central stem and upper tray, pour away any remaining water and wipe dry – Your steriliser is now ready for use.
This steriliser is designed for use with closer to nature® bottles and feeding accessories (except bottle brush). The steriliser will hold up to 6 closer
to nature® bottles, plus accessories.
1
2
3
4
5
6
7
8
9
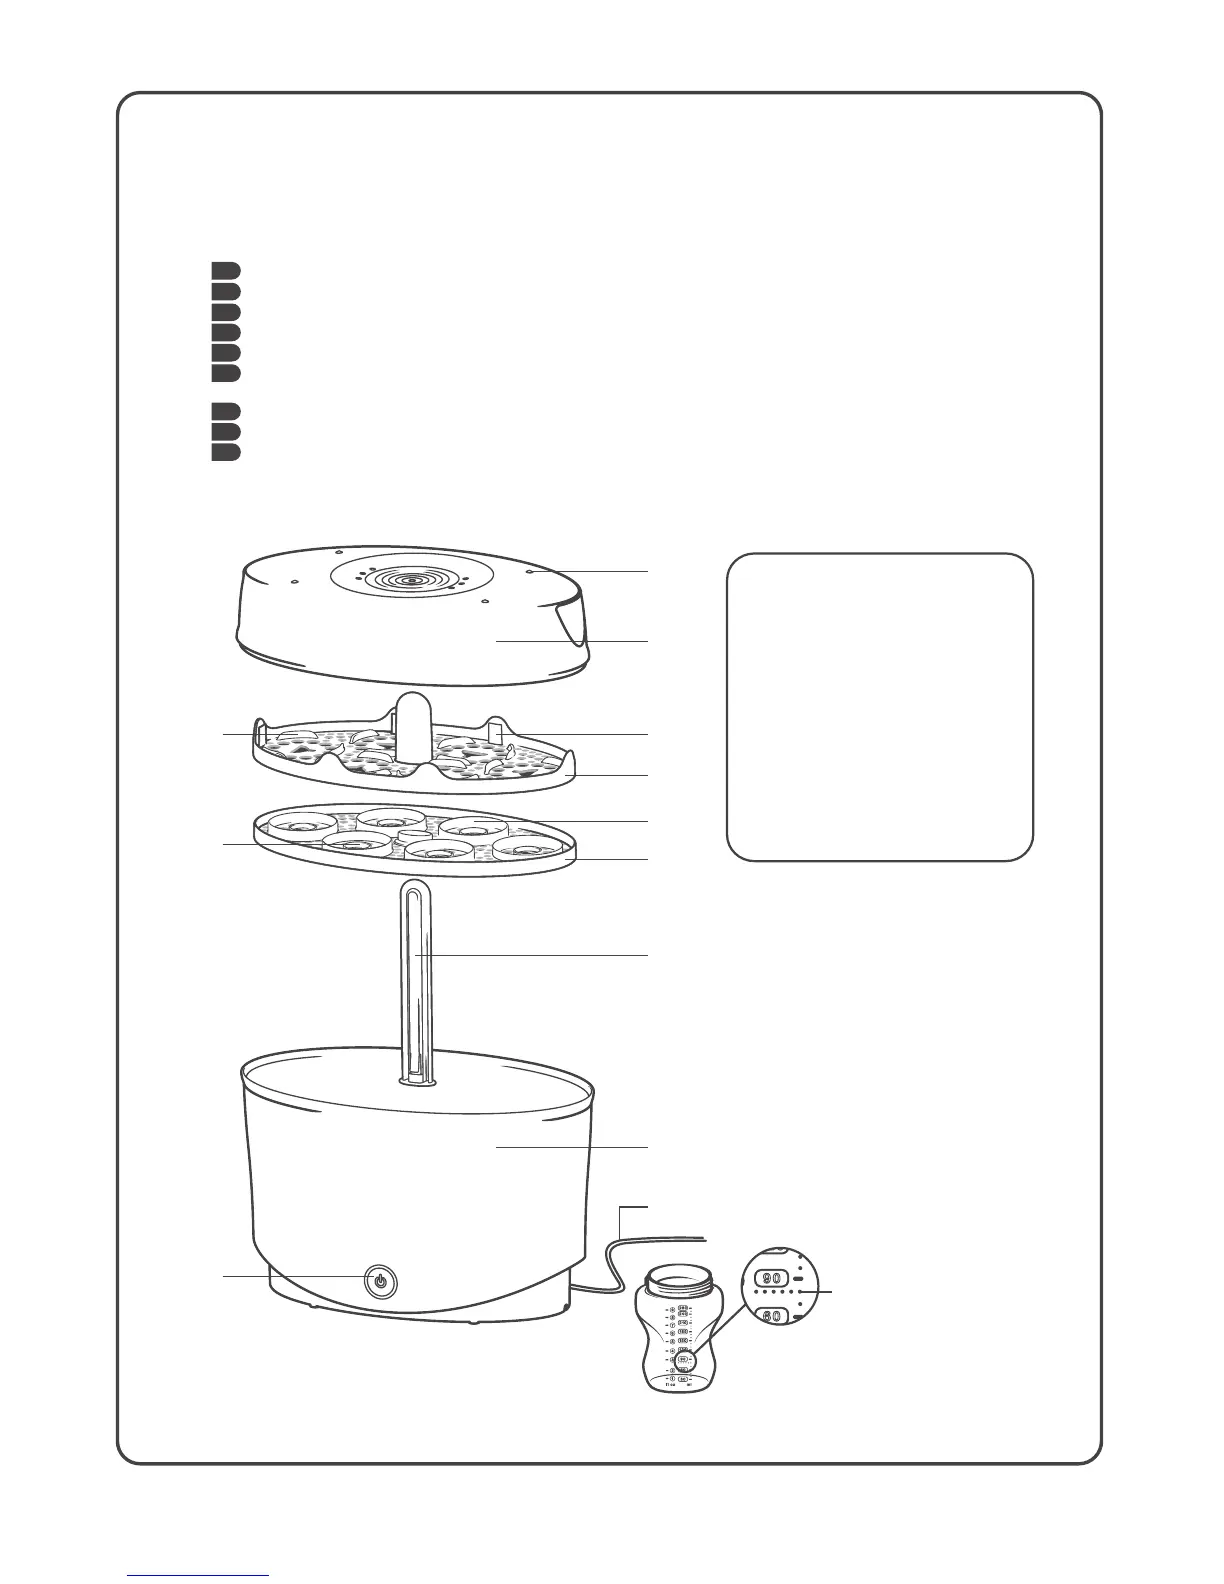
PARTS GUIDE (see diagram)
A
Removable lower tray
B
Removable upper tray
C
Central Stem
D
Locator for closer to nature® bottle neck
E
Locator for closer to nature® anti-colic plus valve
(if sterilising closer to nature® anti-colic plus bottles)
F
Locator for closer to nature® screw ring and teat
G
Locator for bottle hood
H
Lid
I
Sterliser base
J
Lead with plug
K
Start switch and sterilising light.
L
Steam vents
M
80ml measurement on closer to nature® bottle