OPERATING THE DIMMER
• To turn on the lights ON to the last used brightness level,
press and release the top Dimmer Paddle
• To brighten the lights, press and hold the top Dimmer
Paddle and release when the desired level is reached
• To dim the lights, press and hold the bottom Dimmer
Paddle and release when the desired level is reached
• To save the brightness level and turn off the lights, press
and release the bottom Dimmer Paddle
Air Gap Switch on the
TGWF500D
Dimmer
Switch
Paddle
CHANGING THE FACE COVER
To replace the face cover, use a flat screwdriver and insert the
tip at the gap shown in the diagram above and pry cover off.
To re-install, simply align the cover and snap back on.
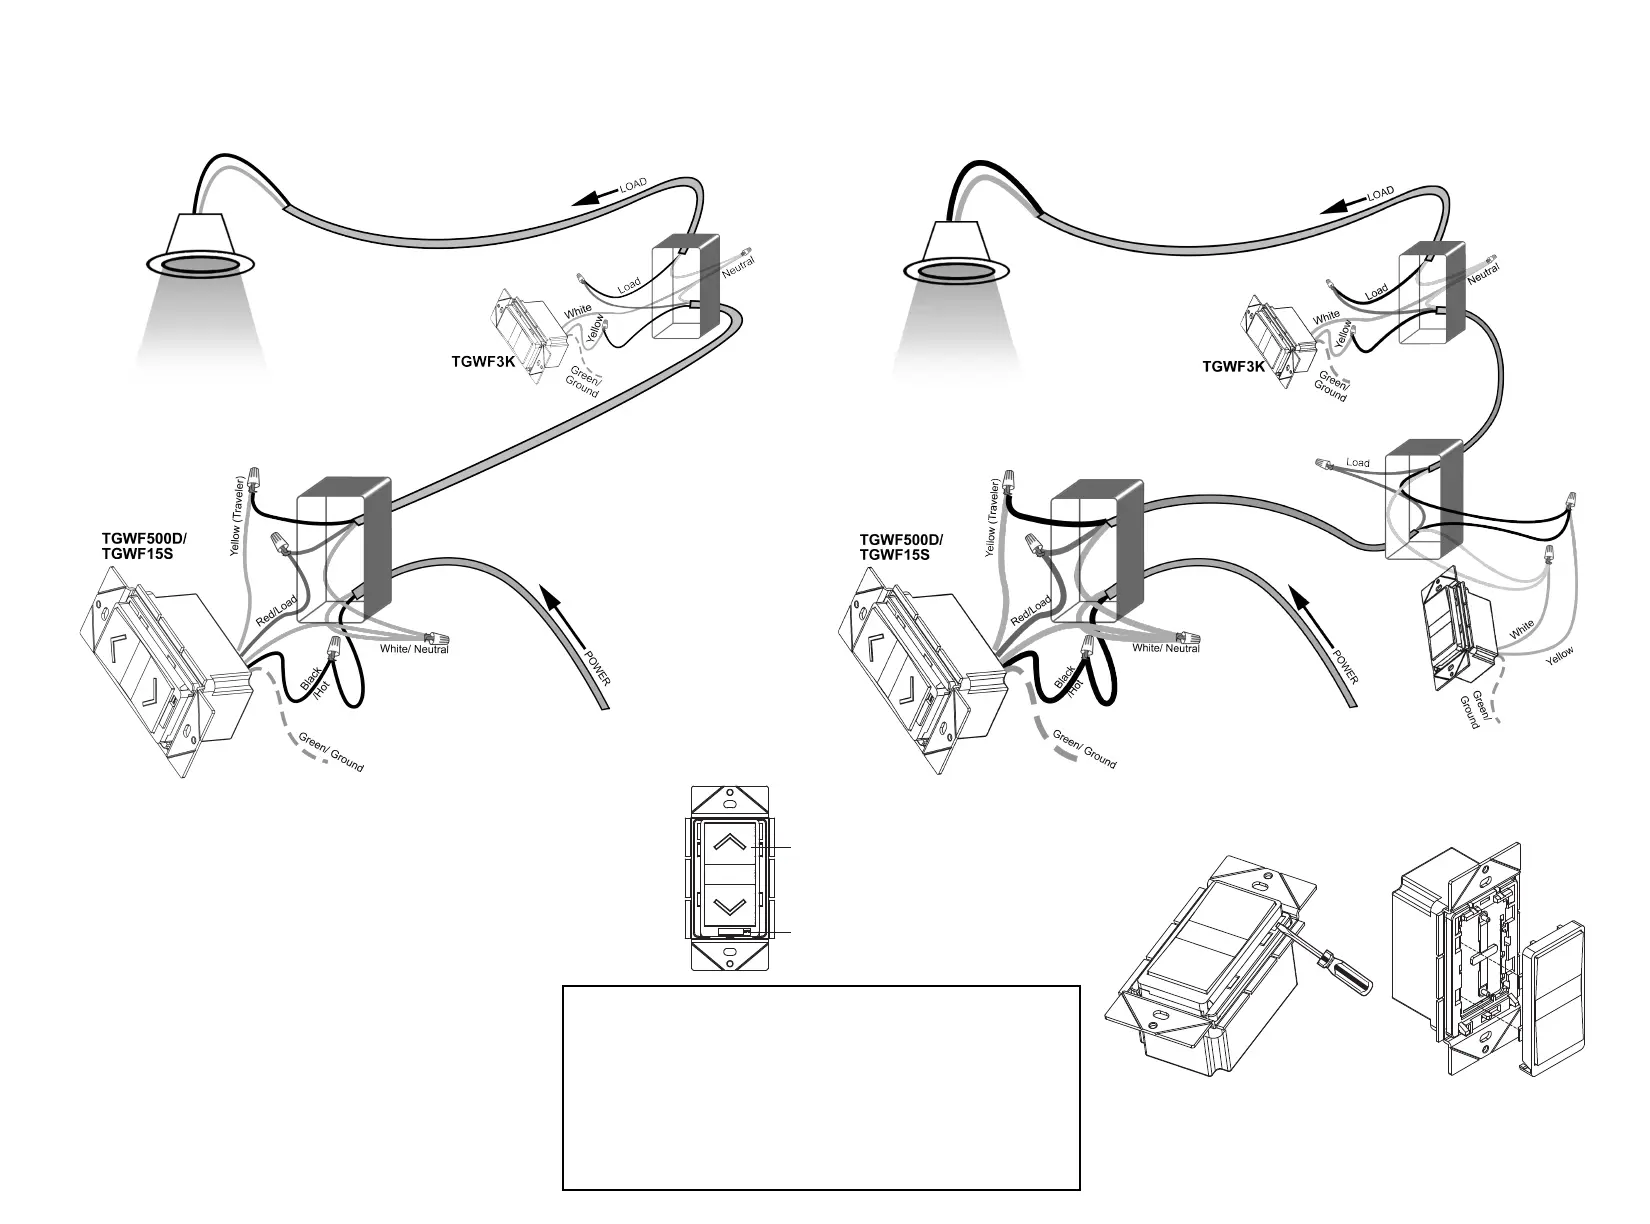
3-Way Installation with TGWF3K
Using existing wires: Follow this diagram to replace your existing 3-way switches. Be sure that
the primary switch (TGWF500D or TGWF15S) is installed at the location with the HOT wire.
Installation with Multiple TGWF3K
Multiple locations: Follow this diagram to replace your existing 3-way and 4-way switches. The
light (LOAD) may be installed at any location.
The Air Gap Switch located below the Dimmer Switch Paddle
is designed for your safety. With push buttons switches, it is
difficult to know if the switch is in the On or the Off position
without having to use a tester. This switch eliminates the hazard
of having to change a light bulb on a possibly live fixture.
Use the Air Gap Switch to Power Off before you
change the bulb.
 Loading...