18
SET-UP INSTRUCTIONS
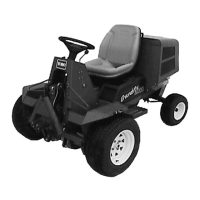
4. To tension rear counterbalance spring, rotate
counterbalance knob (Fig. 35) until distance between
center of anchor bolt opening and inside of frame X" is
as follows:
A. Distance X" is 50mm when equipped with 5 or
8 blade reels without baskets.
B. Distance X" is 15mm when equipped with 5 or
8 blade reels with baskets.
Figure 35
X"
5
4
3
1
2
1. Rear counterbalance knob
2. Anchor bolt
3. Spacer
4. Frame bracket
5. Counterbalance spring
IMPORTANT: These are recommended settings.
Readjust spring positions to attain optimum
performance and counterbalance. By raising
spring locations, cutting unit weight on ground is
reduced and traction is increased.
ADD REAR BALLAST
This unit complies with ANSl B 71.4-1984 Standard
and CE when equipped with rear ballast. Use the
following chart to determine weight or combinations of
weights needed.
Traction UnitWeight Required
Configuration
3 Wheel Axle
and equipped
with Baskets
Calcium Chloride in rear tire
and rear weights, Part No.
24-5790 and 24-5780.
4 Wheel Axle
and equipped
with Baskets
Calcium Chloride in rear tire
and rear weights,
Part No. 24-5780.
IMPORTANT: If a puncture occurs in a tire with
calcium chloride, remove unit from turf area as
quickly as possible. To prevent possible damage to
turf, immediately soak affected area with water.
Either Type 1 (77%) or Type 2 (94%) commercial
calcium chloride flake may be used.
Plain water freezes solid at 32_F(0_C). The 3-1/2
pound (1 .6 kg) calcium chloride to one gallon (3.8 L) of
water solution is slush free to -12_F (-24_C), and will
freeze solid at -52_ F (-46_C). The 5 pound (2.3 kg)
per gallon (liter) solution is slush free to -50_F
(-45_C) and will freeze solid at -62_F (-52_C).
Tires should be filled to approximately 75% capacity
(valve level with valve at the top).
ACTIVATE AND CHARGE BATTERY
(Fig. 36-37)
1. If Battery is not filled with electrolyte or activated,
bulk electrolyte with 1.260 specific gravity must be
purchased from a local battery supply outlet and
added to battery.
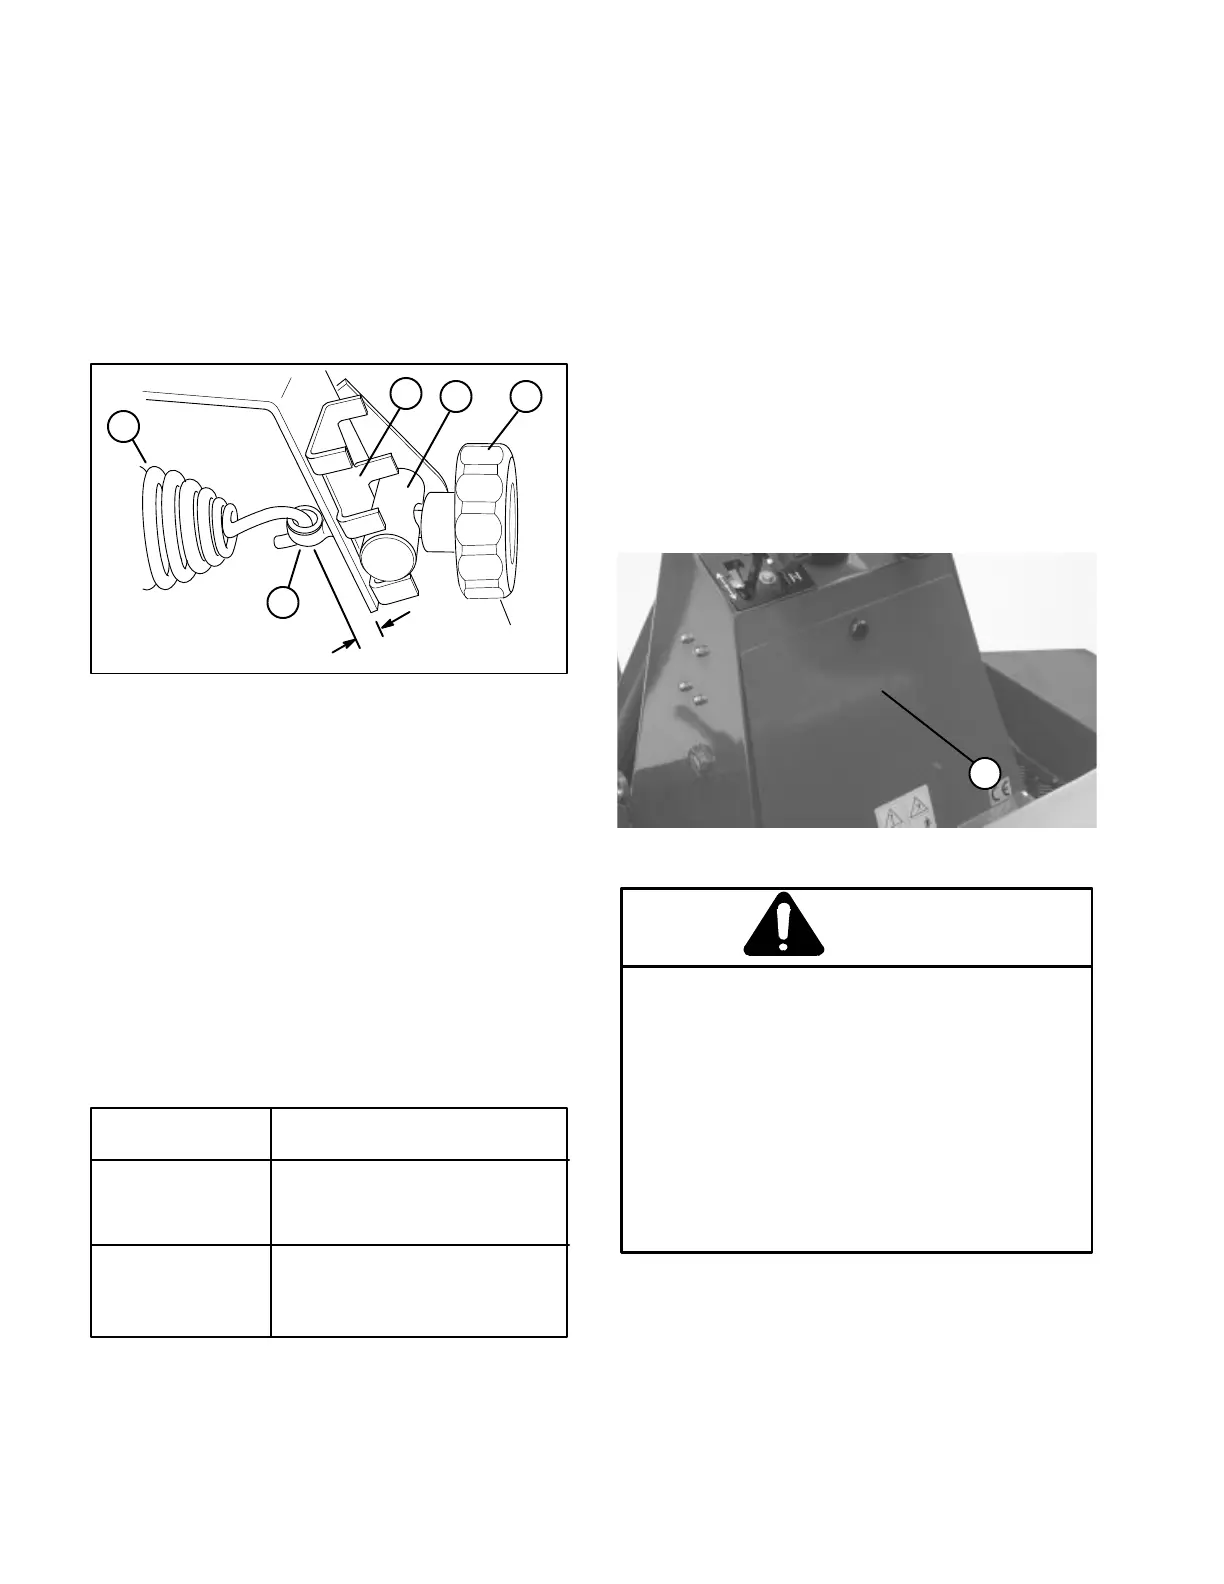
2. Remove access panel from rear of tower (Fig. 36).
1. Access panel
Figure 36
1
Wear safety goggles and rubber gloves
when working with electrolyte. Charge the
battery in a well ventilated place so gasses
produced while charging can dissipate.
Since the gases are explosive, keep open
flames and electrical spark away from the
battery; do not smoke. Nausea may result
if the gases are inhaled. Unplug charger
from electrical outlet before connecting to
or disconnecting charger leads from batĆ
tery posts.
CAUTION
3. Remove filler cap from battery and slowly fill each
cell until electrolyte is just above the plates.
4. Replace filler cap and connect a 3 to 4 amp battery
charger to the battery posts. Charge the battery at a
rate of 3 to 4 amperes for 4 to 8 hours.
5. When battery is charged, disconnect charger from
electrical outlet and battery posts.
6. Remove filler cap. Slowly add electrolyte to each
cell until level is up to fill ring. Install filler cap.
 Loading...