35
MAINTENANCE
CHANGING HYDRAULIC OIL FILTER
(Fig. 76)
The hydraulic oil filter keeps the hydraulic system
relatively free of contaminants. However, the hydraulic
oil filter must be serviced at regular intervals. The
intervals are: initially, after the first 8 hours of operation,
and thereafter every 200 hours of operation or yearly,
whichever comes first. Use a genuine TORO oil filter for
replacement.
1. Remove hydraulic oil filter from mounting head.
Use bottom type filter wrench. Dispose of filter
properly.
2. Apply a film of oil on the gasket. Install filter by hand
until gasket contacts mounting head; then tighten filter
an additional 3/4 turn.
3. Start engine and check for oil leaks. Allow engine
to run for about 2 minutes so any air in system is
purged. Then shut engine off.
4. Check level of oil in reservoir; refer to Check
Hydraulic System Fluid.
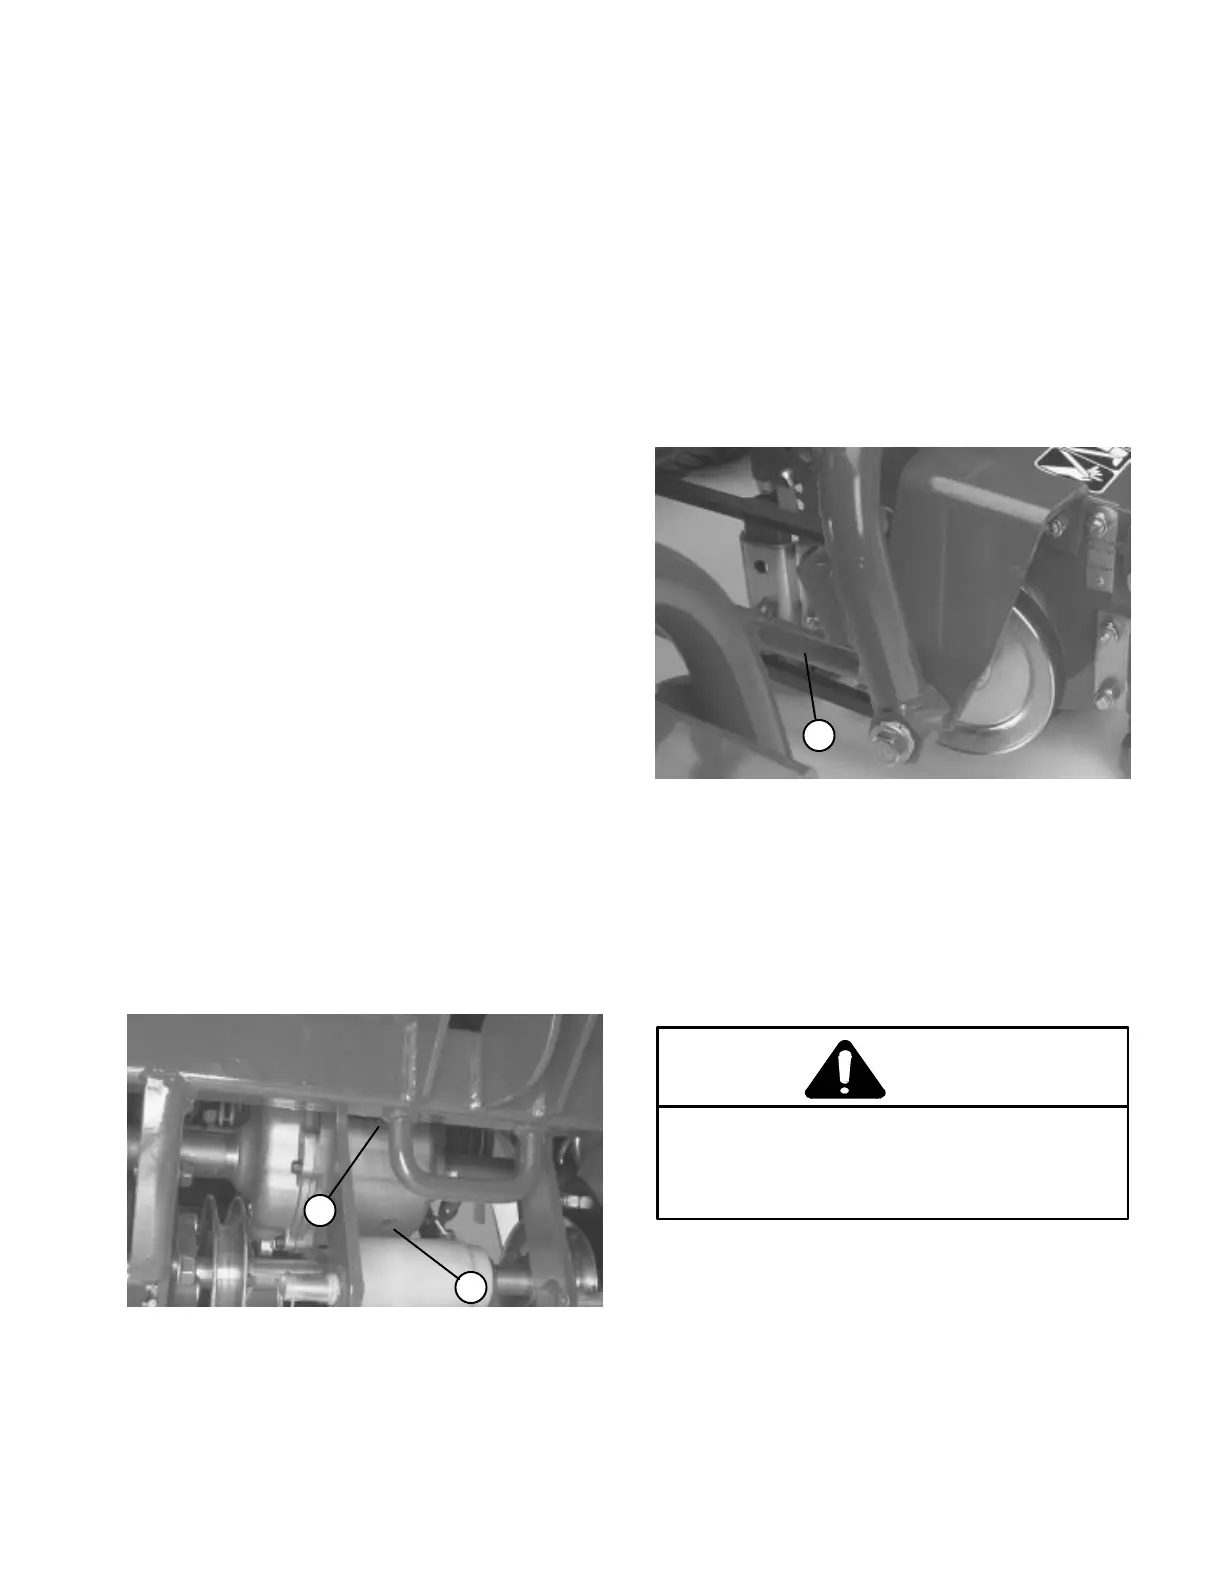
CHANGING FRONT AXLE OIL (Fig. 78)
After every 400 hours of operation, change oil in the
front axle.
Drive machine around for five minutes before changing
oil to warm axle oil. Warm oil flows more freely and
carries more contaminants than cold oil.
Clean area around drain plug and place a drain pan
below drain plug on axle.
Figure 78
1. Drain plug
2. Fill plug
1
2
Remove drain plug and allow oil to flow into drain pan .
After oil is drained, reinstall drain plug.
Remove fill plug and fill to plug level with ISO 150/220
(SAE EPĆ90) oil (approximately 44 oz.).
ADJUSTING CUTTING UNIT BELTS
(Fig. 79)
Make sure belts are properly tensioned to assure
proper operation of the machine and prevent
unnecessary wear. Check all belts midway in span of
belt. Check belts frequently.
1. The cutting unit drive belts should have a
maximum deflection of 1/2 inch with a 10 pound load
applied.
2. Loosen jam nut on front end of belt tension rod.
Rotate rod to lengthen or shorten rod to desired length.
Tighten jam nut.
Figure 79
1. Belt tension rod
1
BATTERY CARE
1. Battery electrolyte level must be properly
maintained and the top of the battery kept clean. If the
Grounds Pro 2000 is stored in a location where
temperatures are extremely high, the battery will run
down more rapidly than if the machine is stored in a
location where temperatures are cool.
CAUTION
Since the gasses from the battery and the
gasoline fumes are explosive, keep open
flame and electrical spark away from the
area; do not smoke.
2. Check the electrolyte level every 25 operating
hours or, if machine is in storage, every 30 days.
3. Maintain cell level with distilled or demineralized
water. Do not fill cells above the bottom of the split ring
inside each cell.
4. Keep top of battery clean by washing periodically
with a brush dipped in ammonia or bicarbonate of soda
solution. Flush the top surface with water after
cleaning. Do not remove the fill caps while cleaning.
5. Battery cables must be tight on terminals to
provide good electrical contact.
 Loading...