32
ENGINE MAINTENANCE
4.. Slide hose clamps onto ends of fuel lines. Push fuel
lines onto fuel filter and secure them with hose clamps.
Be sure arrow on side of filter points toward the
injection pump.
Because diesel fuel is flammable, use
caution when storing or handling it. Do
not smoke while filling the fuel tank. Do
not fill fuel tank while engine is running,
hot, or when machine is in an enclosed
area. Always fill fuel tank outside and
wipe up any spilled diesel fuel before
starting the engine. Store fuel in a clean,
safety-approved container and keep cap
in place. Use diesel fuel for the engine
only; not for any other purpose.
DANGER
BLEEDING AIR FROM INJECTORS (Fig. 63)
Note: This procedure should be used only if fuel
system has been purged of air through normal priming
procedures and engine will not start; refer to Bleeding
Fuel System.
1. Loosen the pipe connection to the No. 1 nozzle
and holder assembly.
Figure 63
1. Fuel Injectors (3)
1
2. Move throttle to FAST position.
3. Turn key in key switch to START position and watch
fuel flow around connector. Turn key to OFF position
when solid flow is observed.
4. Tighten pipe connector securely.
5. Repeat steps on remaining nozzles.
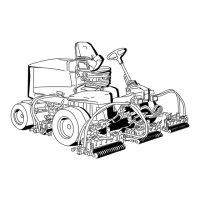
ENGINE COOLING SYSTEM (Fig. 64 & 65)
1. Removing Debris - Remove debris from oil
cooler and radiator daily, clean more frequently in dirty
conditions.
A. Turn engine off and raise hood. Clean engine
area thoroughly of all debris.
B. Remove access panel.
Figure 64
1. Access panel
2. Oil cooler
3. Radiator
1
2
3
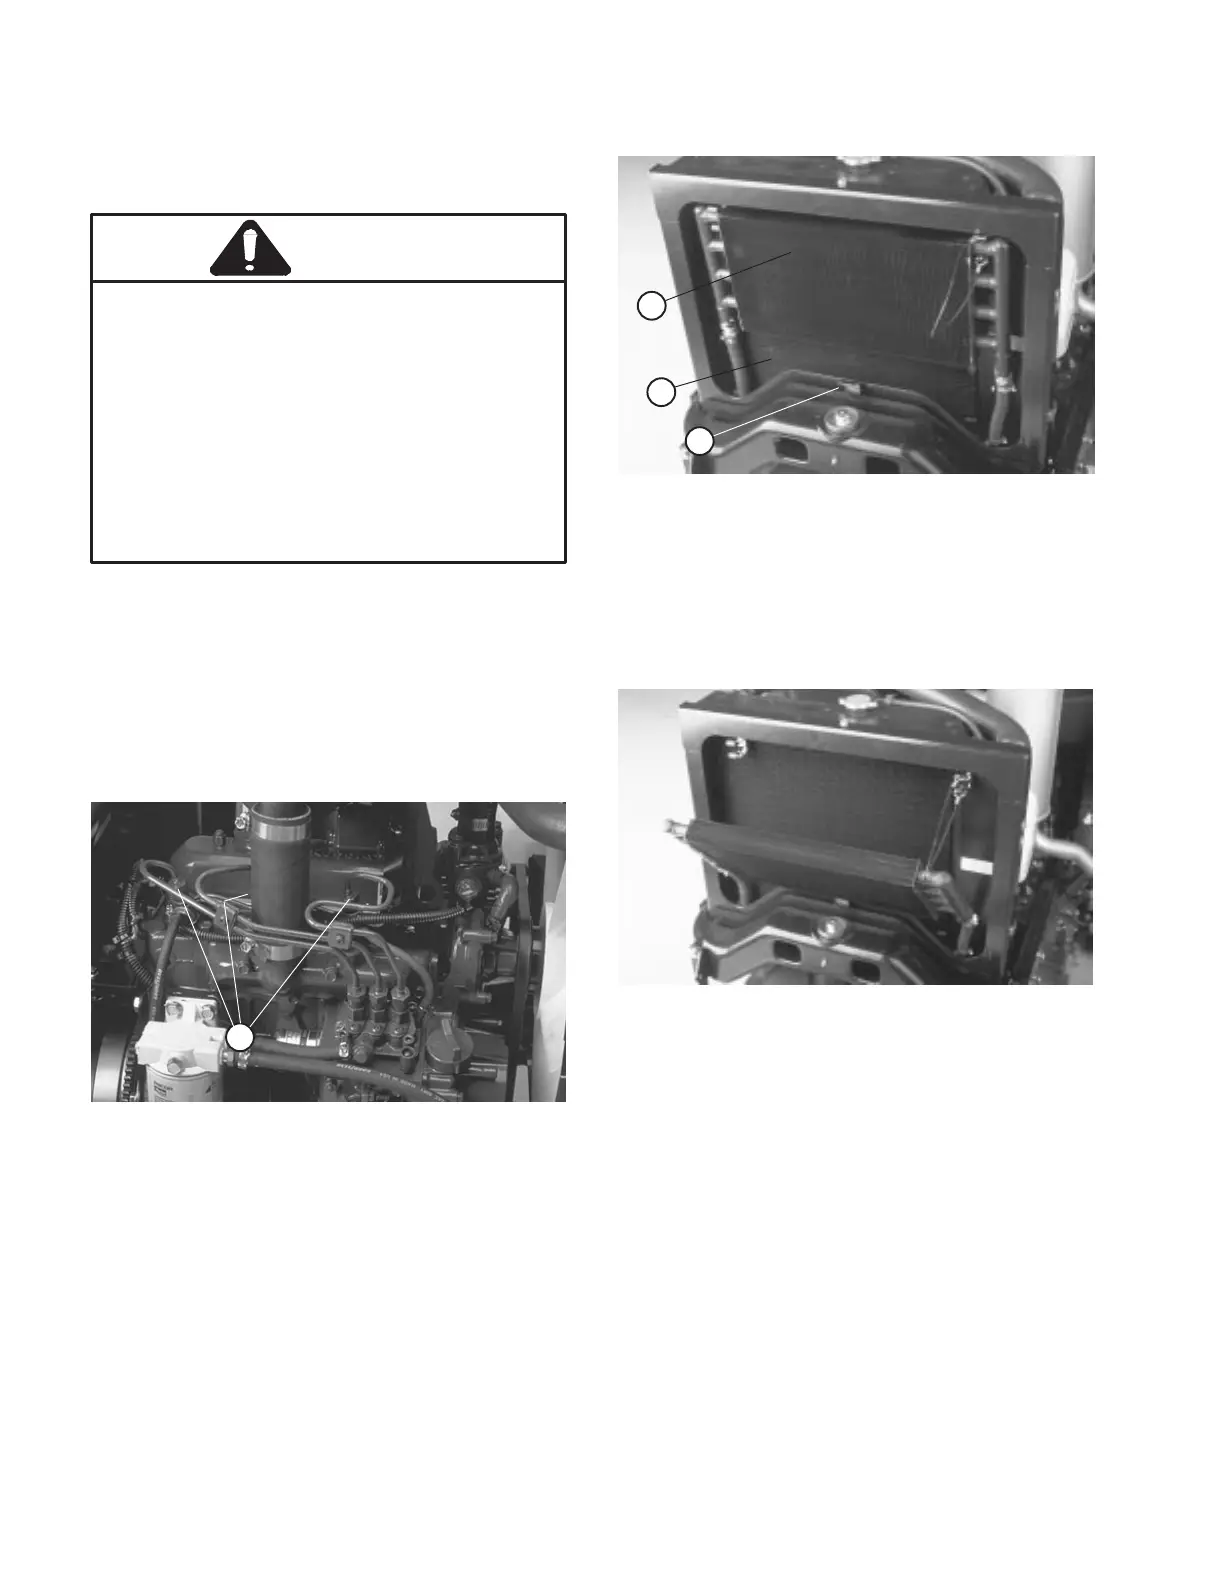
C. Remove access panel. Unlatch oil cooler and
pivot rearward. Clean both sides of oil cooler and
radiator area thoroughly with water or compressed
air. Pivot oil cooler back into position.
Figure 65
D. Install access panel and close hood.
SERVICING ENGINE BELTS
Check condition and tension of all belts after first day of
operation and every 100 operating hours thereafter.
Alternator/fan Belt (Fig. 66)
1. Open hood.
2. Check tension by depressing belt midway
between alternator and crankshaft pulleys with 22 lb. of
force. Belt should deflect 7/16 in. If deflection is
incorrect, proceed to step 3. If correct, continue
operation.
3. Loosen bolt securing brace to engine and bolt
securing alternator to brace.
4. Insert pry bar between alternator and engine and
pry out on alternator.
5. When proper tension is achieved, tighten
alternator and brace bolts to secure adjustment.
 Loading...