CheckingtheSparkPlug
Important:Donotcleanthesparkplug.Alwaysreplace
thesparkplugwhenithas:ablackcoating,worn
electrodes,andoilylm,orcracks.
Note:Ifyouseelightbrownorgrayontheinsulator,the
engineisoperatingproperly.Ablackcoatingontheinsulator
usuallymeansthattheaircleanerisdirty.
Setthegapto0.7to0.8mm(0.028to0.031inch).
Figure49
InstallingtheSparkPlug
Important:Ensurethatthegapbetweenthesideand
centerelectrodesiscorrectbeforeinstallingthespark
plug.
1.Threadthesparkplugclockwiseintothespark-plug
holebyhand.
Note:Avoidcross-threadingthesparkplugwiththe
threadsofthespark-plughole.
2.Rotatethesparkplugclockwiseusinga21mm(13/16
inch)spark-plugwrenchuntiltheplugandsealing
washerareseated(Figure48).
3.Tightenthesparkplugasfollows:
•Wheninstallinganin-servicesparkplug,tighten
thepluganadditional1/8to1/4turn.
•Wheninstallinganewsparkplug,tightentheplug
anadditional1/2turn.
4.Pushthespark-plugwireontotheterminalofthespark
plug(Figure47).
ServicingtheSparkArrester
CleaningtheSparkArrester
ServiceInterval:Every100hours
Note:Asparkarresterisavailableasanoption.Ifyou
requireasparkarrester,contactyourAuthorizedToroService
Dealer.
GenuineTorosparkarrestersareapprovedbytheUSDA
ForestryService.
WARNING
Contactwithhotsurfacesmaycausepersonal
injury.
Keephands,feet,face,clothingandotherbody
partsawaythemuferandotherhotsurfaces.
1.Removethedividerplate;refertoRemovingthe
DividerPlate(page29).
2.Removethe2nuts(8mm)andremovethemufer
fromthecylinder(Figure50).
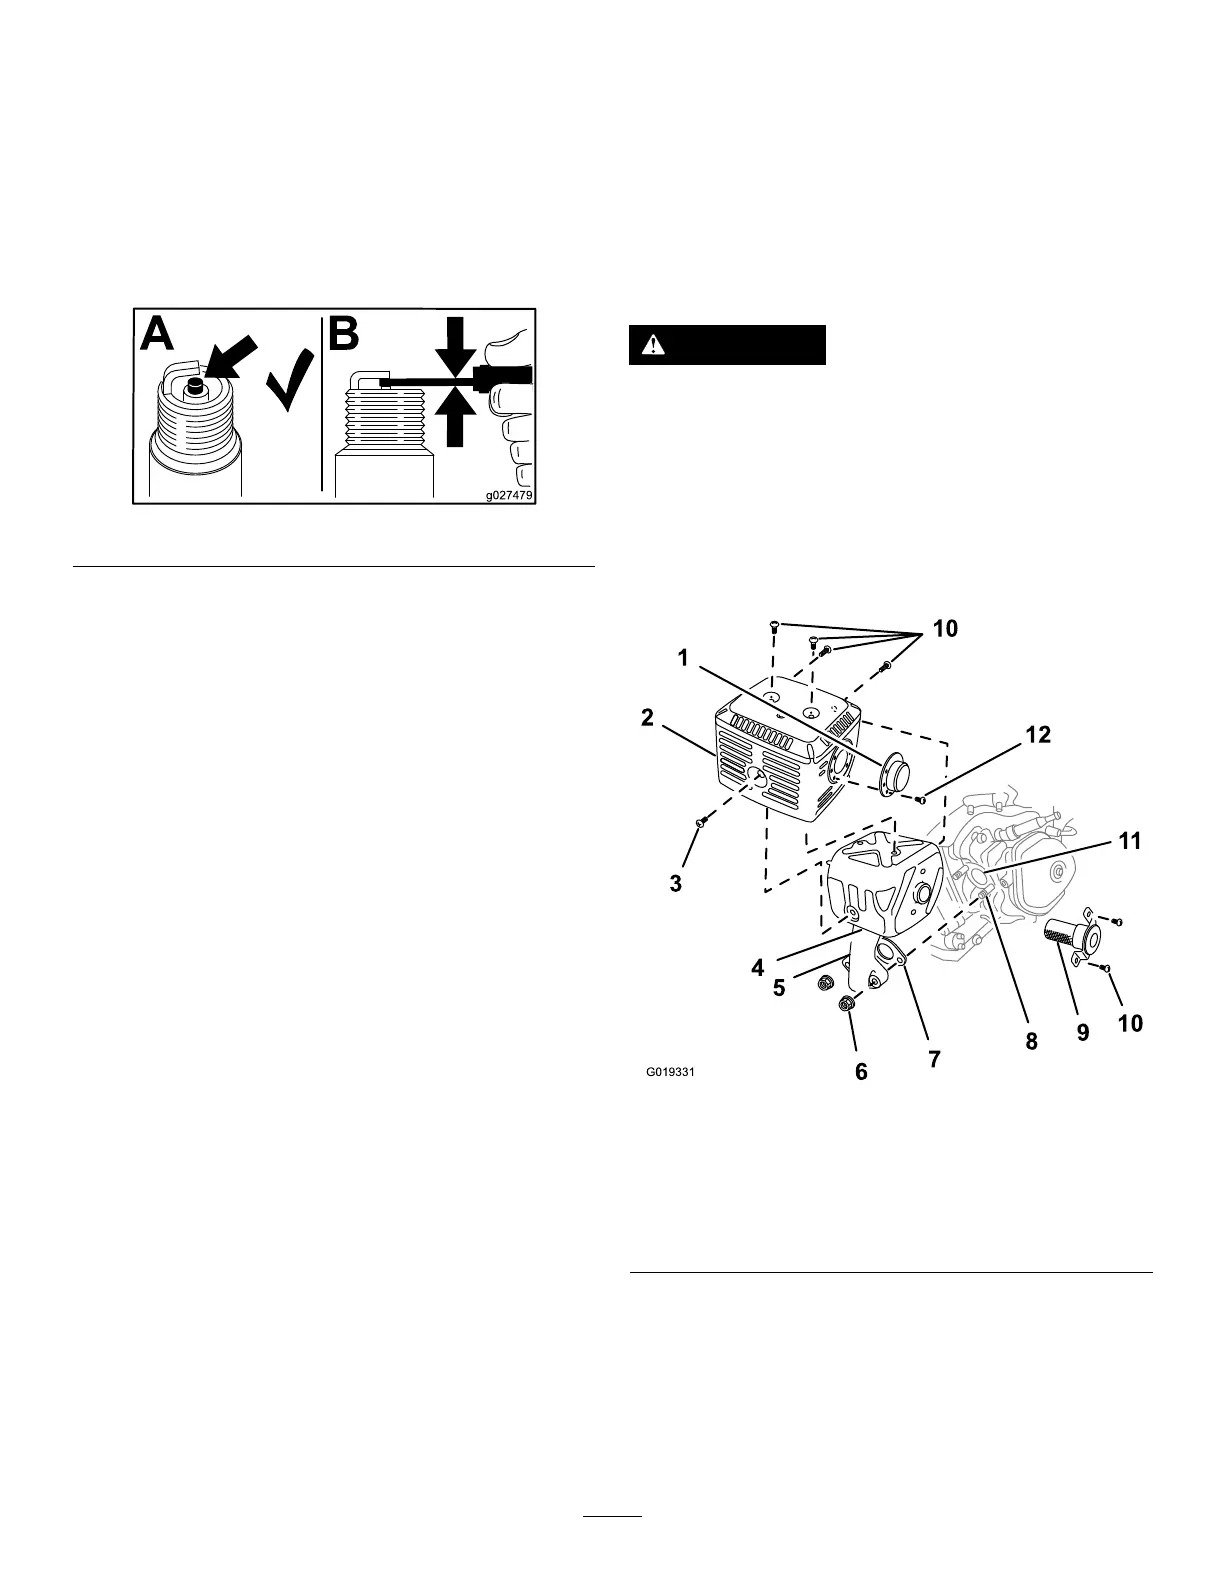
Figure50
1.Deector(if
applicable)
5.Exhaustpipe
9.Sparkarrester
2.Protector
6.Nut(8mm)10.Screws(5mm)
3.Screw(6mm)7.Gasket
11.Exhaustport
4.Mufer8.Bolt(8mm)12.Screw(4mm)
3.Removethe3screws(4mm)fromtheexhaust
deectorandremovethedeector(Figure50).
4.Removethescrews(5mmand6mm)fromthemufer
protector,andremovethemuferprotector(Figure
50).
5.Removethescrew(4mm)fromthesparkarresterand
removethesparkarresterfromthemufer(Figure50).
34

 Loading...