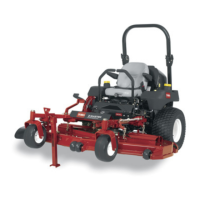
3.Tilttheseatforward,loosentheboltsandremove
thefrontenginepanel.
4.PulluponthespringloadedidlerpulleyforthePTO
drivebeltandremovethebeltfromtheclutchpulley
(
Figure61).
Figure61
1.Springloadedidlerpulley3.PTOdrivebelt
2.Clutch4.Gearbox
5.Unplugtheelectricconnectionfortheclutch
(Figure62).
6.Removethetwoboltsholdingtherubberclutch
straptothemowerframe(Figure62).
7.Removethecenterboltholdingtheclutchto
theengineshaftandremovetheclutchandkey
(
Figure62).
Figure62
1.Clutch4.Clutchcenterbolt
2.Twoboltsandnutsfor
clutchstrap
5.Electricalconnection
3.Rubberclutchstrap
8.Inserta0.015–0.021inch(0.381–0.533mm)feeler
gaugethroughoneinspectionslotinthesideofthe
assembly.Makesureitisbetweenthearmatureand
therotorfrictionsurfaces(
Figure63).
9.Tightenthelocknutsuntilthereisslightbindingon
thefeelergaugebutitcanbemovedeasilywithinthe
airgap(Figure63).
10.Repeatthisfortheremainingslots.
11.Checkeachslotagainandmakeslightadjustments
untilthefeelergaugebetweentherotorandarmature
withveryslightcontactbetweenthem.
Figure63
1.Slot
3.Feelergauge
2.Adjustingnut
12.Installtheclutchtotheengineshaftwiththekey.
13.ApplyblueLoctite®(orequivalent)tothecenter
bolt.
14.Whileholdingthecrankshaftatthebackofthe
machine,installthecenterboltandtorqueitto50
ft-lbs(68N-m)(
Figure62).
15.Installtherubberclutchstraptothemowerframe
withthetwopreviouslyremovedboltsandnuts
(
Figure62).
16.PulluponthespringloadedidlerforthePTOdrive
beltandinstallitontotheclutchpulley(Figure61).
17.Plugintheelectricconnectionfortheclutch
(Figure62).
18.Installthefrontenginepanel.
19.Lowerdowntheseat.
46
 Loading...