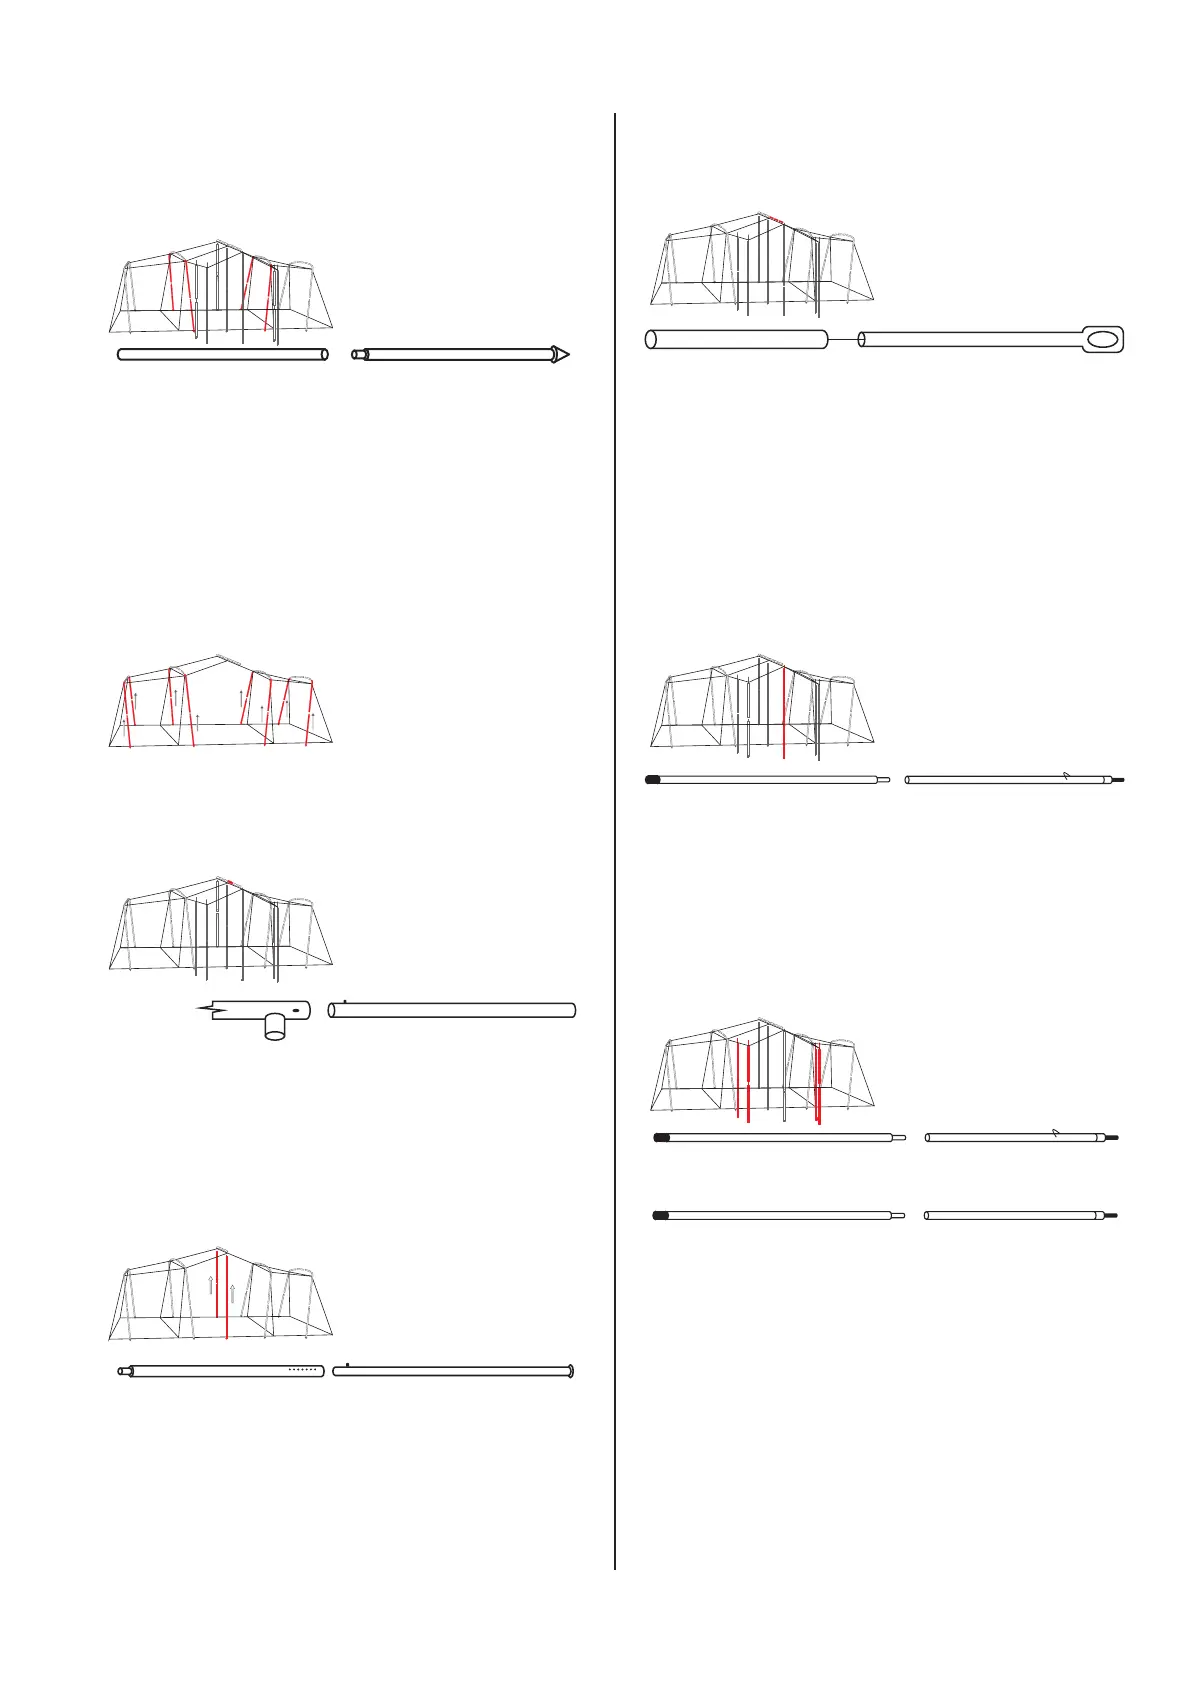
• Install the inside support legs. Select the 4
assembled inside support legs, (4 x part #38 and 4 x
part #39) and insert these into the inside ridge poles
already tted to the tent. The pole socks are then
clipped to the already tted ridge poles.
• With the help of another person, start by lifting one
of the outside sets of support legs until the end
wall is upright and push the bottom of the support
leg against the ground to hold in place. Repeat this
process with the closest set of inside support legs.
Move to the opposite end of the tent and repeat,
lifting the outside support legs rst, followed by
the inside support legs. The tent should now be
supported by the eight upright support legs.
• Fold the front porch back over the cabin of the tent
and t the front porch spreader bar #7 to the already
tted ridge pole #44.
• Attach the front and rear centre upright poles (parts
#40 and #41) to the already tted centre ridge pole.
Clip the pole sock to the centre ridge pole, and
again with the help of another person, lift both the
front and rear centre poles into position and adjust
accordingly.
WARNING - Do not push the poles up too high as
this may cause undue stress and damage to the
fabric.
• Setting the front porch. Insert the remaining porch
spreader bars (parts #8 & #9) to the already tted
part #7. Please note that this join is not xed and
is designed to slide for adjustment.
• Carefully pull the folded porch over from the cabin
of the tent and insert completed centre porch pole
(parts #14 and #14a) by inserting the spike on the
top of the pole through the center porch ridge pole
and then the eyelet located in the centre front of the
porch canvas. Attach a guy rope to the pole spike
and peg the rope to the ground approximately 1.5
meters from the base of the pole. Note that part #14
has a metal clip attached to the porch pole to t a
corresponding hook from the canvas porch.
• Repeat this process for the remaining porch poles
making sure to place the poles in the correct
positions. Place corner poles (parts #10 and #11)
to the outside corners and outside poles (parts #10
and #12) to the sides of the porch. Note that part
#12 has a metal clip attached to the porch pole to t
a corresponding hook from the canvas porch.
• Once all porch poles are in place, adjust the tension
on the guy ropes to set the porch evenly and taut.
WARNING - If the porch is not tensioned correctly,
water will pond and may cause damage to the
fabric and poles.
REVERSE THESE PROCEDURES
TO LOWER THE TENT
Part #38
INSIDE SUPPORT LEG TOP
Part #39
INSIDE SUPPORT LEG BOTTOM
Part #44
CENTRE RIDGE POLE FRONT
Part #40
CENTRE UPRIGHT TOP
Part #7
PORCH SPREADER BAR
Part #41
CENTRE UPRIGHT BOTTOM
Part #8
PORCH SPREADER BAR
Part #14A
PORCH CENTRE POLE BOTTOM
Part #10
PORCH POLE BOTTOM
Part #10
PORCH POLE BOTTOM
Part #9
PORCH END BAR
Part #14
PORCH CENTRE POLE TOP
Part #12
OUTSIDE PORCH POLE TOP
Part #11
CORNER PORCH POLE TOP
 Loading...