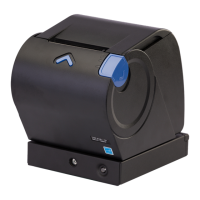
Testing the 4610
When you switch on the SureMark printer, it runs a power-on self-test (POST). If
the POST finds no errors, the printer is ready for operation. Follow these steps if
you receive an error:
1. If the printer is turned on, turn off the printer and turn it on again.
v If the printer is attached to the system with the RS-232 cable or the standard
USB cable with a power brick, disconnect the power cord and then reconnect
the power cord to a properly wired and grounded power source.
v If the printer is attached to the system with the RS-485 cable, turn off the
POS system then switch on the system, which also powers on the printer.
v If the printer is attached to the system with a powered USB cable, the USB
attached printer can be hot-plugged.
2. Check the status of the printer-ready indicator:
v Printer-ready indicator ON: The POST completed successfully.
v Printer-ready indicator OFF or blinking: The POST failed.
3. If the POST fails or if you suspect problems with your system, see
“Troubleshooting” on page 49.
4. See “Firmware offline tests” on page 45 and run the offline tests. If the offline
tests fail or you suspect problems with your system, see “Troubleshooting” on
page 49.
Low paper sensing and calibration
Low-paper sensing in the Models 1NR, 1NA, and 1ND is based upon the paper
thickness and the core size. You can modify the low-paper and critically low sensing
settings. These settings determine the amount of paper that remains on the roll and
at which time the low-paper and the critically low-paper status is sent. The default
setting for low-paper status is 5 meters (or 5000 mm) remaining on the roll, and
critically low status is 1 meter (or 1000 mm) remaining on the roll.
Note: Prior to turning off the printer, send a reset command to the printer. If you
turn off the printer without a reset command, when you turn the printer back
on, it will start counting motor steps from the number stored in the printer's
memory. This will not be an accurate number if the printer was not able to
store the number with a reset command.
The low-paper sensor is customer-selectable for table or wall mount, depending on
application. The printer comes from the factory already in table mount mode. For
wall mount applications, you must move the low-paper selector switch on the
bottom of the printer to the WALL position.
You must calibrate the printer to accurately recognize the thickness of the paper
supply, which you can do with an offline test or by a command. You only need to
calibrate one printer for a specific paper supply. You can then broadcast that
calibration constant to all printers that will use the same paper.
To set the low-paper supply sensors of all printers within your system:
1. Run the calibration on one printer.
2. Read out MCT#0X'28' from the calibrated printer.
Note: The calibration constant is stored in MCT#0X'28'. System management
can interrogate all printers to determine whether one has been recently
calibrated.
Chapter 4. Running tests and diagnostics 43
 Loading...