10
© 2009 - 2011 TOSHIBA TEC CORPORATION All rights reserved e-STUDIO555/655/755/855
DRUM/CLEANER UNIT
10 - 7
10.6 Disassembly and Replacement
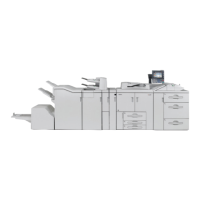
[A] Cleaner unit
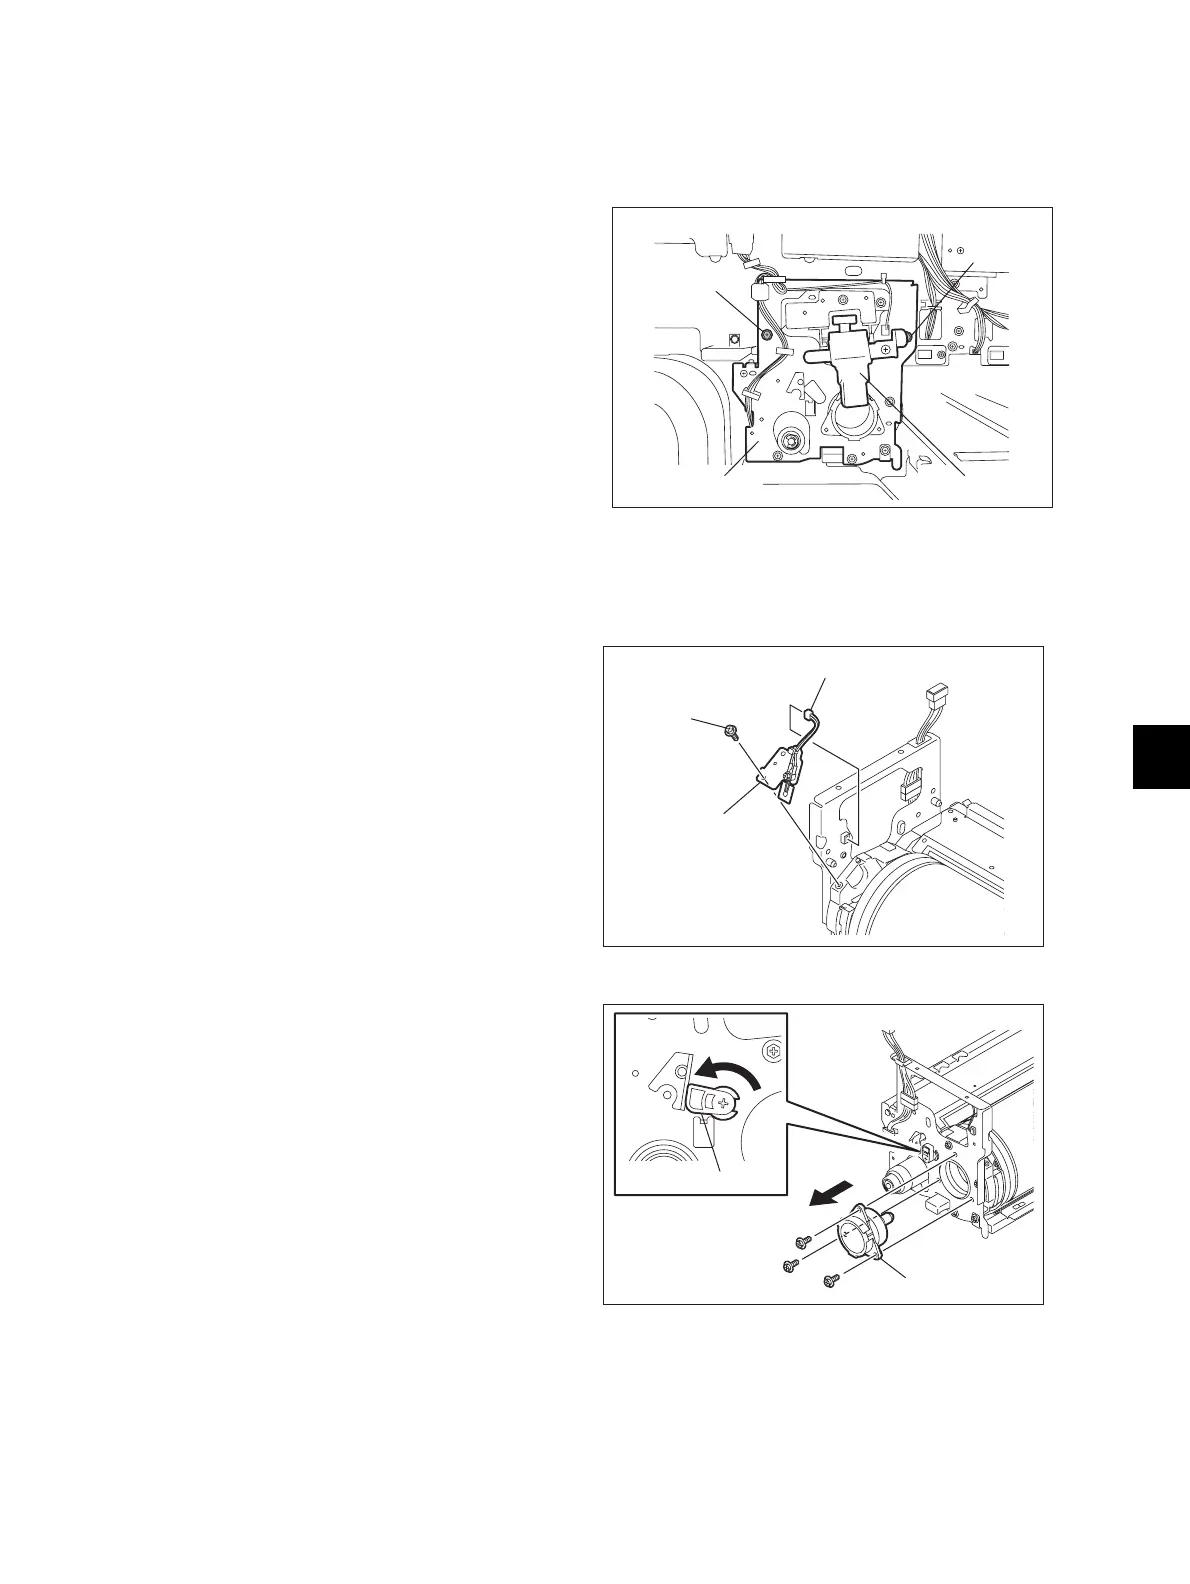
[B] Drum thermistor (THM5) and Drum
(1) Take off the main charger.
( P.9-9 "[A] Main charger")
(2) Disconnect 1 connector and remove 2
screws to pull out the cleaner unit.
Fig. 10-6
(1) Take off the cleaner unit
( P.10-7 "[A] Cleaner unit")
(2) Disconnect 1 connector and remove 1 screw
to take off the drum thermistor with its
bracket.
(3) Remove 1 screw to take off the drum
thermistor.
Note:
When installing the thermistor, tighten it with
the 0.2-0.6N•m torque.
Fig. 10-7
(4) Turn the cam to release the pressure of the
cleaning blade.
(5) Remove 3 screws to take off the drum shaft.
Fig. 10-8
Main charger
Cleaner unit
Screw
Screw
Drum thermistor
Connector
Screw
Drum shaft
Cam

 Loading...