2.SETTING ITEMS (ADMIN)
Setting Network Functions 143
2 SETTING ITEMS (ADMIN)
4
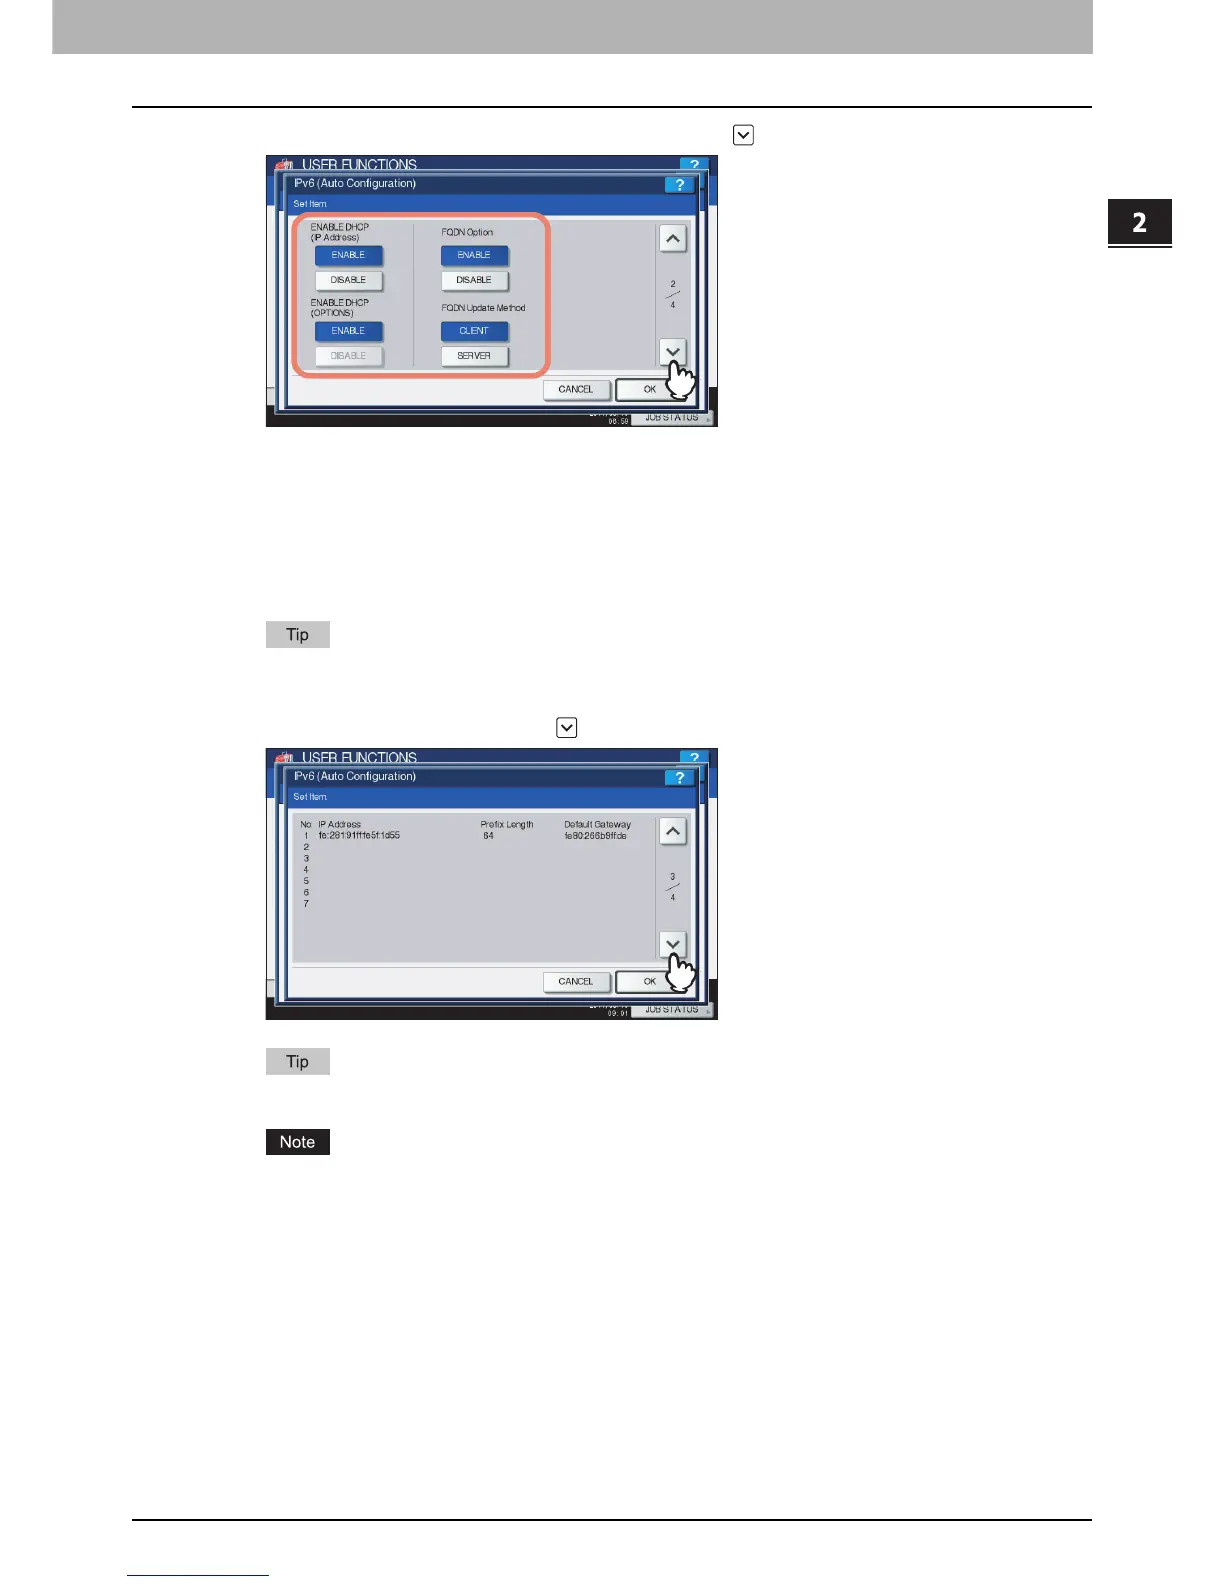
Specify the following items as required and press .
ENABLE DHCP (IP Address) — Press [ENABLE] to use the IPv6 address issued from the DHCPv6 server in a
stateless network environment, or [DISABLE] not to use it.
ENABLE DHCP (OPTIONS) — Press [ENABLE] to use the optional information (IPv6 address for the DNS server,
etc.) issued from the DHCPv6 server in a stateless network environment, or [DISABLE] not to use it.
FQDN Option — Press [ENABLE] to use DNS for setting FQDN (Fully Qualified Domain Name), or [DISABLE] not
to use it for setting FQDN.
FQDN Update Method — Press [CLIENT] to update DNS from the equipment, or [SERVER] to update DNS from
the DHCPv6 server.
When you select [ENABLE] for the [ENABLE DHCP (IP Address)] option, [ENABLE] is automatically set for the
[ENABLE DHCP (OPTIONS)] option.
5
Confirm the settings, and press .
IPv6 addresses obtained from routers are displayed. Up to 7 IPv6 addresses can be retained.
When this equipment receives a router advertisement (RA) from a router with an M flag configuration of “0”, the
DHCPv6 function is disabled. If you change a router advertisement (RA) M flag configuration from “0” to “1”,
reboot this equipment by using the [POWER] button on the control panel to enable the DHCPv6 function.

 Loading...


