Chapter 3 Installation and Wiring
6F8C1497
88
Insert the module from the bottom.
(5) Insert the M4 screw through the screw hole at
the top of the module, and tighten it to secure
the module on the base unit firmly.
To secure the G2 I/O module to a slot from S1
to S11 of BUM7B, insert a 150-mm or longer
Phillips screwdriver into the hole on the top
bracket of BUM7B to tighten the screw
(tightening torque: approx. 1.47N・m = 15kgf・
cm).
(6) Make necessary wirings and connections.
For wiring with cables, be sure to use sheathed crimp-type terminals.
Power supply terminal: Wire the terminal block
type1 light controller module (PUM12): Connect the cable.
TC-net I/O loop G2 I/O adapter module (GA922): Connect the cable.
I/O module: Mount the detachable terminal block, or connect the connector cable.
The bottom lock lever is engaged in the base unit with a clicking
sound when the module is pushed into the base unit from the
bottom. Push it through until the top lock lever is engaged in the
base unit with a clicking sound.
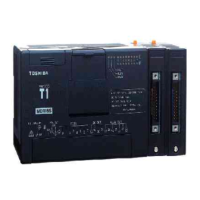
Backplane of BUM7B

 Loading...