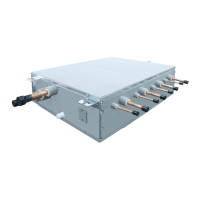
5 APPLICABLE CONTROLS
REQUIREMENT
• When you use this air conditioner for the first time,
it takes approx. 5 minutes until the remote
controller becomes available after power-on. This
is normal.
<When the power is turned on for the first time
after installation>
It takes approx. 5 minutes until the remote
controller becomes available.
<When the power is turned on for the second
(or later) time>
It takes approx. 1 minute until the remote
controller becomes available.
• Normal settings were made when the unit was
shipped from factory.
Change the indoor unit as required.
• Use the wired remote controller to change the
settings.
• The settings cannot be changed using the wireless
remote controller, sub remote controller, or remote
controllerless system (for central remote controller
only).
Therefore, install the wired remote controller to
change the settings.
Changing of settings for
applicable controls
Basic procedure for changing settings
Change the settings while the air conditioner is not
working.
(Be sure to stop the air conditioner before making
settings).
The display content for setting differs from that on
former types of remote controller (RBC-
AMT21E/AMT31E). The number of CODE No. has
increased).
Procedure 1
Push
+ + buttons simultaneously for at
least 4 seconds.
After a while, the display flashes as shown in the
figure.
Confirm that the CODE No. is [10].
• If the CODE No. is not [10] push
button to
erase the display content and repeat the
procedure from the beginning.
(No operation of the remote controller is accepted
for a while after
button is pushed).
(While air conditioners are operated under the
group control, “ALL” is displayed first. When
is pushed, the indoor unit number
displayed following “ALL” is the header unit).
(* Display content varies with the
indoor unit model).
on
controller
is available
on
controller
is available
 Loading...