RemotEye 4 User Manual – 90988-007 31
4 REMOTEYE 4 NETWORK CONNECTION SETUP
The RemotEye 4 comes with two user interfaces:
A built in web interface can be accessed with a web browser that allows setup and monitoring over the
Ethernet with a user-friendly GUI (Graphical User Interface). This is the recommended interface for
configuring your system. Recommended browsers are:
o Internet Explorer 10 or above
o Firefox 15 or above
o Google Chrome 25 or above
A built in console allows setup for installations that do not have access to a web browser, or whose
networks have HTTP disabled. The RemotEye console can be accessed via Telenet, SSH, or USB using
terminal emulation software such as HyperTerminal or Tera Term.
Table 4-1 Monitoring Protocol and Port Connector
Using the web interface is the preferred method of setting up and working with the RemotEye 4. Alternatives are
briefly discussed at the end of this section.
IP ADDRESS SETUP WITH DHCP
The only data required for the network is the RemotEye 4 MAC address. (See Table 3-1 Set-up Checklist)
Each Ethernet network is different. Use the following steps as an outline for connecting the RemotEye 4 to the
network.
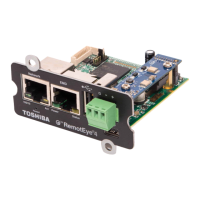
1. Connect the RemotEye 4 NETWORK RJ45 receptacle to the designated network switch, hub, or
computer with a Cat 5 or better cable. (See Figure 4-1)
2. Turn on the UPS.
3. Verify a network link has been established with the RemotEye 4: Confirm green and/or yellow LED’s
illuminate. (See Table 2-2)
4. RemotEye 4 automatically obtains a network IP address.
- The RemotEye 4’s “DHCP/BOOTP” setting comes enabled by default. If there is a DHCP/BOOTP
server within the network, the DHCP/BOOTP server will allocate (lease) an IP address to the
RemotEye 4.
- (If there is no DHCP/BOOTP server on the network, RemotEye 4 will use the default IP address
192.168.1.168, subnet mask 255.255.255.0, and Gateway 192.168.1.1.)
5. Connect a Laptop/PC to the same network as the RemotEye via network switch, hub, or directly to the
RemotEye Network port.
6. GO TO Section 5 – System Configuration.
 Loading...