3
a
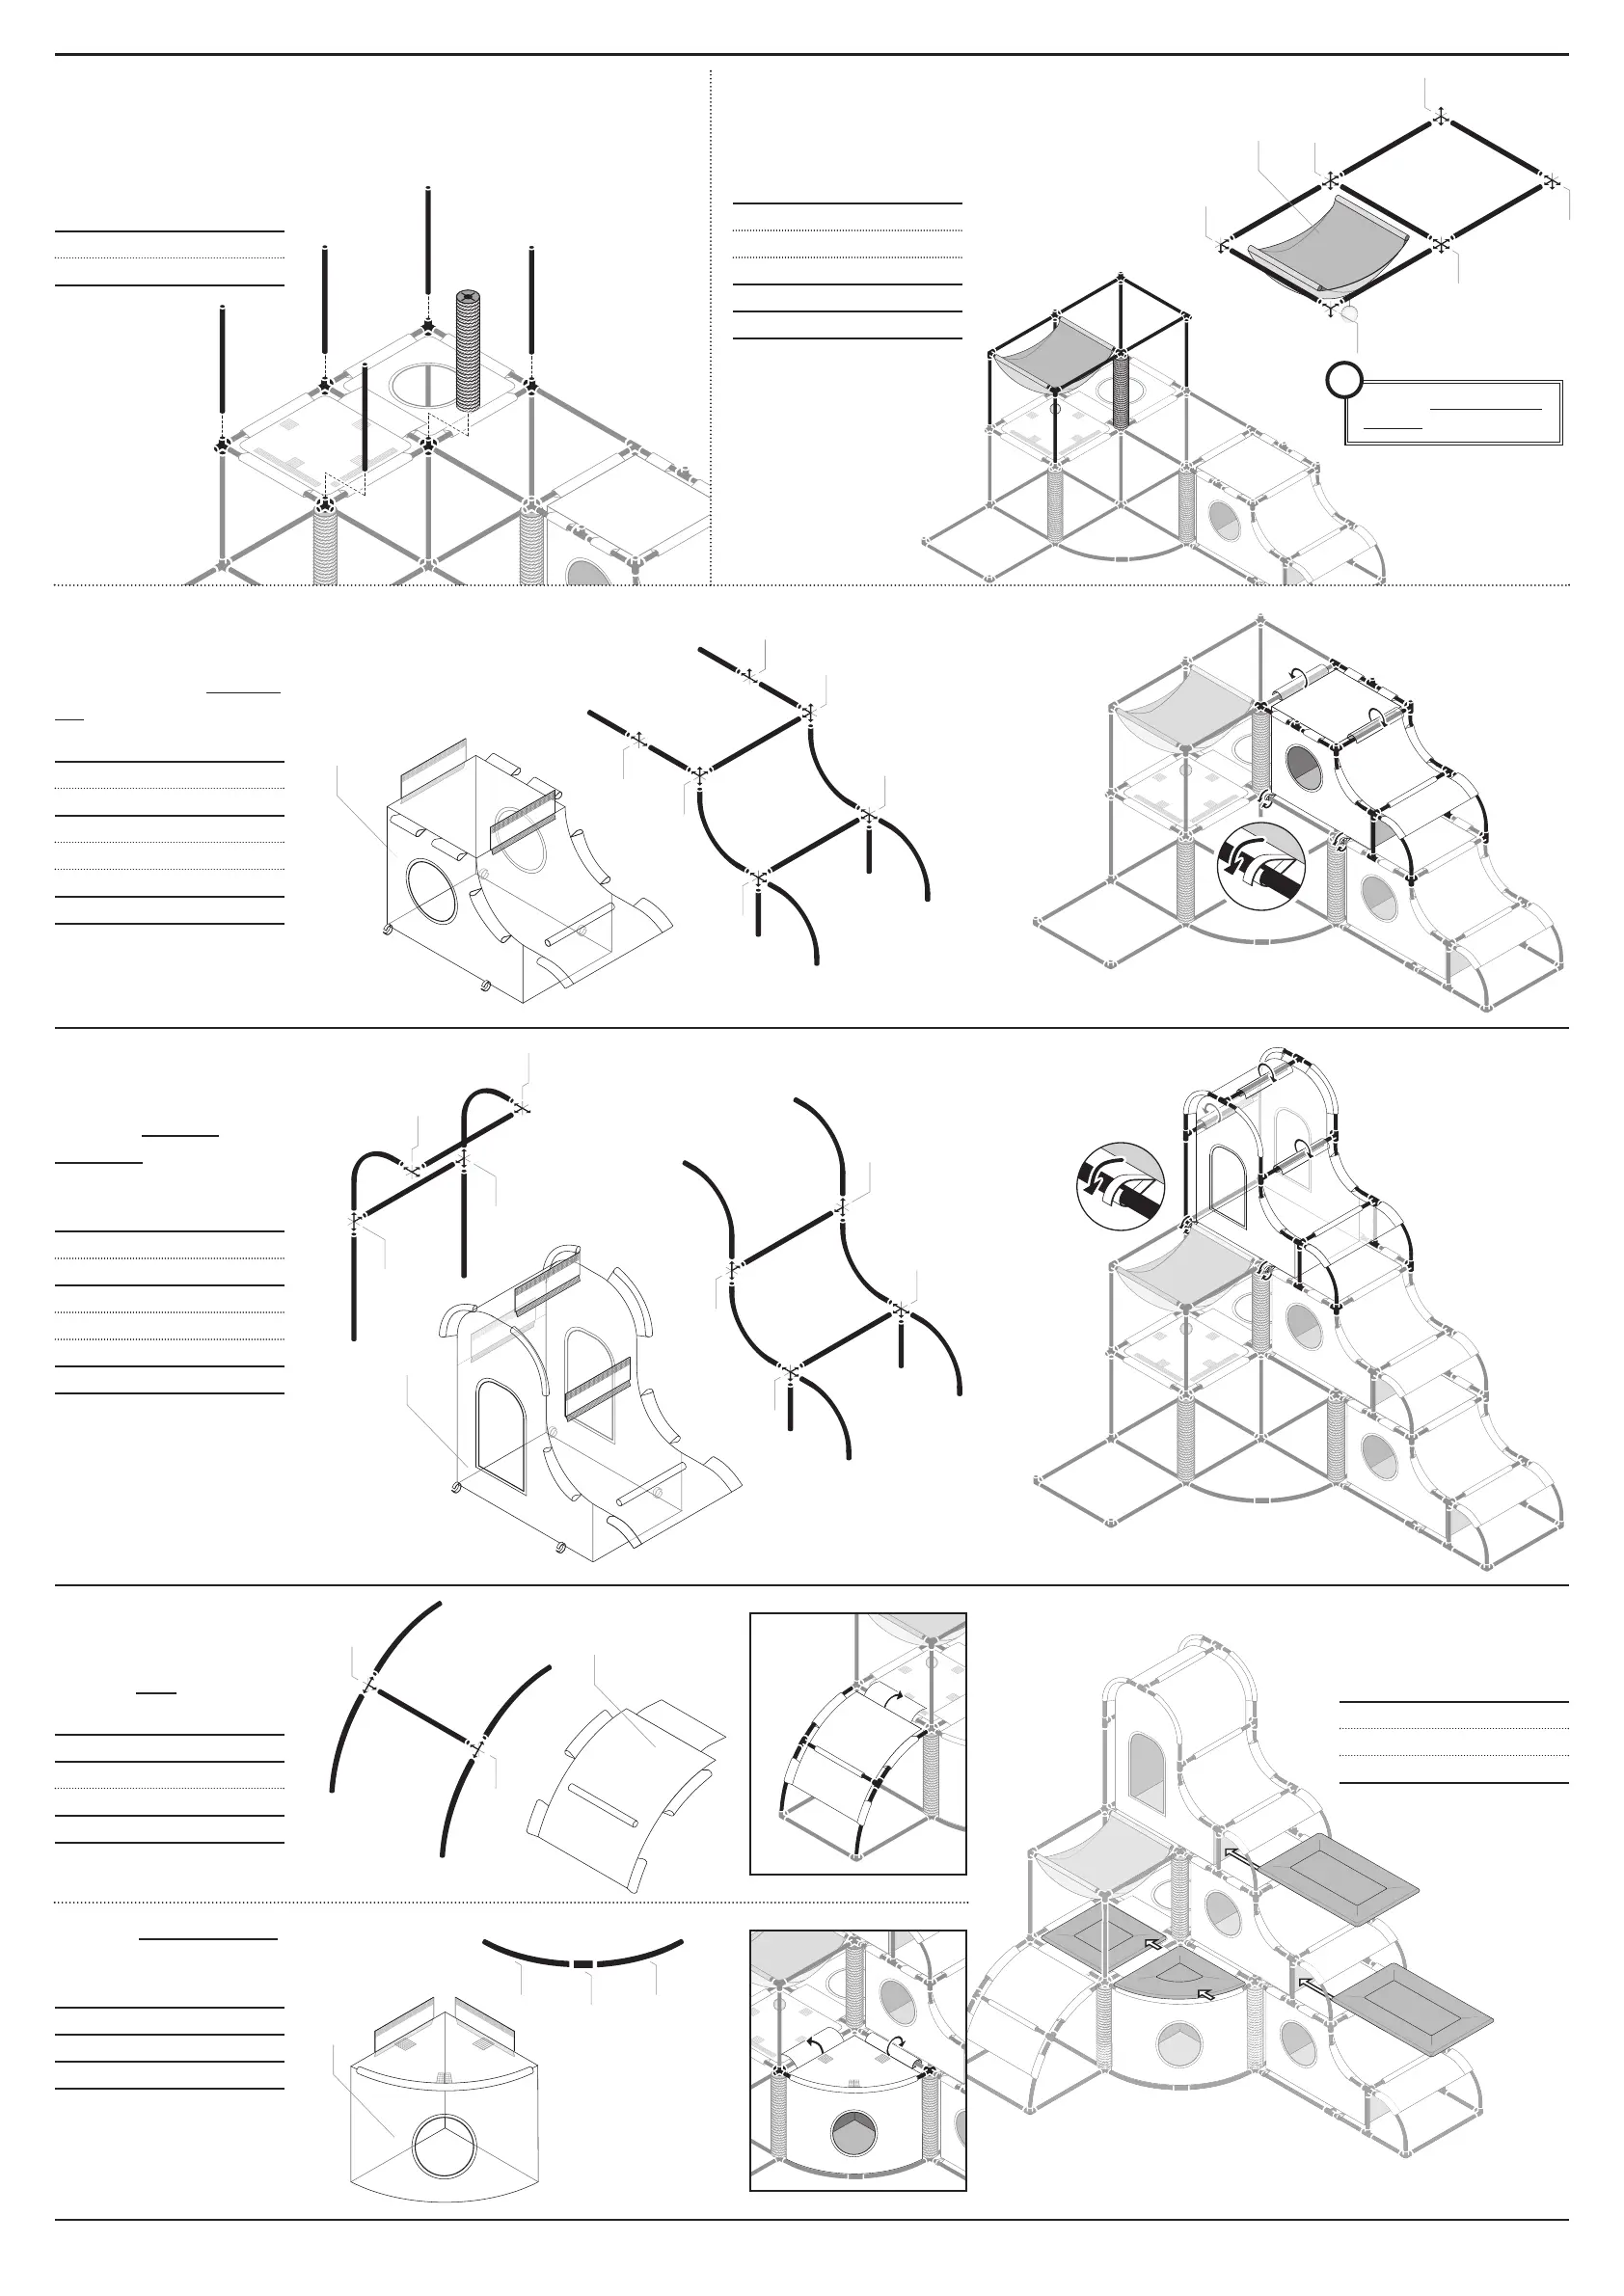
PARTS NAME QTY
A35 Long Tube ( 5 )
A1 Sisal Post ( 1 )
To begin the 2nd floor, you will
need these pieces:
4
PARTS NAME QTY
3 S 3-Way Straight ( 6 )
4 C 4-Way Corner ( 2 )
A35 Long Tube ( 6 )
A16 Short Tube ( 2 )
B31 Long Curve ( 8 )
L2 Hideaway Penthouse ( 1 )
To form the HIDEAWAY
PENTHOUSE, you will need
these pieces:
5
PARTS NAME QTY
3 S 3-Way Straight ( 2 )
A35 Long Tube ( 1 )
B 2 8 Short Curve ( 4 )
S1 Ramp ( 1 )
To form the RAMP, you will need:
PARTS NAME QTY
2S 2-Way Straight ( 1 )
B 2 8 Short Curve ( 2 )
D 2 Hideaway Corner ( 1 )
To form the HIDEAWAY CORNER,
you will need:
PARTS NAME QT Y
M G 1 Square Plush Mat ( 1 )
M G 2 Corner Plush Mat ( 1 )
M G 3 Rectangle Plush Mat ( 2 )
To finish, add mats as shown:
3
c
PARTS NAME QTY
3 S 3-Way Straight ( 2 )
4 C 4-Way Corner ( 4 )
A35 Long Tube ( 2 )
A16 Short Tube ( 6 )
B31 Long Curve ( 4 )
L3 Hideaway Den ( 1 )
To form the2nd floor HIDEAWAY
DEN, you will need these pieces:
Add these vertical posts to
the first floor as shown.
3
b
PARTS NAME QT Y
3 C 3-Way Corner ( 2 )
4 C 4-Way Corner ( 2 )
5 C 5-Way Corner ( 2 )
A35 Long Tube ( 7 )
H Hammock Floor ( 1 )
Then you will need these pieces:
Assemble the unit,
then add it to 3a.
After the hideaway den is assembled, add it
to the 1st floor, and secure the velcro
sleeves around the horizontal tubes at top
and bottom as shown.
Add the hideaway penthouse to the
2nd floor and secure the velcro
sleeves around the horizontal tubes
at top, sides and bottom as shown.
Secure the
velcro strip
at the top.
Secure the
velcro strips
at the top.
REMINDER: Insert tubes into the
fabric first, then add connectors.
⁕
 Loading...