7
Before First Use:
Read all instructions and safety information carefully before first use. Please retain this
information for future reference.
1. Remove your appliance from the packaging.
2. Check that there is no damage to the cord or any visible damage to the body.
3. Dispose of the packaging in a responsible manner.
4. Remove any stickers or labels from the appliance.
5. Thoroughly clean the fryer with hot water, some washing-up liquid and a non-
abrasive sponge.
6. Wipe the inside and outside of the appliance with a moist cloth.
7. Do not fill the fryer with oil or frying fat. This fryer operates using hot air and requires
very little to no oil.
8. Familiarise yourself with the control panel shown in the Specifications section above.
Using Your Appliance.
Preparing For Use:
1. Place the appliance on a stable, horizontal and even surface. Do not place the
appliance onto a non-heat-resistant surface.
2. Do not use oil or any other liquid.
3. Do not put anything on top of the appliance, as this will disrupt the airflow and the
hot air frying will be affected as a result.
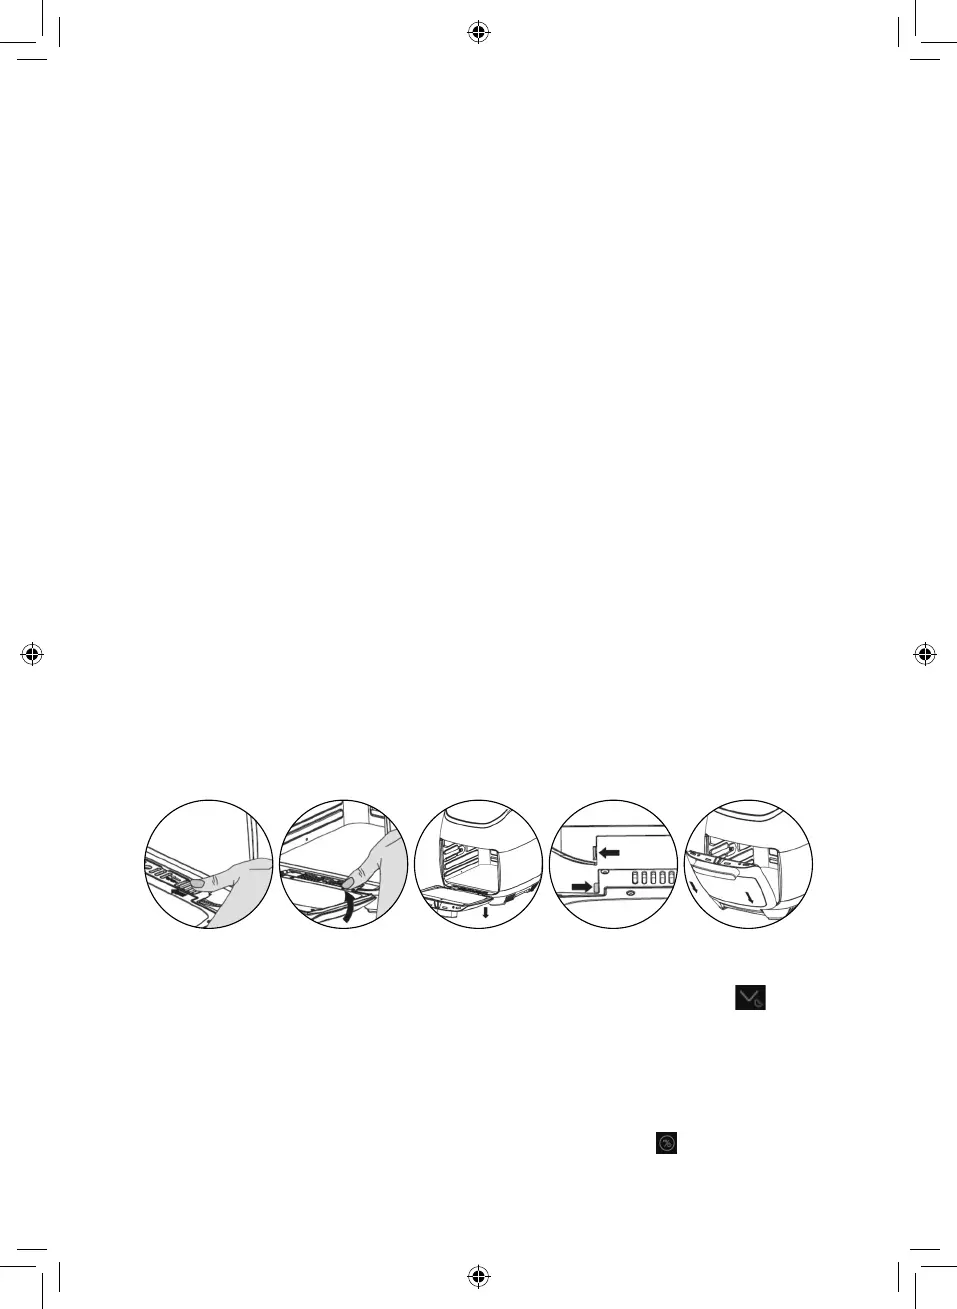
Removing the door:
1. The air fryer has a removable door, which can be pulled apart from the appliance for
easier cleaning.
2. To separate the door from the air fryer, push the door as far down as it will go (about
70 degrees), then push the grooved latch on the right-hand side of the hinge
horizontally to release the door. Once the door has been released, pull it downward to
separate it from the body of the fryer.
3. To reinstall the door, begin by pushing the locking tab to the side to unlock the
pins on either side of the door. Once the pins have been loosened, position the
door underneath the fryer and bring it up and inwards, aligning each pin with the
corresponding hole on the main body of the fryer so that they slot into place. Take
care to slot the pin on the left-hand side of the door in first; once that has securely
slotted into place, insert the right-hand pin into its corresponding hole in a similar
manner, and release the locking tab to secure the door into place.
Note: ALWAYS take care to come in from the bottom of the fryer and move from left
to right when installing the door. Attempting to install the door from the top down or
moving from right to left will cause it to be incorrectly fitted, and may cause damage to
the hinge mechanism.
Automatic Switch Off:
The Tower Air Fryer has a built in timer, which will automatically shut off the air fryer when
the timer reaches zero. You can manually switch off the air fryer by pressing the key
until the timer reaches zero.
Air Frying:
1. Connect the mains plug into an earthed wall socket.
2. Open the air fryer door.
3. Fit any relevant accessories to the air fryer before placing the food inside.
4. Put the ingredients into the air fryer.
5. Close the air fryer door. The fryer will give off a beeping sound and all the indicators
will light up momentarily.
6. After a few seconds, all of the indicators will go off except for the indicator, which
will remain illuminated to indicate the appliance is turned on but in Standby mode.
Press this key at any time while the fryer is in this mode to bring up the touch control
panel.
 Loading...