8
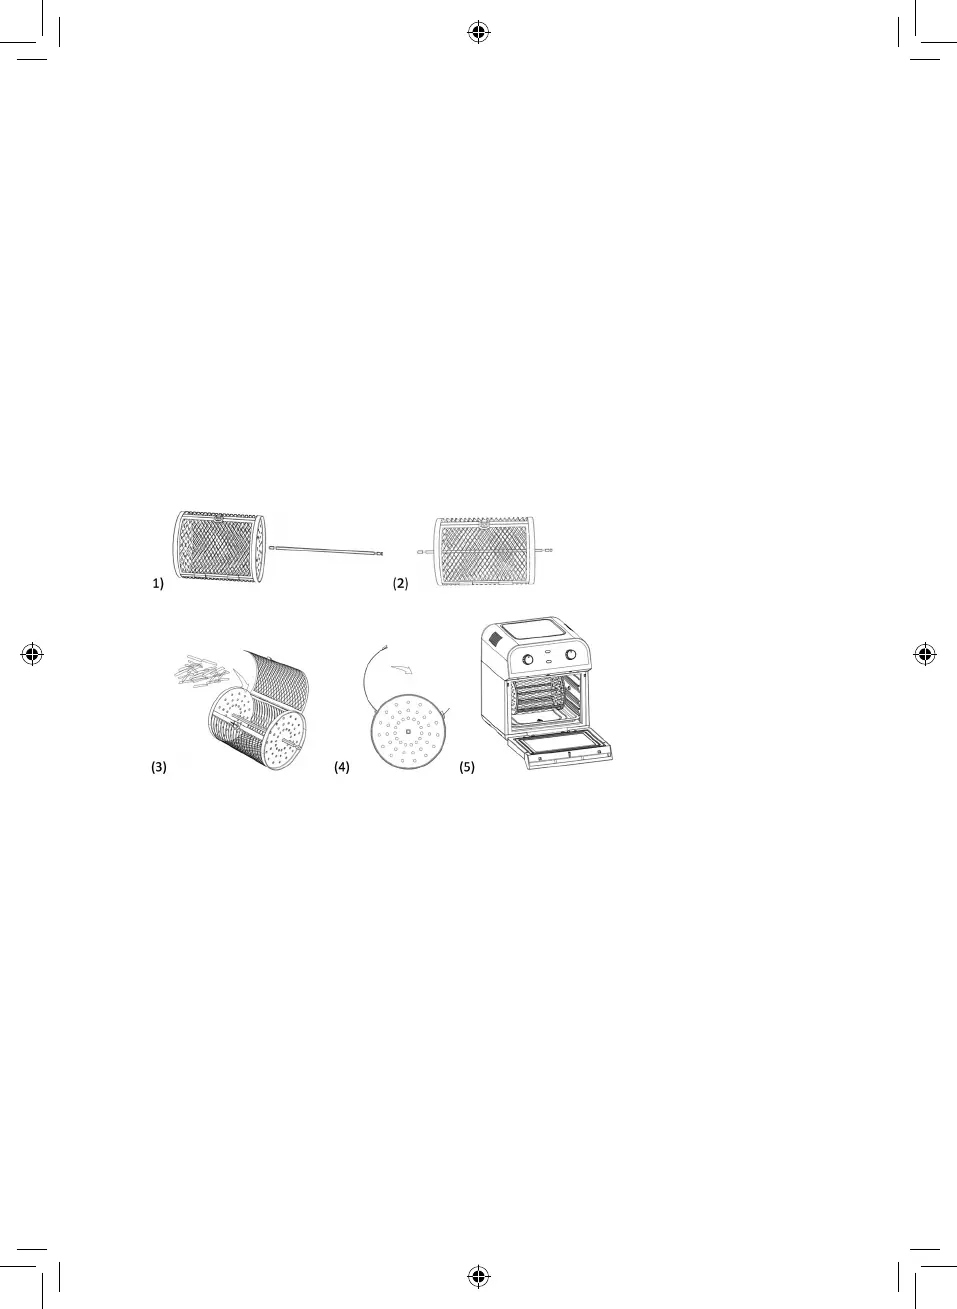
Frying Basket
The rotating basket, turns during cooking to ensure that the food crisps on all sides. The
rotating basket is particularly suitable for preparing chips or other potato products, small
pieces of vegetables and meat as well as frozen products, e.g. chicken nuggets or squid
rings.
1. Place the shaft through the basket so that the shaft end with one notch exits the side
of the basket with the L shaped metal attachment.
2. Open the rotating basket.
3. To ensure food is cooked evenly fill the rotating basket no more than ¾ full with food.
4. Close the basket, ensuring that the catch is shut, so that the basket does not open
during use.
5. Insert the right-hand side of the rotating basket (with the L shaped metal attachment
and the shaft end with just one notch) into the holder on the right side of the oven
walls. Push into the holder as far as it will go.
6. Hang the other end of the shaft (with two notches) into the support on the left-hand
side of the cooking space.
7. Check that the rotating basket fits securely. It must not be able to rotate about its
own axis when the device is switched off. If this is not the case, plug the right-hand
end of the shaft deeper into the holder.
After use, remove the hot rotating basket from the cooking space using the removal tool
(see the ‘Removal Tool’ section). Always use oven gloves to open and empty the rotating
basket.
Rotating Spit - Rotisserie
The rotisserie function can help cook food more evenly.
The rotating spit consists of the shaft and two rotating spit forks. The rotating spit is
suitable for grilling large pieces of meat, e.g. chicken, pork.
Assemble the rotating spit and insert it into the appliance:
1. Slide one of the rotating spit forks (sharp prongs facing inwards) onto the shaft and
lock it with the locking screw. The shaft contains a small round notch for the tip of
the locking screw. In the case of smaller pieces of food, the rotating spit forks can be
secured more centrally on the shaft.
2. Slide the food for grilling onto the rotating spit fork.
3. Slide the other rotating spit fork (sharp prongs facing inwards) onto the shaft and
food and lock it with the locking screw.
4. Plug the end of the shaft with one notch into the round holder on the right-hand
side of the cooking space. Then hang the other end of the shaft, with two notches,
into the support on the left-hand side of the cooking space.
5. Check that it fits securely. The rotating spit must not be able to rotate about its own
axis when the device is switched off. If this is not the case, plug the left-hand end of
the shaft deeper into the holder.
6. After use, remove the hot rotating spit using the removal tool (see the ‘Removal Tool’
section). Always use oven gloves to remove the rotating spit forks and take off the
grilled items.