Do you have a question about the Toyotomi TID-1200 Type A and is the answer not in the manual?
Covers Cooling, Dehumidifying, and FAN modes with their specific operations.
Details Automatic Operation, Timer, Intermittent, and Oscillating Louver features.
Includes automatic shut-off for full tank and the air filter's role.
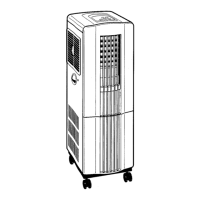
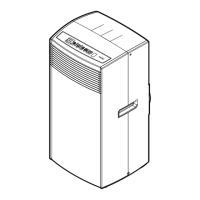
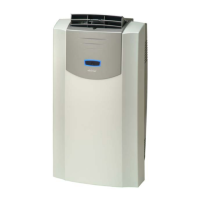
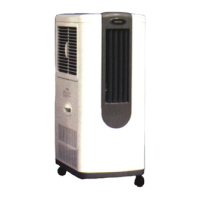
Identifies external parts visible from the front of the unit.
Identifies external parts visible from the rear of the unit.
Details the Timer Lamp, Dehumidifying Lamp, and Tank Full indicator.
Functions of the Mode, Select, and Timer buttons for operation settings.
Operation of the Power button and the Air Deflector button for louvers.
Covers temperature range, restart delay, clearance, and mist management.
Guidelines for handling, power outlets, and cord placement/modification.
Includes sunlight, wet locations, and keeping children away from the unit.
Turn the rear selector knob to 'OFF' for Cooling or 'ON' for Dehumidifying.
Press the 'POWER' button to start the unit; the power lamp will illuminate.
Use the 'MODE' button for 'COOL' or 'FAN' only operation.
Use the 'SELECT' button for HIGH, LOW, or INT. airflow.
Press 'AIR DEFLECTOR' button for automatic louvers; do not move manually.
Press the 'POWER' button to turn off the unit and all lights.
Use the 'TIMER' button to set an automatic shut-off time.
Remove tank when full (POWER lamp flashes); align arrow on replacement.
Press the power button twice to resume after emptying the tank.
Connect a hose to the drain pipe for continuous drainage.
Ensure tight connections, avoid sharp bends, and keep outlet lower than fitting.
Clean filter bi-weekly; vacuum dust, wash with mild soap, rinse, and dry thoroughly.
Wipe exterior with a soft damp cloth; avoid solvents and polishes.
Run unit in 'FAN' mode, empty tank, clean unit and filter before storing.
Store in original carton or a plastic bag in a cool, dry place.
Check power connection, breaker, button, drain tank, mode, or selector knob.
Check mode, selector knob, air filter obstruction, or discharge grill obstruction.
Details model TID-1200, cooling/dehumidifying capacities, power source, and consumption.
Provides physical dimensions (W x D x H) and weight of the unit.
Specifies compressor type (ROTARY) and refrigerant (FREON R-22).
States the capacity of the internal drain water tank.
Lists room temperature and relative humidity for cooling and dehumidifying tests.
Instructions for connecting the exhaust duct hose to the unit and window.
Details using the window panel kit for double-hung or sliding windows.
Steps for attaching fittings and exhaust cover to the plastic panel.
Instructions for fitting the panel into the window and connecting the hose.
Lists available optional window panel kits (M and L) with sizes.
Covers defects in materials/workmanship for 12 months; lists what is not covered.
Requires returning defective product with proof of purchase to an authorized dealer.
Disclaims other warranties; limits liability for consequential damages.
| Cooling Capacity | 12000 BTU/h |
|---|---|
| Power Supply | 220-240V, 50Hz |
| Refrigerant | R410A |
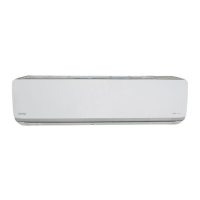
| Type | Split System |
| Noise Level (Outdoor) | 52 dB |