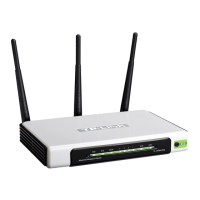
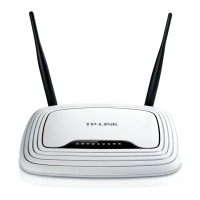
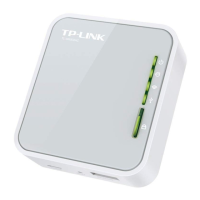
LEDs:
©2016 TP-LINK
At Home
Hardware Information
Blinkling
WPS connection is in progress.
No WPS connection is established.
The LED stays on for 5 minutes when a WPS
connection is established, then goes off.
IndicationStatusLED
On
On
On
Blinking
Off
Blinking
(Power)
(Internet)
(Wireless)
(USB)
(WPS)
Off
On
On
Off
Off
The router is on.
The Internet is available.
The wireless network is enabled.
The wireless network is disabled.
The router is connecting to the host network
when in Range Extender or Client mode.
The Internet is unavailable
A USB device is connected.
No USB device is connected.
The router is initializing or being upgraded.
Range Extender Mode
1. Switch the operation mode to AP/Rng Ext/Client and plug the router’s
adapter into an electrical outlet near your host AP.
2. Connect your device to the router wirelessly or via an Ethernet cable. The
Wi-Fi network name and password are on the router’s label.
3. Launch a web browser and enter http://tplinkwifi.net in the address bar.
Log in with admin (in lowercase) for both username and password.
4. Click Quick Setup to start the configuration. Select your Time Zone and
click Next.
5. Select Range Extender and click Next.
6. Select 2.4GHz OR 5GHz, click Survey to find the corresponding host
network and click Choose. Enter the password and click Next.
7. Select the LAN type of the router (Smart IP in most cases) and click Next.
8. Click Save to apply the configurations.
9. Relocate the router about halfway between your host AP and the Wi-Fi
dead zone.
Note: The extended networks share the same passwords as those of your
host networks, but a suffix (e.g. _2.4G or _5G) will be added for one of the
two extended SSIDs.
Internet
A
B
Host AP
Client Mode (TV/Game Console Adapter)
1. Switch the operation mode to AP/Rng Ext/Client and plug the router’s
adapter into an electrical outlet near your host AP.
2. Connect your device to the router wirelessly or via an Ethernet cable. The
Wi-Fi network name and password are on the router’s label.
3. Launch a web browser and enter http://tplinkwifi.net in the address bar.
Log in with admin (in lowercase) for both username and password.
4. Click Quick Setup to start the configuration. Select your Time Zone and
click Next.
5. Select Client and click Next.
6. Select 2.4GHz OR 5GHz, click Survey to find the corresponding host
network and click Choose. Enter the password and click Next.
7. Select the LAN type of the router (Smart IP in most cases) and click Next.
8. Click Save to apply the configurations.
9. Connect your wired-only device to the router via an Ethernet cable.
Internet
OR OR
A
B
Other Device
Smart TV Desktop
Host AP
1. Switch the operation mode to AP/Rng Ext/Client and connect the
hardware according to Step A to D in the left diagram.
2. Connect your device to the router wirelessly. The Wi-Fi network name and
password are on the router’s label.
3. Launch a web browser and enter http://tplinkwifi.net in the address bar.
Log in with admin (in lowercase) for both username and password.
4. Click Quick Setup to start the configuration. Select your Time Zone and
click Next.
5. Select Access Point and click Next.
6. Either customize your
Network Name
and
Password
for the 2.4GHz/5GHz
wireless network or keep the default ones, and then click
Next
.
7. Select the LAN type of the router (Smart IP in most cases) and click Next.
8. Click Save to apply the configurations.
Access Point Mode
If you have changed the default Wi-Fi name and password, you have to
reconnect your wireless devices to the new Wi-Fi network.
Internet
B C
D
A
Wired Router
Ports:
DescriptionPorts
Mode Switch
WAN/LAN
Power
3G/4G USB
RESET
The port is used to connect the power adapter.
This port functions as the WAN port in Router mode
and as the LAN port in Hotspot, Access Point, Range
Extender and Client mode.
To reset the router, use a pin to press and hold the
button for about 5 seconds.
This port is used to plug a 3G/4G modem or a USB
disk into.
This button is used to switch the operation mode of
the router.
 Loading...
